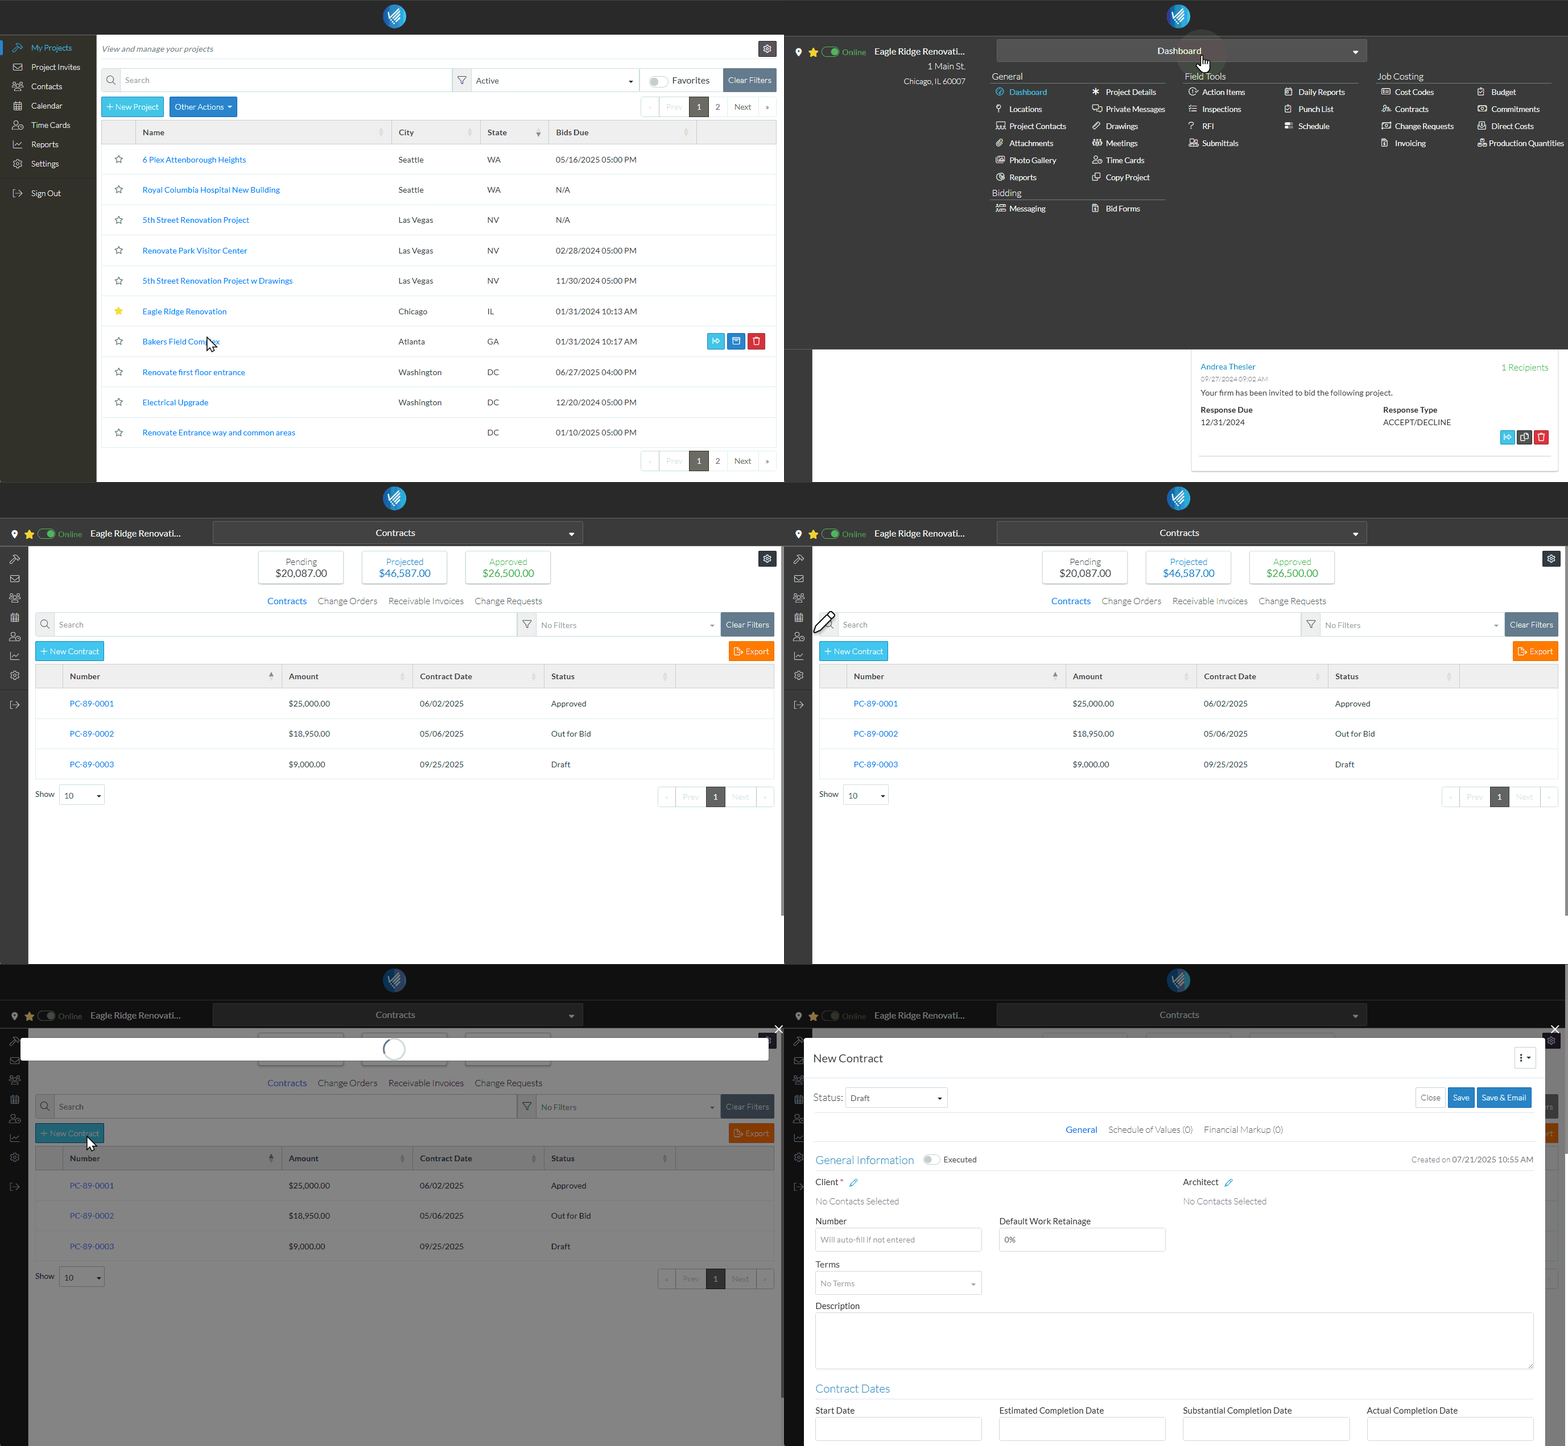
New Contract
Suggested Prior Reading
Things to do before you add a Contract
New Contract
Before adding a Contract, review Things to do before you add a Contract and setup information as necessary.
- Access the project, see Project - Accessing.
- Access the Contracts List, see Contracts List - Accessing.
See Contracts List – Layout and Navigation for more information.
- Click the New Contract
 button.
The New Contract form displays.

When adding a Contract, the Status defaults to Draft. This is usually the appropriate status to use during the initial add while information is being entered and details haven't been finalized. See Contract – Status for a description of all the Statuses.
- If required, change the Contract Status during the add, see Contracts - Add - Status.
- Enter the General Contract information.
The General Contract information form is is broken down into sections with headings highlighted in blue. The System Administrator can turn on/off various fields to display so not all the sections listed below may display. At minimum, the Client for the Contract must be entered before the Contract can be saved.
See Contracts - General for more information.
- Setup Contract Financial Markups if required. See Contracts - Financial Markups. Note* Financial Markups can be setup later on as well, not just during the add and they will be automatically added to the Schedule of Values.
- Setup the Schedule of Values. See Contracts - Schedule of Values.
- Click the Save
 button to save all the information on the General, Schedule of Values and Financial Markup forms.
OR
Click the Save & Email  button to save all the information on the General, Schedule of Values and Financial Markup forms and send an email with a link to the Contract in JobPlanner. The Contract is also added as an attachment in PDF format, with the Default Company signature and date.
OR
Click the Close  button to close the form without saving the information.
Next Steps
View the Contract on the Budget, see Budget - Overview.
Email a PDF of the Contract, see Contracts - Email.
Create a PDF of the Contract, see Contracts - Export.
Manage Change Orders, see Contract Change Orders - Overview.
Manage Invoices, see Contract Invoices - Overview.
Manage Payments, see Contract Payments - Overview.
