Setup your QuickBooks Online Integration

Connecting to QuickBooks Online
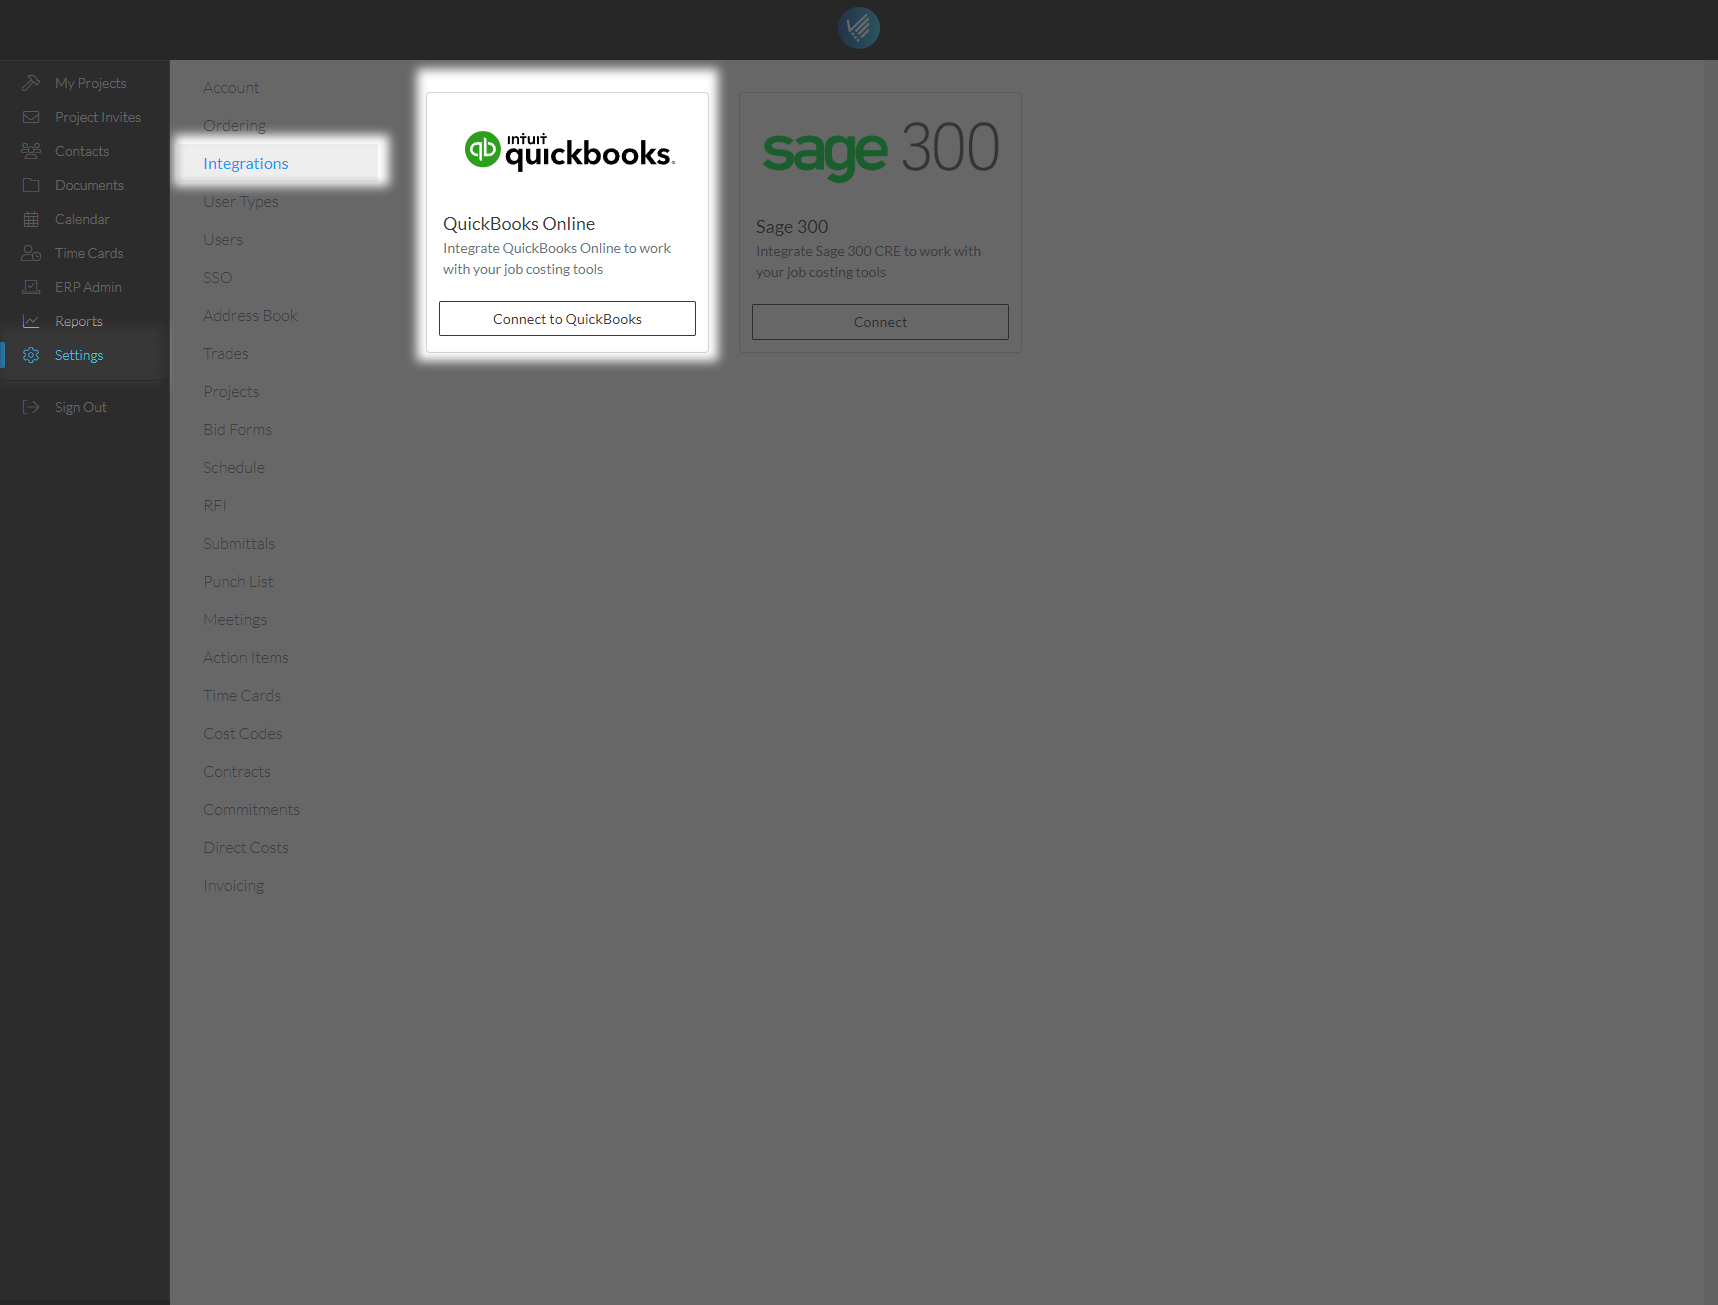
To get started setting up your QuickBooks Online integration navigate to Settings -> Integrations, then click the Connect to QuickBooks button.
You will now be redirected to QuickBooks where you will be asked to log in and authorize JobPlanner. After authorizing you will be automatically redirected back to JobPlanner to finish setting up your integration.
Configuring the Integration
Your QuickBooks integration requires a few settings to be configured before we can start moving data back and forth. All settings marked with a red asterisk (*) must be filled out and saved for your integration to be enabled.
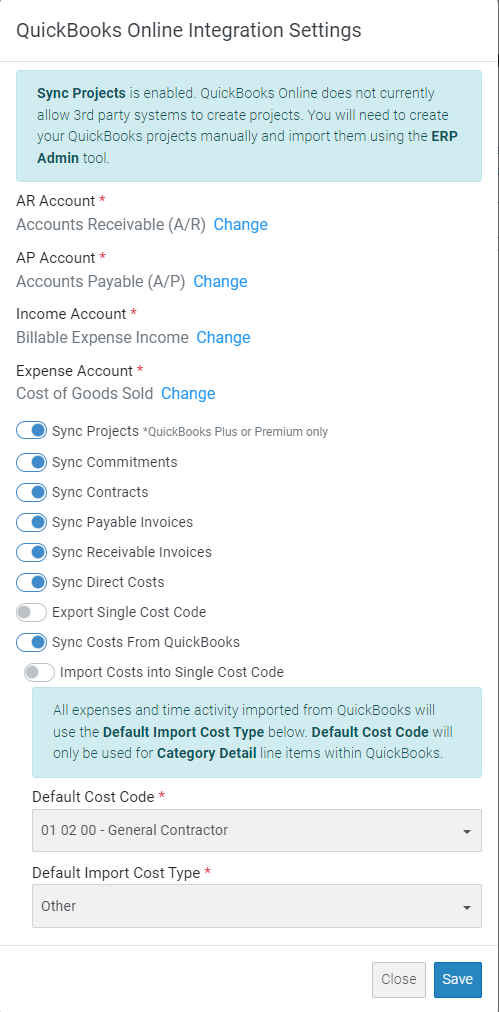
- AR Account: The default account used when pushing Estimates and Invoices to QuickBooks
- AP Account: The default account used when pushing Commitments and Bills to QuickBooks
- Income Account: The default income account used when pushing Products to QuickBooks
- Expense Account: The default expense account used when pushing Products to QuickBooks
- Sync Projects: When enabled, you will be able to import Projects from QuickBooks in the ERP Admin tool
- Sync Commitments: When enabled, you will be able to push Commitments and Commitment Change Orders to QuickBooks Purchase Orders
- Sync Contracts: When enabled, you will be able to push Contracts and Contract Change Orders to QuickBooks Estimates
- Sync Payable Invoices: When enabled, you will be able to push Payable Invoices to QuickBooks Bills
- Sync Receivable Invoices: When enabled, you will be able to push Receivable Invoices to QuickBooks Invoices
- Sync Direct Costs: When enabled, you will be able to push Direct Costs to QuickBooks Expenses
- Export Single Cost Code: When enabled, all job costs sent to QuickBooks will be combined into 1 line item using the Default Export Income Product and Default Export Expense Product
- Sync Costs from QuickBooks: When enabled, you will be able to pull Expenses, Billable Time Activity, & Receipts from QuickBooks Projects into Direct Costs. (Sync Projects must be enabled)
- Import Costs into Single Cost Code: When enabled, all job costs imported from QuickBooks will be combined into 1 line item using the Default Import Cost Code and Default Import Cost Type
- Default Cost Code: All Billable Time Activity from QuickBooks will be imported using this Cost Code. Expenses with line items within Category Details will also be imported using this cost code.
- Note: When Import Costs into Single Cost Code is enabled, all imported job costs will use this cost code only
- Default Import Cost Type: All job costs imported from QuickBooks will use this cost type.
Once you have filled out all required fields, click the Save button to finish the integration setup.