Groups/Trades - Add Group levels
These are instructions to add tiers or multiple levels of Groups. Up to 3 levels can be added:
Parent Group -> Child Group
Parent Group -> Sub-Parent Group -> Child Group
Set the number of levels
- From the Global Menu options, click Settings
- From the Settings Menu options, click Groups.
The Groups List displays. If there are any Groups already entered, they will be listed.
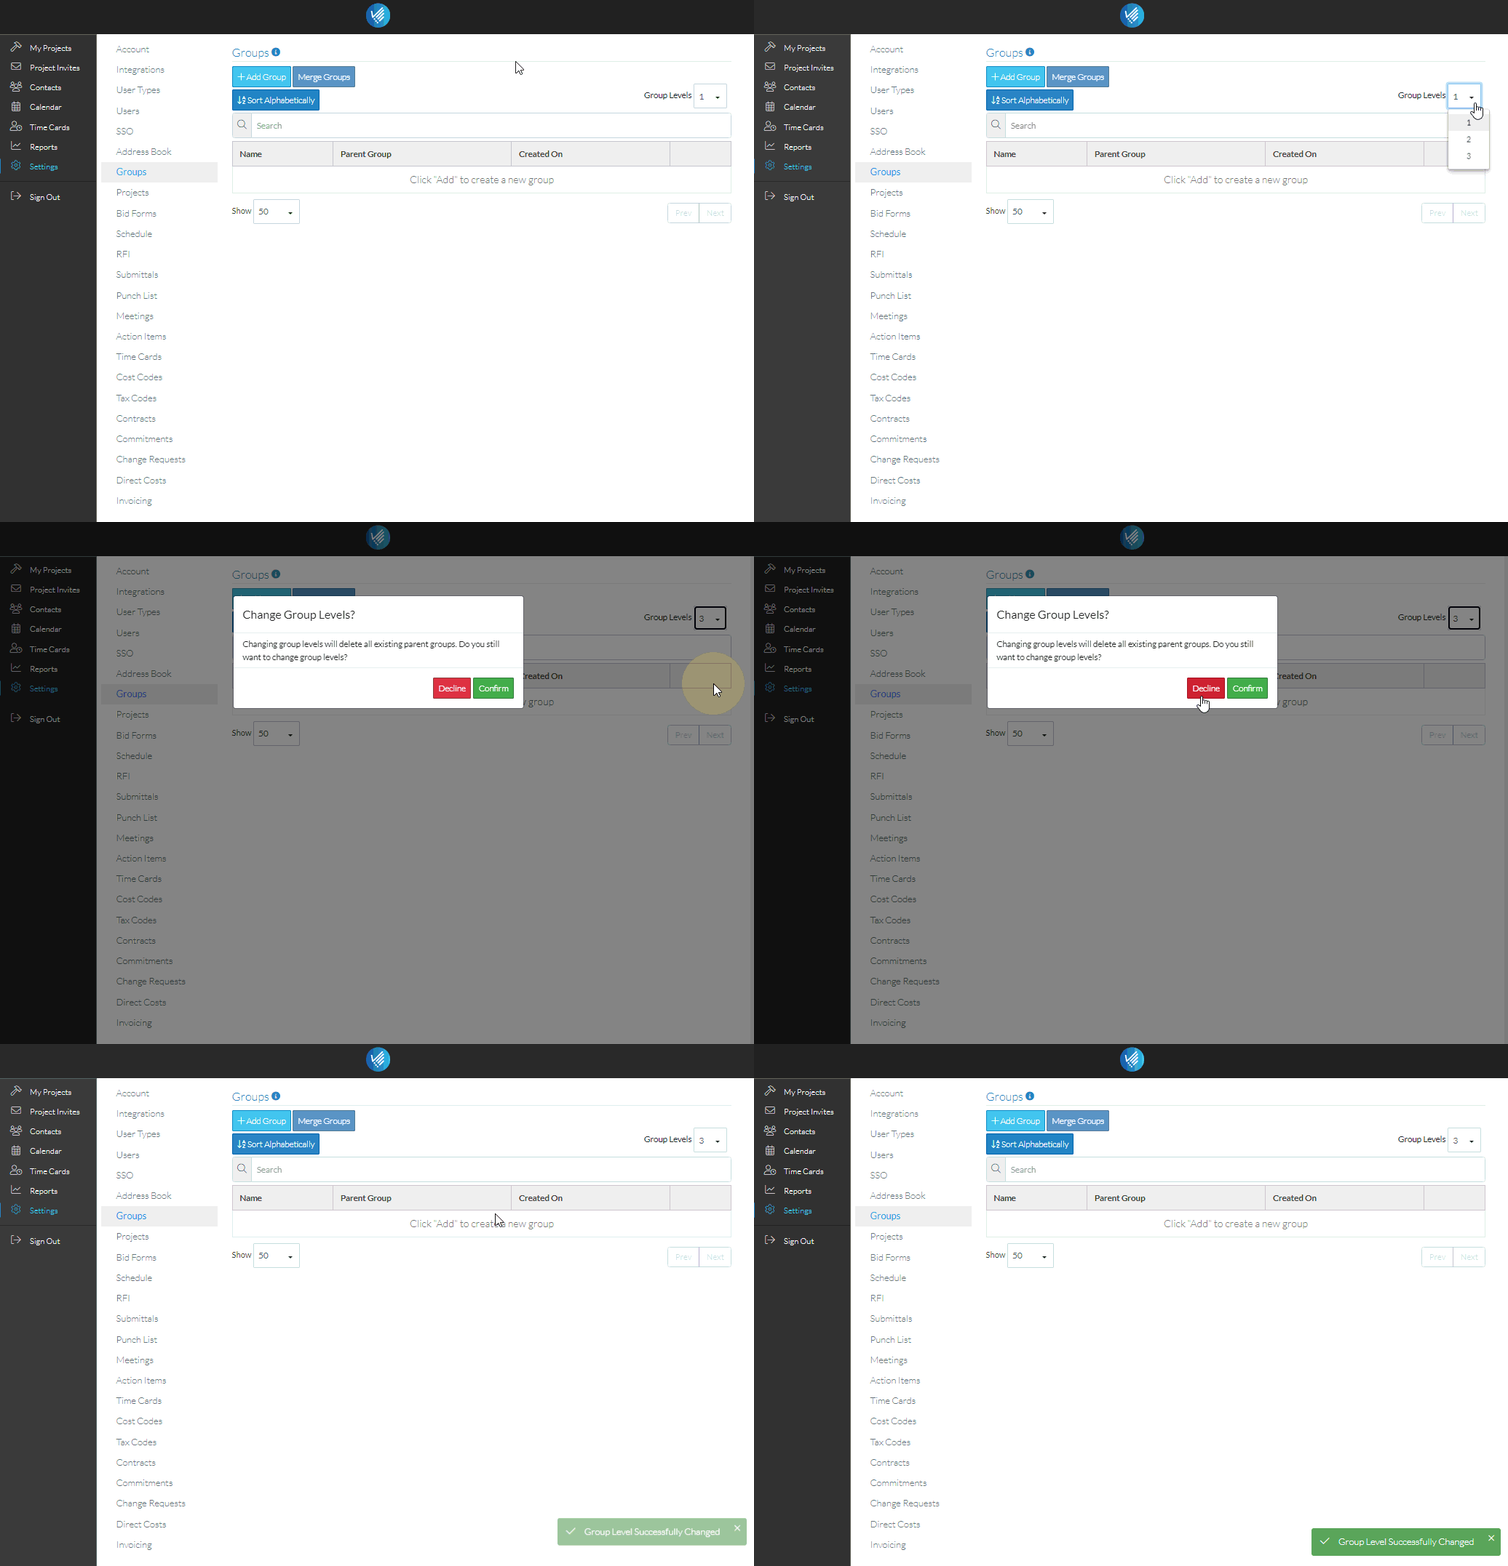
- Click on the Drop down for Group Levels. Select 3 to have 3 levels of groups/subgroups.
A prompt appears indicating that changing the Group Levels will delete all existing parent groups. If the delete is confirmed, the lowest level group will still be kept but all its parents will be automatically deleted. Any contacts with that lowest level group assigned will keep that group.
- Click Confirm to confirm delete of all existing parent groups

The Group List is displayed. If there were any Parent Groups, they will be removed.
Add the Groups
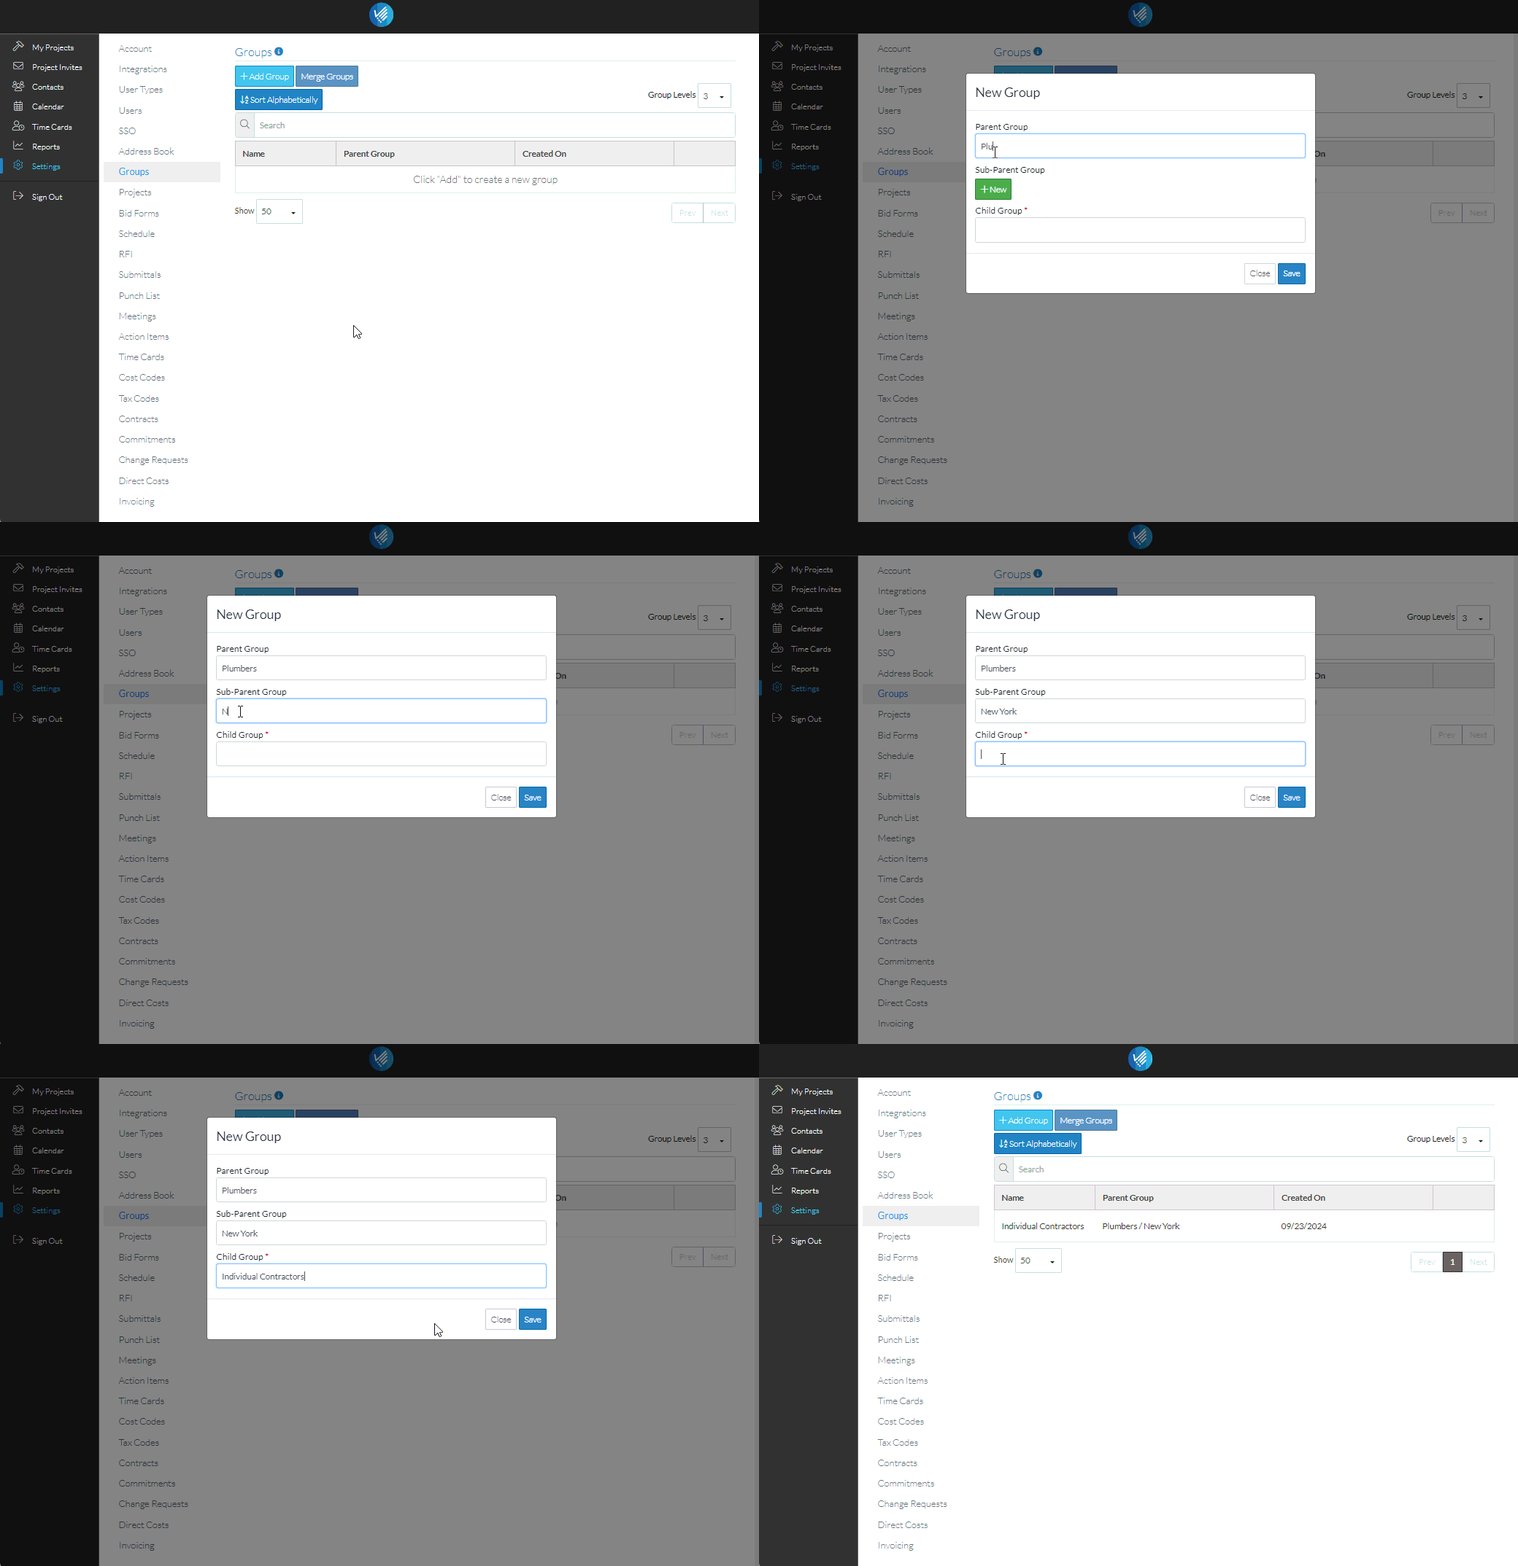
- Click the Add Group button
- The New Group form displays
- Click on the +New button under the Parent Group to add a new Parent Group (or click on the +Existing button to select an existing one. This button will only be displayed if a Parent Group already exists).
- If the Group Level is set to 3, click on the +New button on the Sub-Parent Group to add a new Sub-Parent Group (or click on the +Existing button to select an existing one. This button will only be displayed if a Sub-Parent Group already exists). If the Group level is set to 2, this Sub-Parent section will not appear.l
- Enter the Child Group name.
- Click Save

The Group List is displayed with the new Child Group and its Parent.
Note* These are instructions for adding Grouping with multiple levels. To add a Group with one level, see Trades - Add a Trade or a Group.
