Setup your Acumatica Integration

Create Connected Application
The first step to getting your Acumatica integration connected is creating a connected application within Acumatica.
- Navigate and Login to your Acumatica instance
- Search for Connected Applications using the search bar at the top of the page, click on the Connected Applications option that appears. If you do not see this option, you may not have permissions within Acumatica to manage this.
- Click the + button near the top of the page to start adding a new Connected Application.
- Fill out the connected application form
- Client Name: jobplanner
- Flow: Resource Owner Password Credentials
- Plug-In: No Plug-In
- Mode: No Refresh Tokens
- Click the Add Shared Secret button below the fields you filled out in the previous step.
- Copy the secret value and paste it somewhere accessible, once this dialog is closed this secret will never be shown within Acumatica again. We will need this secret for a later step.
- In the dialog that appears, enter any value in the description textbox and click Ok.
- Click the Save button near the top of the page.
- Copy the value in the Client ID textbox once the save is complete and save it somewhere accessible. We will need this Client ID for a future step.
Importing the Acumatica Customization Package
Next we will import JobPlanner's Customization Package into Acumatica, which will allow JobPlanner to communicate with your Acumatica instance.
- Navigate and Login to JobPlanner at https://app.jobplanner.com
- Navigate to Settings -> Integrations
- Click the Connect button within the Acumatica card
- Select the API version that matches your Acumatica system's current API version.
- Click the Download Customization Package link that appears after selecting your API version. Note where this downloads to, we will need this for a later step.
- Navigate and Login to your Acumatica instance
- Search for Customization Packages using the search bar at the top of the page, click on the Customization Packages option that appears. If you do not see this option, you may not have permissions within Acumatica to manage this.
- Click the Import button near the top of the page.
- Choose the customization package zip file that was downloaded in the previous step
- After successful import, select the checkbox next to the JobPlanner customization package that was imported then click the Publish button near the top of the page.
Connecting JobPlanner to Acumatica
- Navigate and Login to JobPlanner at https://app.jobplanner.com
- Navigate to Settings -> Integrations
- Click the Connect button within the Acumatica card
- Enter in your Acumatica Instance URL, API Version, Client ID, Shared Secret, and your Integration user's Username/Password
- It is recommended that you use an Administrator user for your integration user.
- Click Authorize
- Note: If authorization fails confirm that the Instance URL, Client ID and Secret are entered correctly, and the customization package imported previously is published.
- Once authorized, the integration will be connected and you are ready to proceed to the final step of configuring the Acumatica integration settings within JobPlanner.
Configuring the Integration
Your Acumatica integration requires a few settings so it can start moving data back and forth. All settings marked with a red asterisk (*) must be filled out and saved for your integration to be fully enabled.
- Default Income Account Group: The account used when pushing Contracts to Acumatica Project Revenue Budgets
- Default Sales Subaccount: Only required when Sales Subaccounts are used in Acumatica. This is the default subaccount used when pushing Projects to Acumatica
- Default Credit Terms: The credit terms used when pushing Commitments to Acumatica Subcontracts and Purchase Orders
- Default Non-Stock Item: The default non-stock item used when pushing Commitments to Acumatica Subcontracts and Purchase Orders
- Default Contract CO Class: The Contract CO Class used when pushing Contract Change Orders to Acumatica Change Orders
- Default Commitment CO Class: The Commitment CO Class used when pushing Commitment Change Orders to Acumatica Change Orders
- Default Vendor Class: The Vendor Class used when pushing vendors to Acumatica
- Sync Projects: When enabled, you will be able to import and export Projects with Acumatica in the ERP Admin tool
- Sync Contracts: When enabled, you will be able to push Contracts to Acumatica Project Revenue Budgets
- Sync Contract Change Orders: When enabled, you will be able to push Contract Change Orders to Acumatica Change Orders
- Sync Commitments: When enabled, you will be able to push Commitments and Commitment Change Orders to Acumatica Subcontracts, Purchase Orders, and Change Orders
- Sync Vendor with imported Costs: When enabled, Direct Costs/Expenses that are imported from Acumatica will be imported with their associated vendor. This will add the vendor to your JobPlanner Address Book and the Project's Contacts.
- Import Project Cost Budget lines with no costs or budget: When enabled, Cost Budget line items will not be imported into your JobPlanner project's budget if the line has $0 actual or budgeted costs.
- Sync Time Cards: When Enabled, Approved Employee and Equipment Time Cards will be pushed to Acumatica daily.
- Automatically Create Acumatica Equipment: When enabled, Equipment will be automatically created in Acumatica when pushing Time Cards for them.
- Automatically Create Acumatica Employees: When enabled, Employees will be automatically created in Acumatica when pushing Time Cards for them.
- Week Start Day: The day of the week that your Acumatica time cards start on. This is usually Sunday by default, but this can be changed in Acumatica so we recommend verifying this.
- Admin Employee Delegate: The Employee ID associated with the integration user. This Employee will be added as a delegate to all employees that JobPlanner syncs Acumatica Time Cards for.
- Default Employee Class: The Employee Class used when creating Employees in Acumatica.
- Default Employee Department: The Employee Department used when creating Employees in Acumatica.
- Default Employee Calendar: The Employee Calendar used when creating Employees in Acumatica.
- Default Employee Expense Account: The Expense Account used when creating Employees in Acumatica.
- Default Employee Sales Account: The Sales Account used when creating Employees in Acumatica.
Once you have filled out all required fields, click the Save button to finish the integration setup within JobPlanner.
Sync Cost Codes
Now we will sync your Acumatica cost codes to JobPlanner. This process will automatically pull all cost codes from Acumatica and link them to existing JobPlanner cost codes (if they exist), or create new cost codes in JobPlanner.
- Navigate and Login to JobPlanner at https://app.jobplanner.com
- Navigate to ERP Admin -> Cost Codes
- You should now see a list of cost codes from your Acumatica system. If the list is empty, click the Refresh from ERP button.
- Individually select, or select all cost codes you would like to import into JobPlanner. Once selected, click the Import button located near the top right of the page.
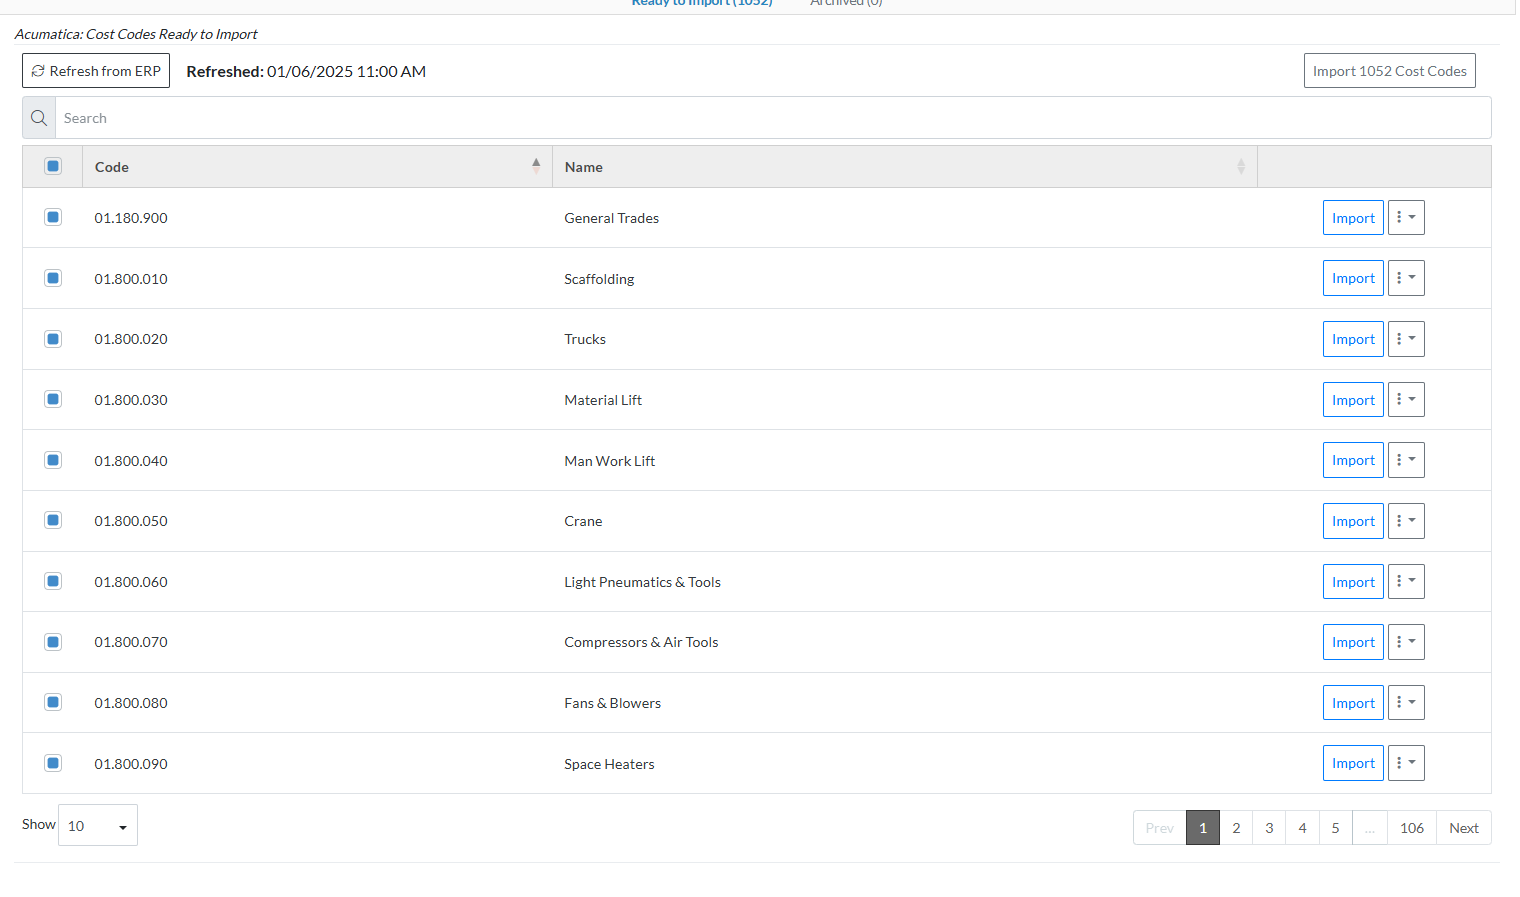
- Your cost codes are now successfully imported into JobPlanner and are ready to be used on projects.
Configuring Employee Sync for Time Cards
This step is only necessary if you have enabled the Sync Time Cards feature in your Acumatica integration settings. In this step, we will verify that your integration user has an associated Employee. This employee will be entered as the Admin Employee Delegate in your Acumatica integration settings and will be added as a Delegate to all employees that JobPlanner creates Acumatica Time Cards for.
- Navigate and Login to your Acumatica system
- Navigate to the Employees for your organization by typing Employees in the search bar
- Here you will need to either find an existing employee that is associated with your integration user (if one exists), or create a new Employee. Take note of the Employee ID of the employee you will be linking. Once this employee is determined/created, continue to the next step.
- Now we will associate this employee with your integration user. Navigate to the Users for your organization by typing Users in the search bar.
- Search for and select the integration user that you used to authorize your your JobPlanner/Acumatica integration
- If you already have an employee selected for this user, you can either keep this employee selected or use the employee you created. If you use the employee already selected, you will need to navigate to Employees to determine it's Employee ID.
- Click on the search icon within the Linked Entity text box, select the employee that you found/created earlier.
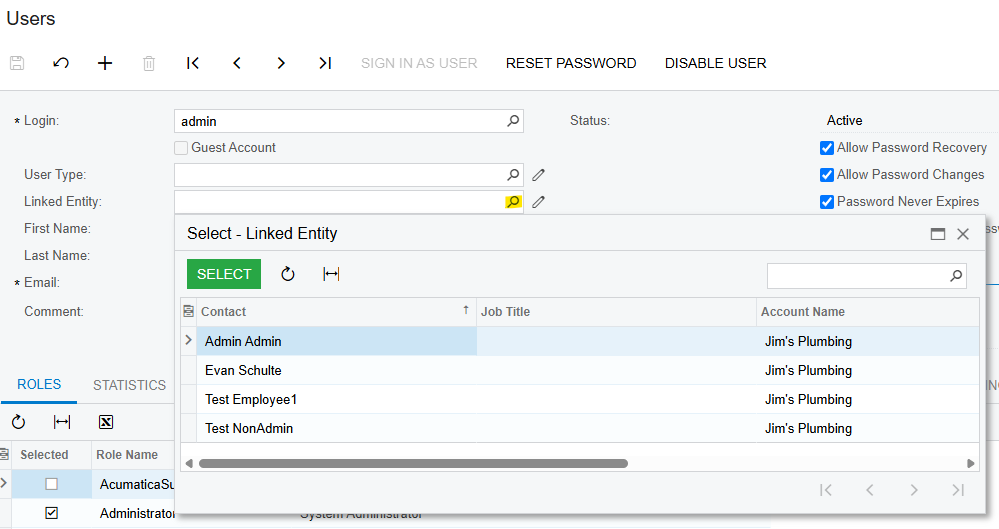
- Once the linked employee has been selected, click the save icon.
- In your Acumatica Integration settings within JobPlanner, enter the Employee ID of your admin linked employee into the Admin Employee Delegate textbox.