Setup a Contract with the Owner
![]() Updated
Updated
Contracts can be setup for the work with the Owner/Architect or whomever is responsible for paying for the Project.
To Setup a Contract with the Owner
- Click on the Project Menu option bar.
- Click on Contracts in the Job Costing section.
The Contracts form displays.
- Click the + New Contract
 button.
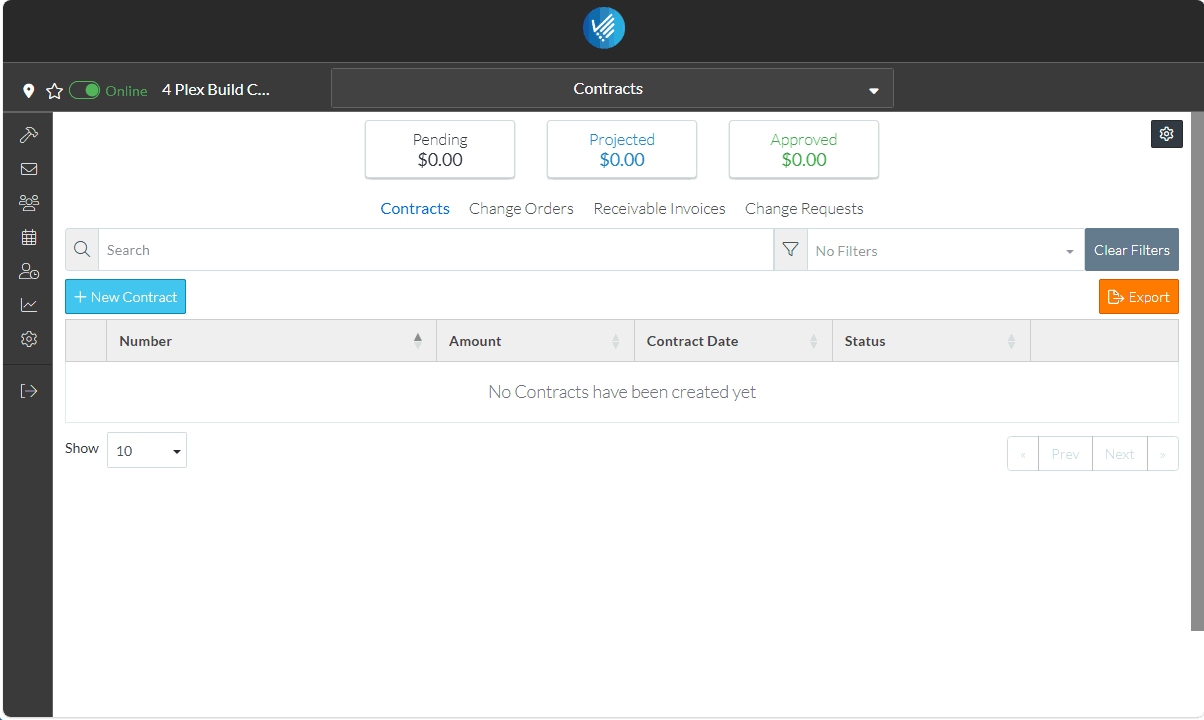
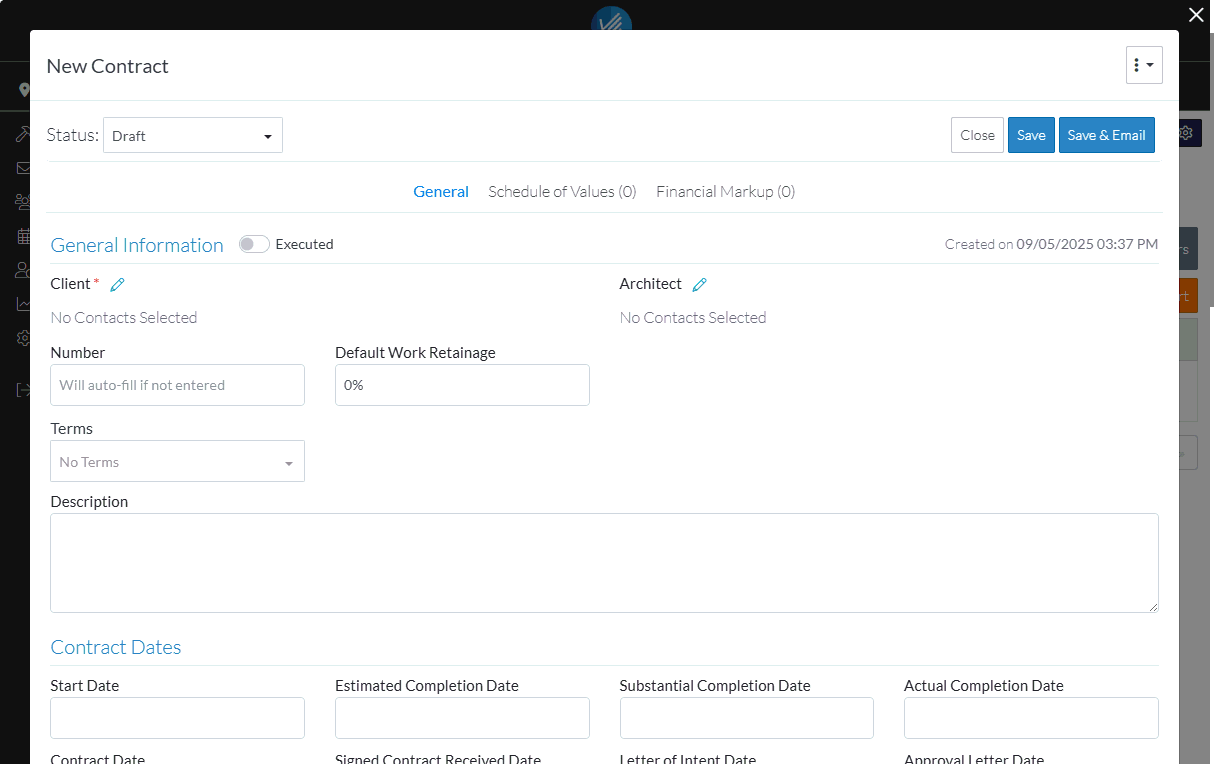
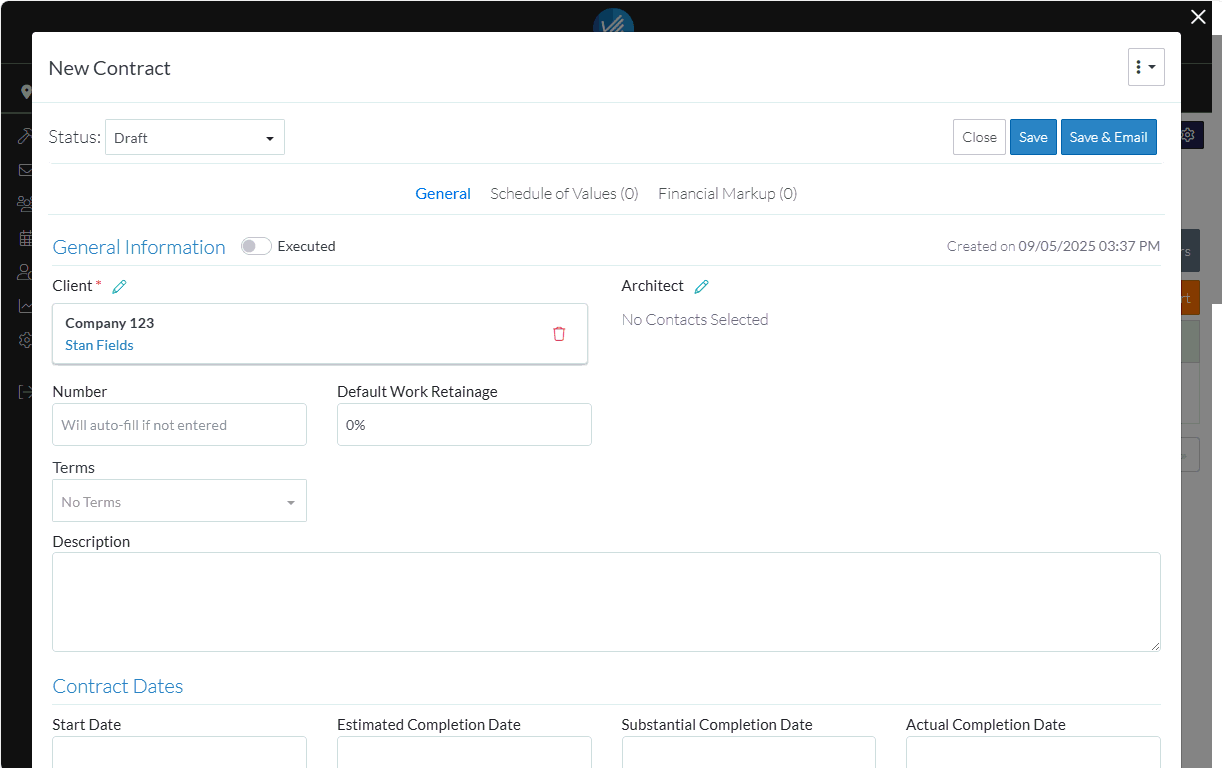
The New Contract form displays.
There are multiple components that makeup the Contract. This is the General Component and the only required field on this section is the Client.
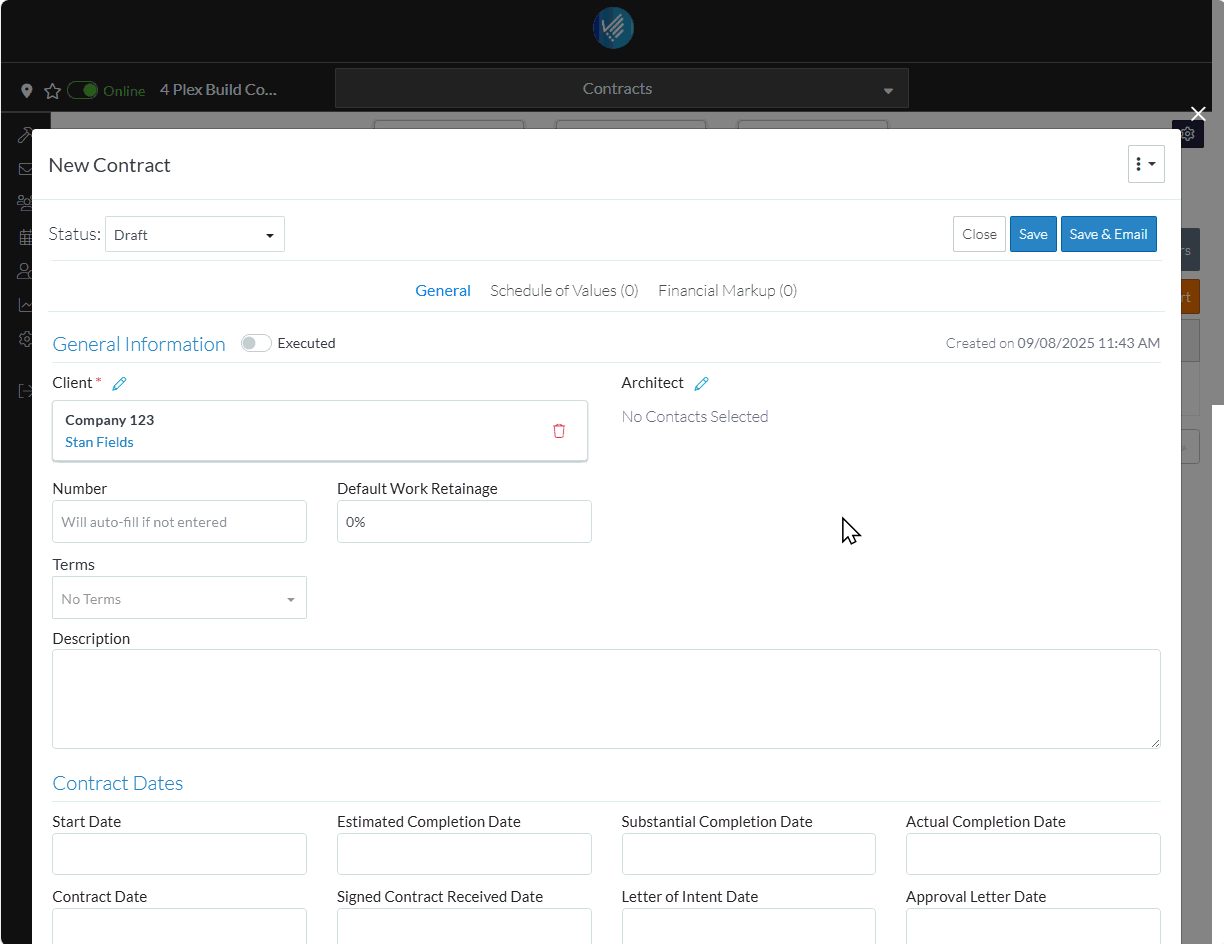
- To set the Client
- Click the Edit
 Button next to the Client text. The Select Project Contacts form displays. It shows the two Project Contacts that were entered.
 - Click on the box on the far left on the row of the Project Contact to select. It is filled in blue to indicate its selected.
- Click the Save
 button to set this Contact as the client.
- Click the Edit
The Contact Name and Company is displayed in the Client.
There is a lot of additional information that can be entered and managed for Contracts such as the Architect, Terms, Contract Dates, Inclusions and Exclusions, Attachments, Signed Documents, Executed Documents
- Scroll to the bottom of the form to see all of the data that can be entered (but for this example and to demonstrate how easy it is to add the item, the rest of the fields can just be left blank).
The System Administrator can turn off display of some of the fields if they are not used, as well, user defined fields can be added.
The Schedule of Values for the Contract is created next.
- Scroll back up to the top of the form.
- Click on the Schedule of Values text on the Contract Menu bar.
There are a lot of features available when creating the Schedule of Values; including setting how the amounts are entered, having parent and sub jobs, adding financial markups and applying a tax.
For this example, just a simple line item is entered.
- Click the + Add Line Item
 button.
A blank line appears on the Schedule of Values and the Cost Code drop down is selected.
- Click on the Cost Code.
The Cost Code is displayed and the Type drop down is selected.

- Click on a Type to apply.
A predefined list of Types are setup in the system. The System Administrator can maintain these to configure the list specifically for an organizations processes.
The Type is displayed and the Description is selected.
- Enter a Description if required. This is optional.
- Enter an Amount for this line item.
The Subtotal is automatically calculated as line items are entered as well as other information.
- Click the Save
 button.
The Close, Save and Save & Email buttons appear at both the top and bottom of the Schedule of Values for easy access if there are a large number of line items.
The Save & Email option can be used to email a link to the Contract to any of the Project Contacts.
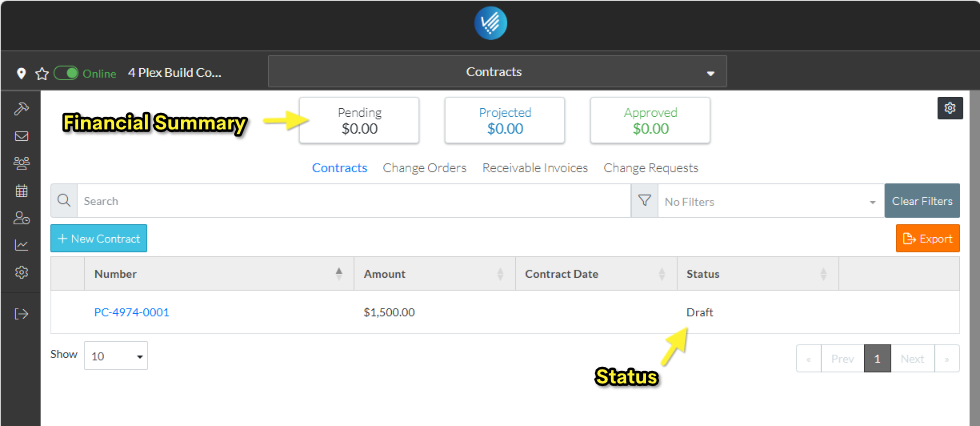
The Contract is saved as a Draft status by default, but can be changed to manage the Contract through its life cycle.
Once it is changed from a Draft status, such as to Pending or Approved, the Financial Summary at the top of the form is automatically calculated based on all Contracts entered to give a quick overview. Also the Contract will automatically appear on the Budget.
In addition,
- Change Requests can be created for the client and managed through approval.
- Change Orders can be created and managed.
- Invoices can be generated.
- Payments can be tracked.
Next Steps
Setup a Subcontract with a Subcontractor or Specialty Contractor.