Add Project Contacts
![]() Updated
Updated
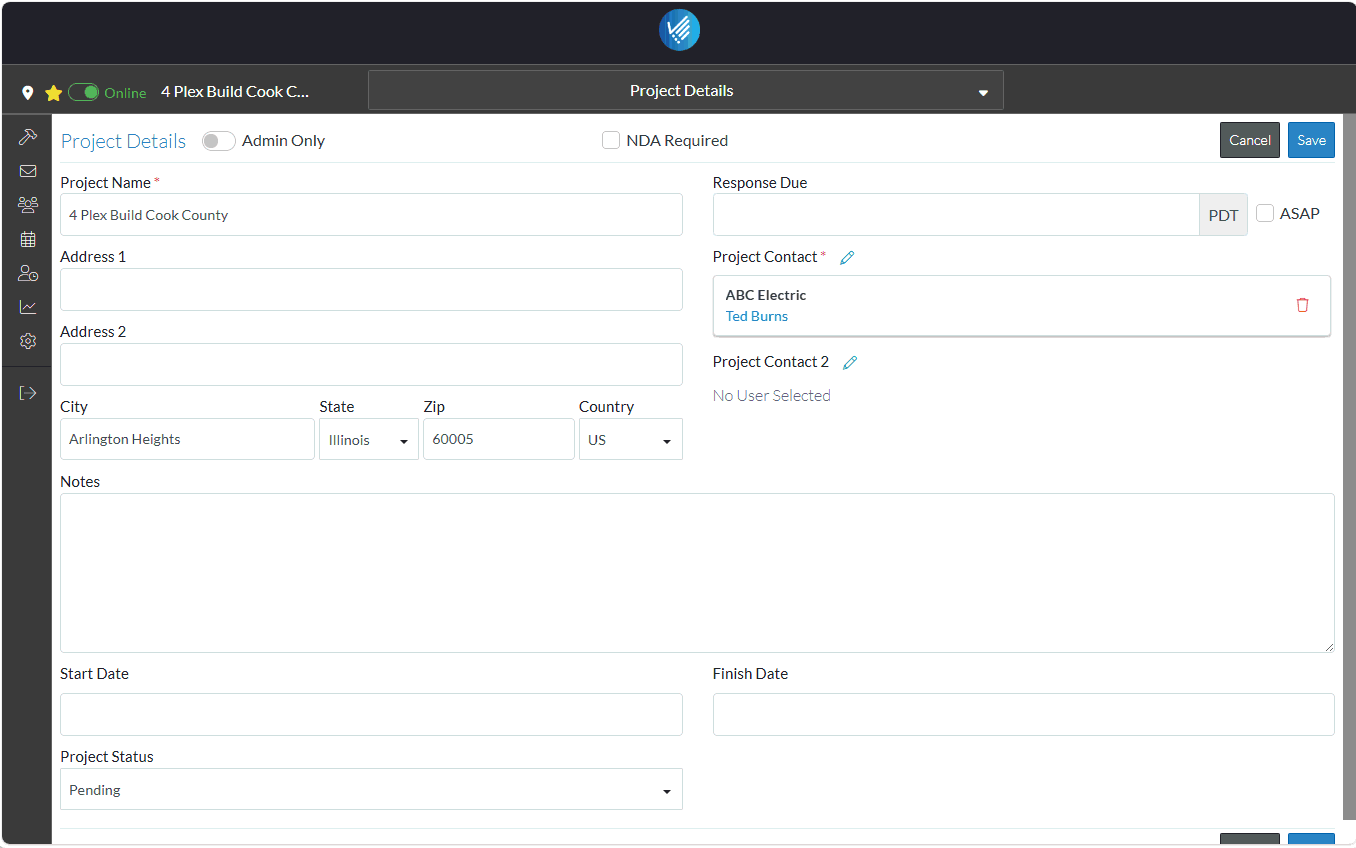
Project Contacts, such as Owner(s), Architect(s), Contractor(s), Subcontractor(s) and Vendor(s) are setup for each Project (this is sometimes referred to as the Project Address Book).
The Project Contacts can be entered for internal use only or they can actually become users and access the system and view information and make updates to the items to which they are assigned.
For a trial system or quick setup, it is recommended to add two Project Contact types:
- Owner
- Subcontractor
To add Project Contacts
- Click on the Project Menu option bar.
- Click on Project Contacts in the General section.
The Project Contacts form displays.
- Click the + Add Project Contacts
 button.
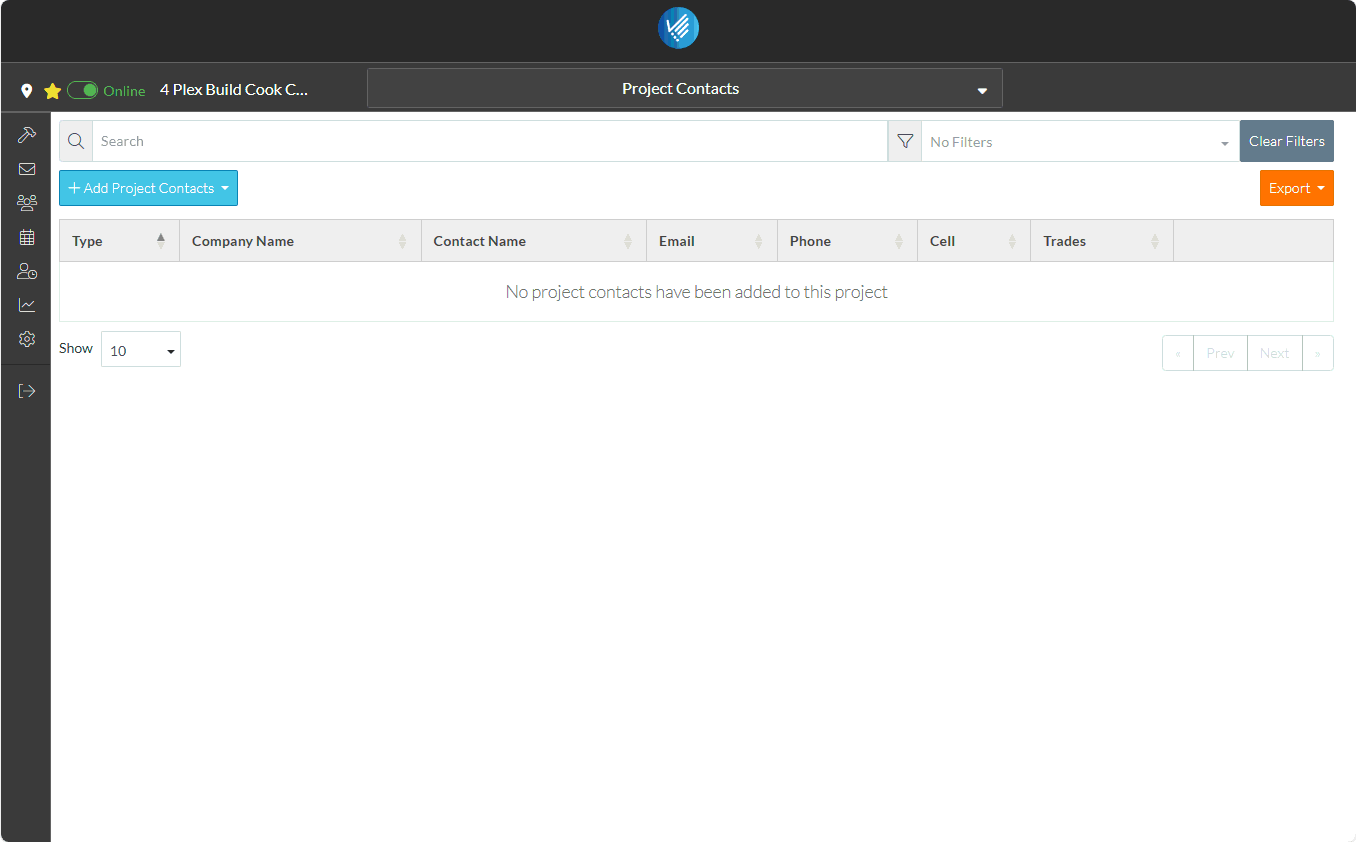
A drop down list appears with various ways to add Contacts.
- Since this is a new system, click the New Contact option.
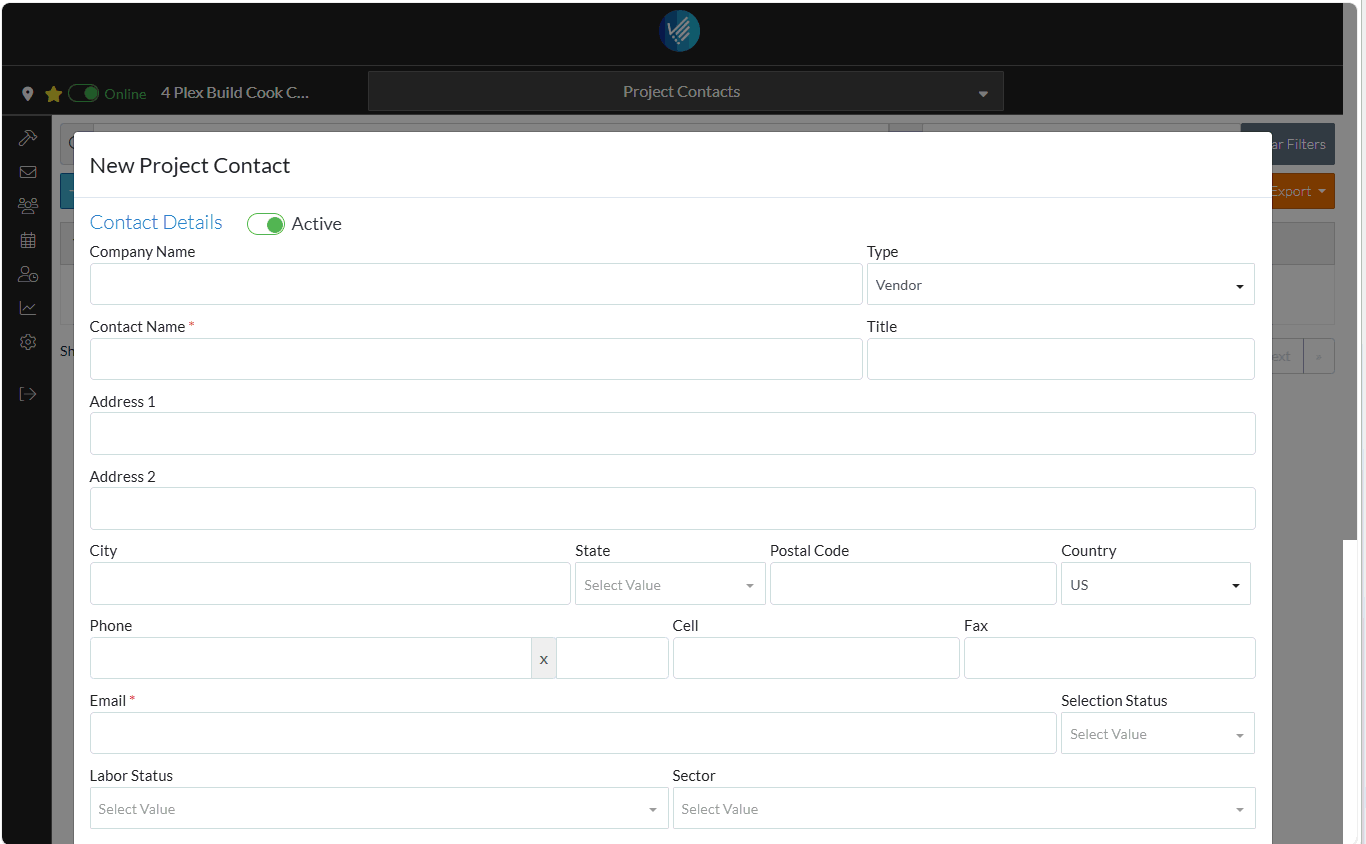
The New Project Contact form displays.
This is a comprehensive form where a lot of information can be entered about a Project Contact.
The only required fields are the Contact Name and Contact Email and just that data can be entered for quick adding of a Project Contact. For this example, the Company Name and Type are also entered (although those fields are optional):

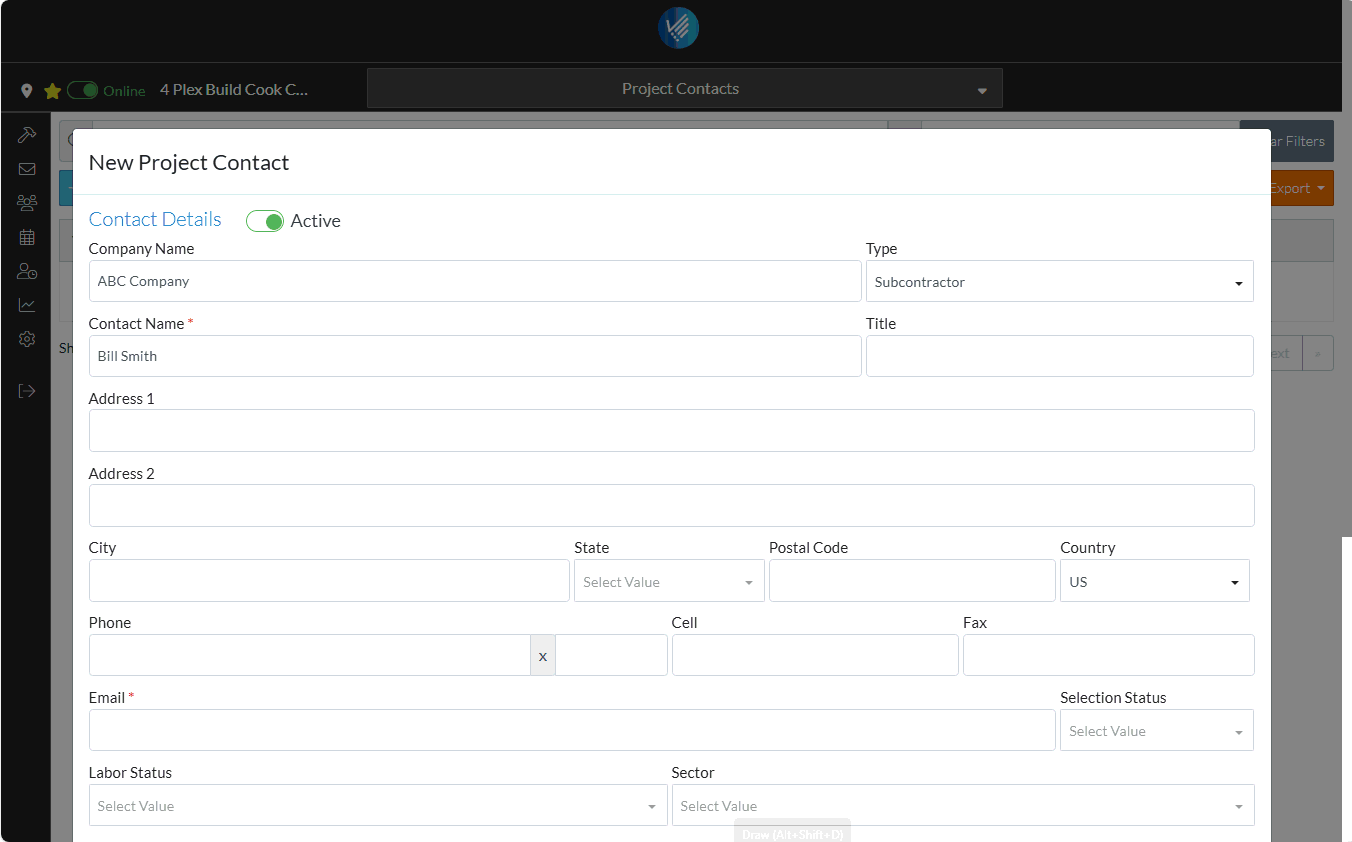
This example is setting up a Subcontractor.
- Enter the Company Name. This is not required, but it helps for easier contact identification.
- Click in the Type and from the drop down, select the one of the options.
- Enter the Project Contact Name.
- Enter the Email. Note* this system is live so emails will be sent to this project contact. To avoid that, it is recommended to setup an alias email based on your email and you will receive the email. This also shows how it would look to a real Project Contact.
- Identify your main email address: For example,
john.doe@gmail.com. - Add a plus sign and a tag: After your username, add a
+and then a word or combination of characters of your choice (e.g.,john.doe+owner@gmail.com orjohn.doe+sub@gmail.com
john.doe@gmail.cominbox. Plus signs (+) in email addresses enable a feature called plus addressing or subaddressing, allowing the creation of receive-only extensions of your main email address. - Identify your main email address: For example,
- Scroll to the bottom of the form and click the Save
 button.
Repeat this to add the Owner or Architect, so there are two Project Contacts in the list.

Note* Although these two Project Contacts were added for the Project, they are also automatically added to the Company Address Book, so they can be easily selected to be added to other Projects.
A notification will be automatically sent to the Project Contact that they've been added as a Project with a link for them to View the Project. See Notification - Added to Project Contacts for an example of the email and more information. If an alias email was setup (as outlined above) the notification is sent to that email so the actual email can be viewed.