Project Navigation
Once a project is added, the Project Menu option bar is used to access the different information about a project.
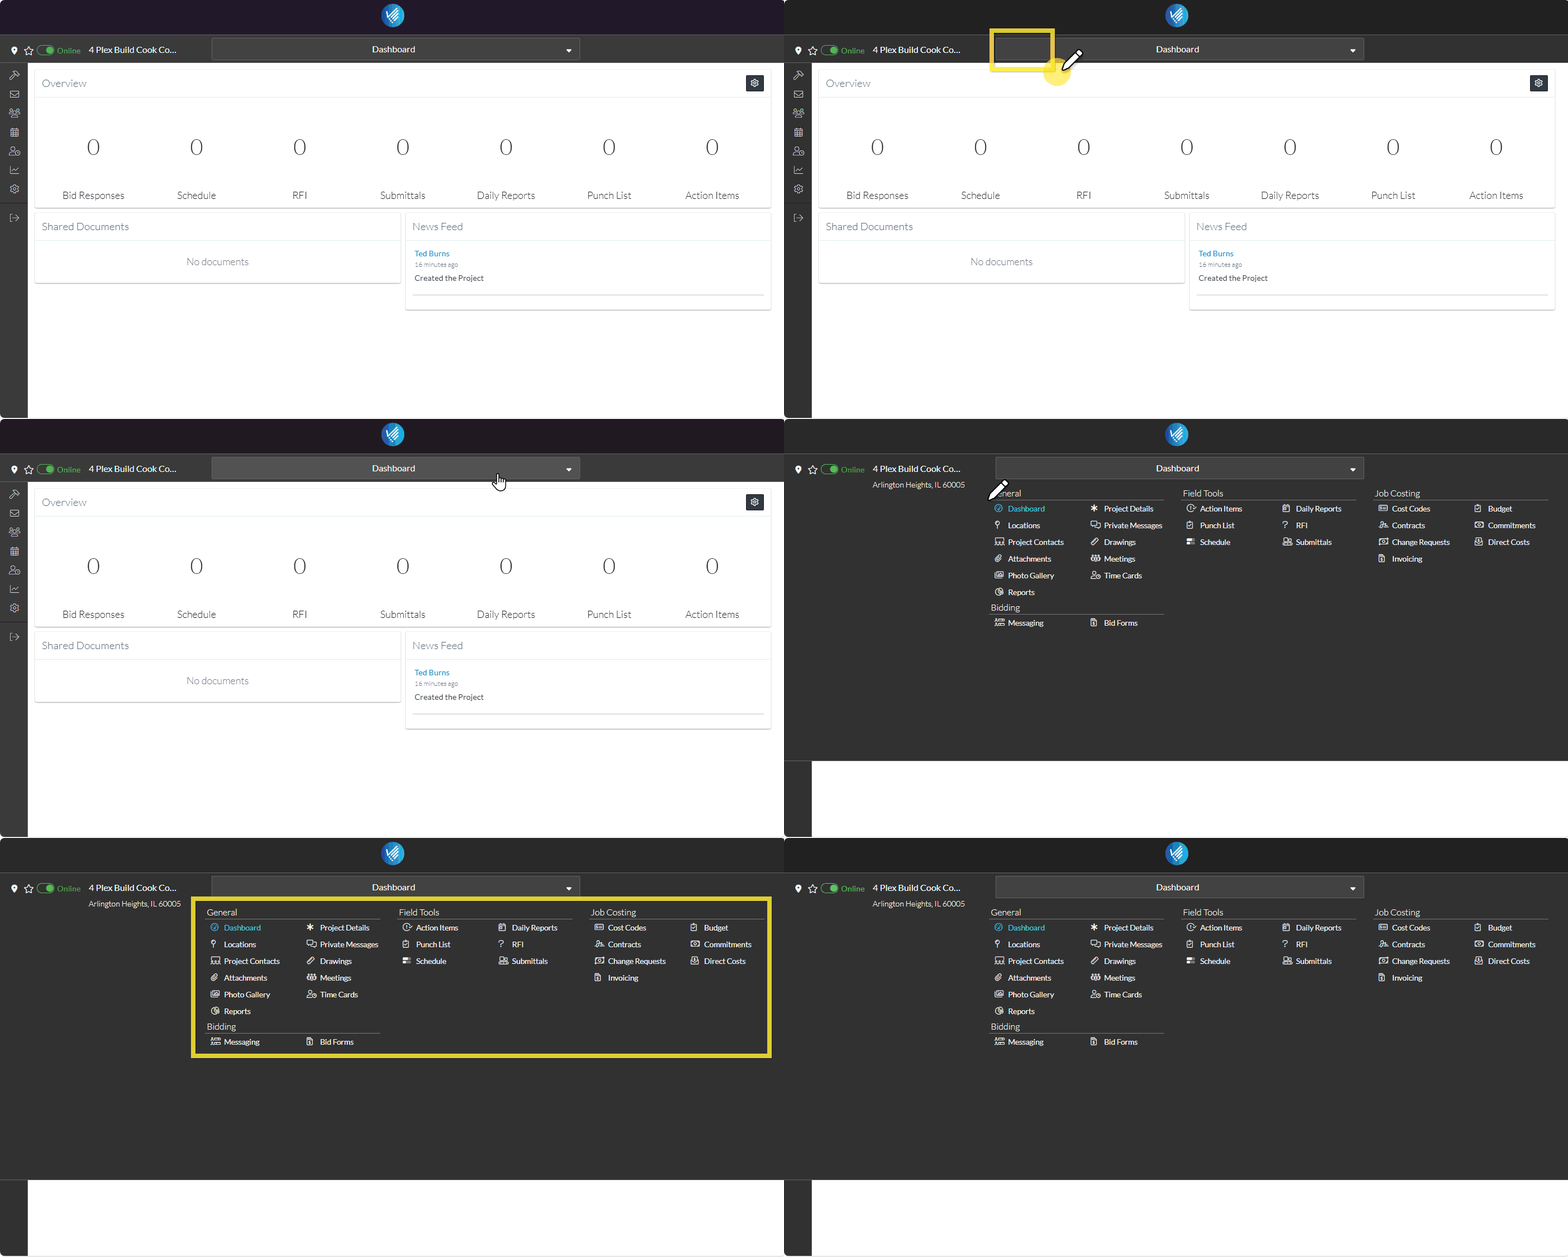
The Project Menu option bar shows which project form is currently displayed but it also serves as a menu option when clicked.
- Click on the Project Menu option bar to show all the options available for the Project and the User.

The menu options may display differently than the example depending on the size of the screen, the Project Menu Options available according to the Plan in place and the Permissions for the user. These Examples are for an Enterprise System, with a User that has all permissions.
There are four sections on the Project Menu options bar:
- General
- Field Tools
- Job Costing
- Bidding
Each with menu options.
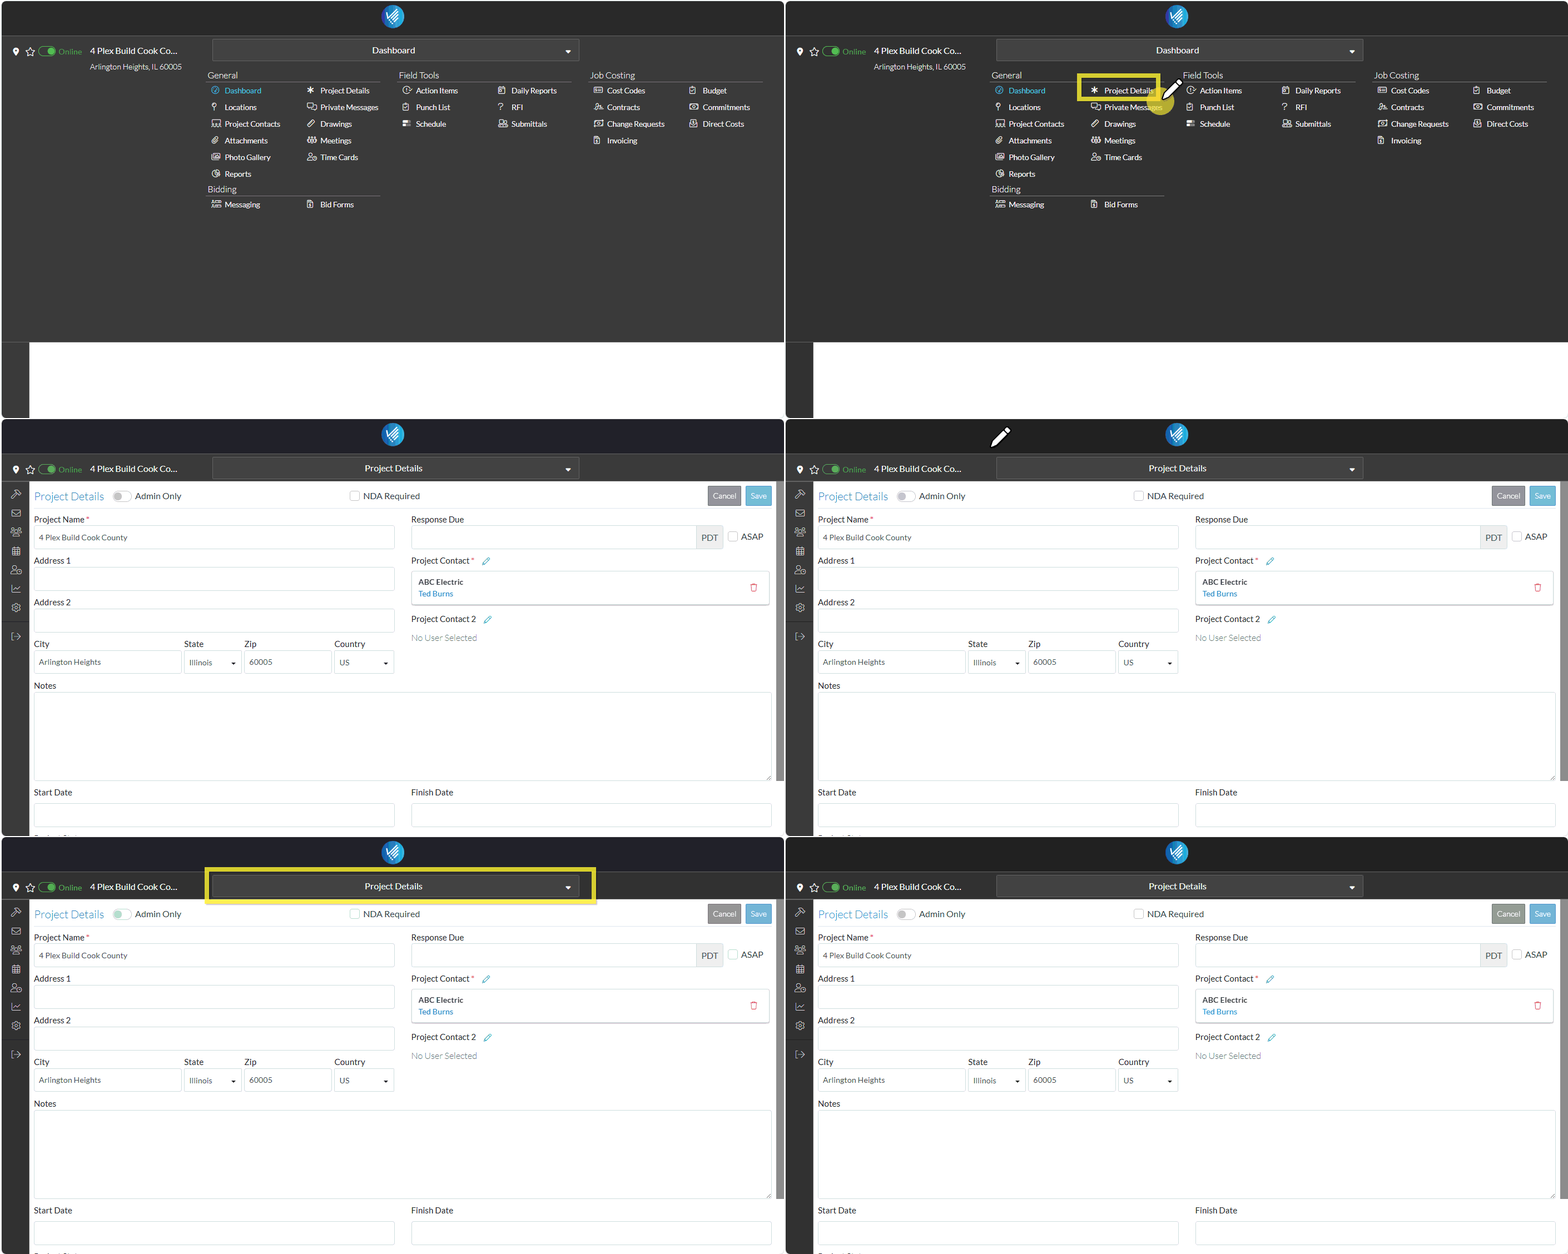
- To access a different Project Option, click on the menu option on the Project Menu Options bar.
For example, to see the Project Details that were just entered, click Project Details.
That form is displayed and the Project Menu option bar changes to display that form label.

That is how to navigate around the Project.
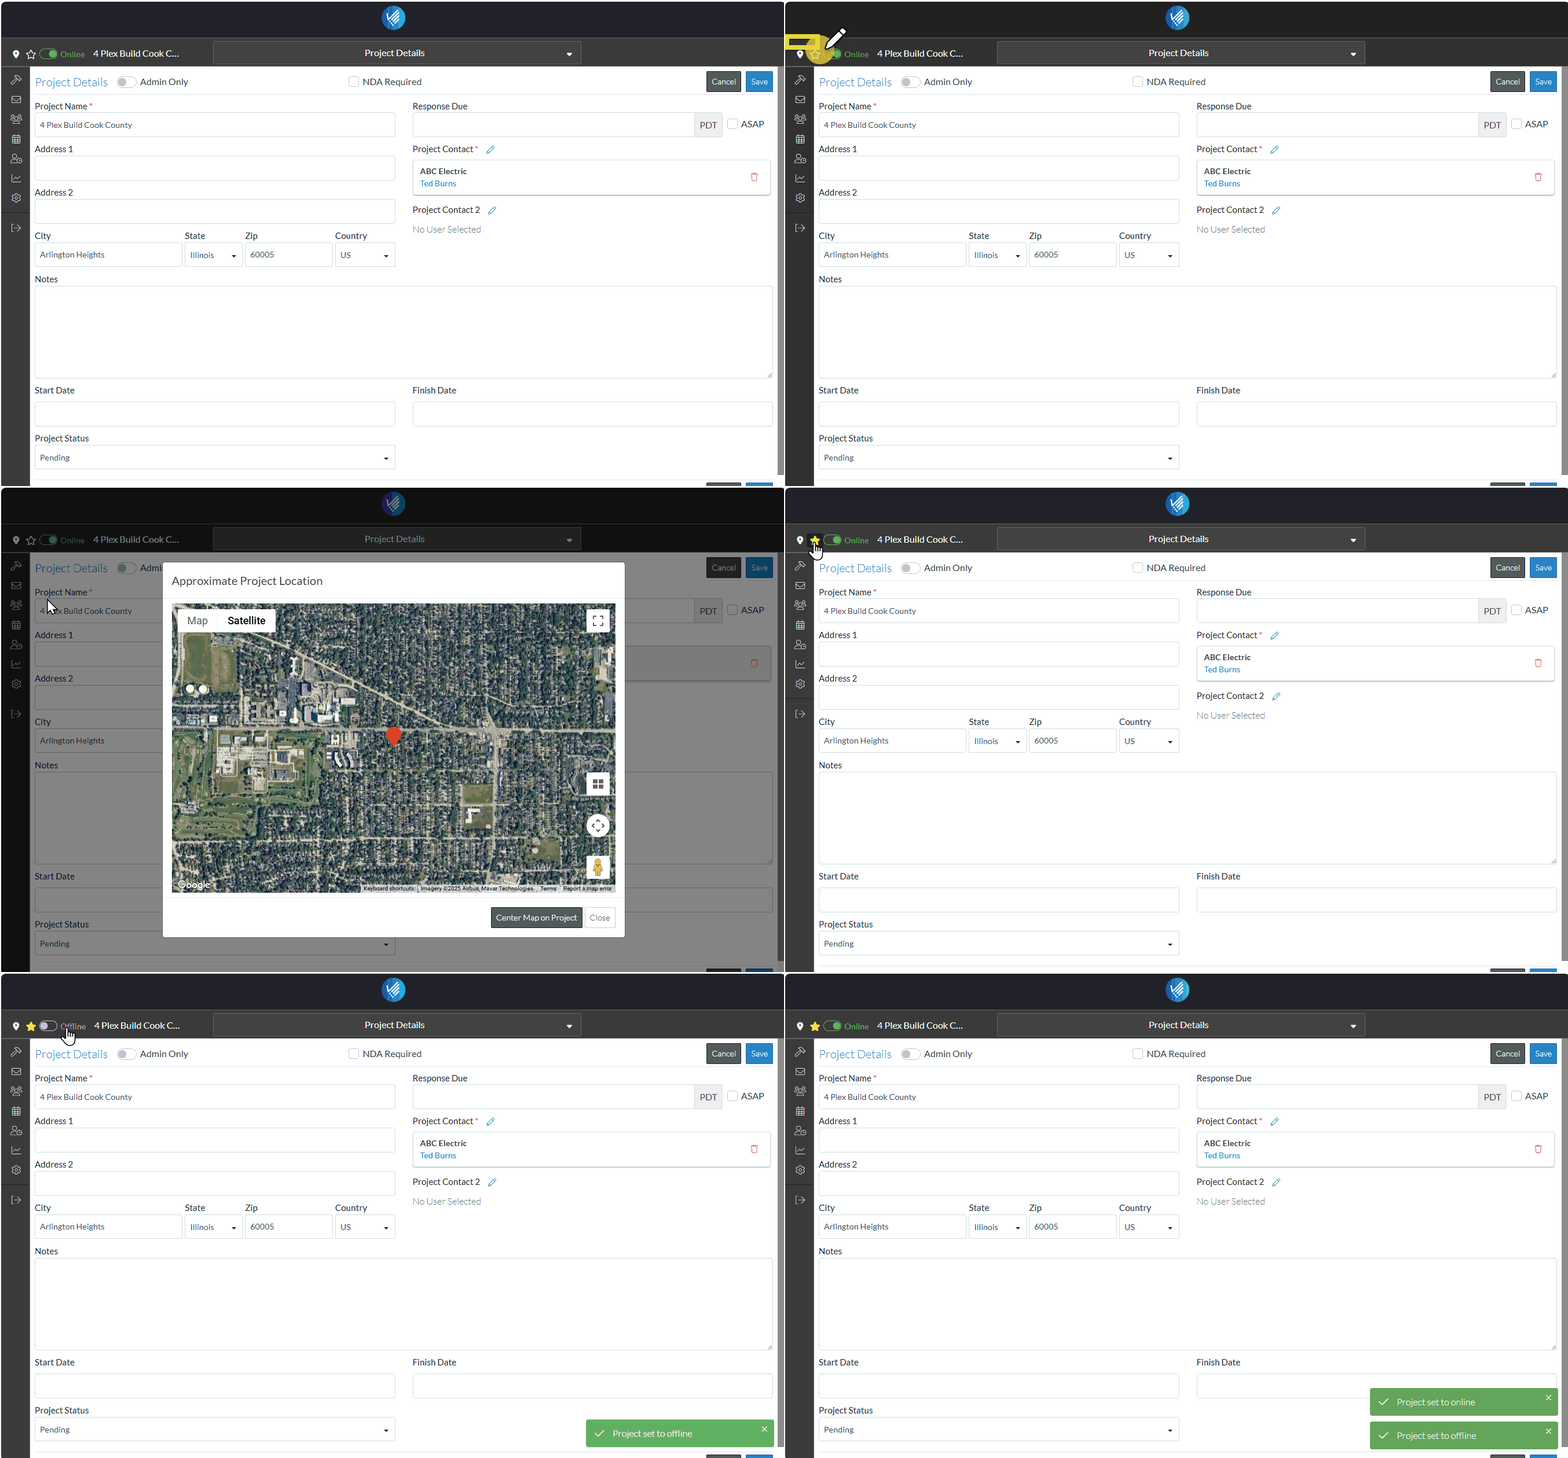
Besides the Project Menu Options, there are some other really cool features, that we'll let you know about but won't cover in detail here:
- Click the Project Location button to see quickly where this project is on a map
- Set the Project as a Favorite to quickly access it
- Set whether other people besides the user in your company can see this project (with the online/offline feature).

Next Steps
The next step is to add the Project Contacts, such as Owner(s), Architect(s), Contractor(s), Subcontractor(s) and Vendor(s), see Add Project Contacts.
