Create a Submittal
Submittals can be created, assigned and managed:
- Specify the Submittal type and Due Date
- Assign People to the Submittal (submitter, approvers, who court the submittal is in)
- Send the Submittal to a Distribution List
- Add Attachments
- Submit the Submittal for approval
- Create Submittal Templates for easy setup
- And more
To Create a Submittal
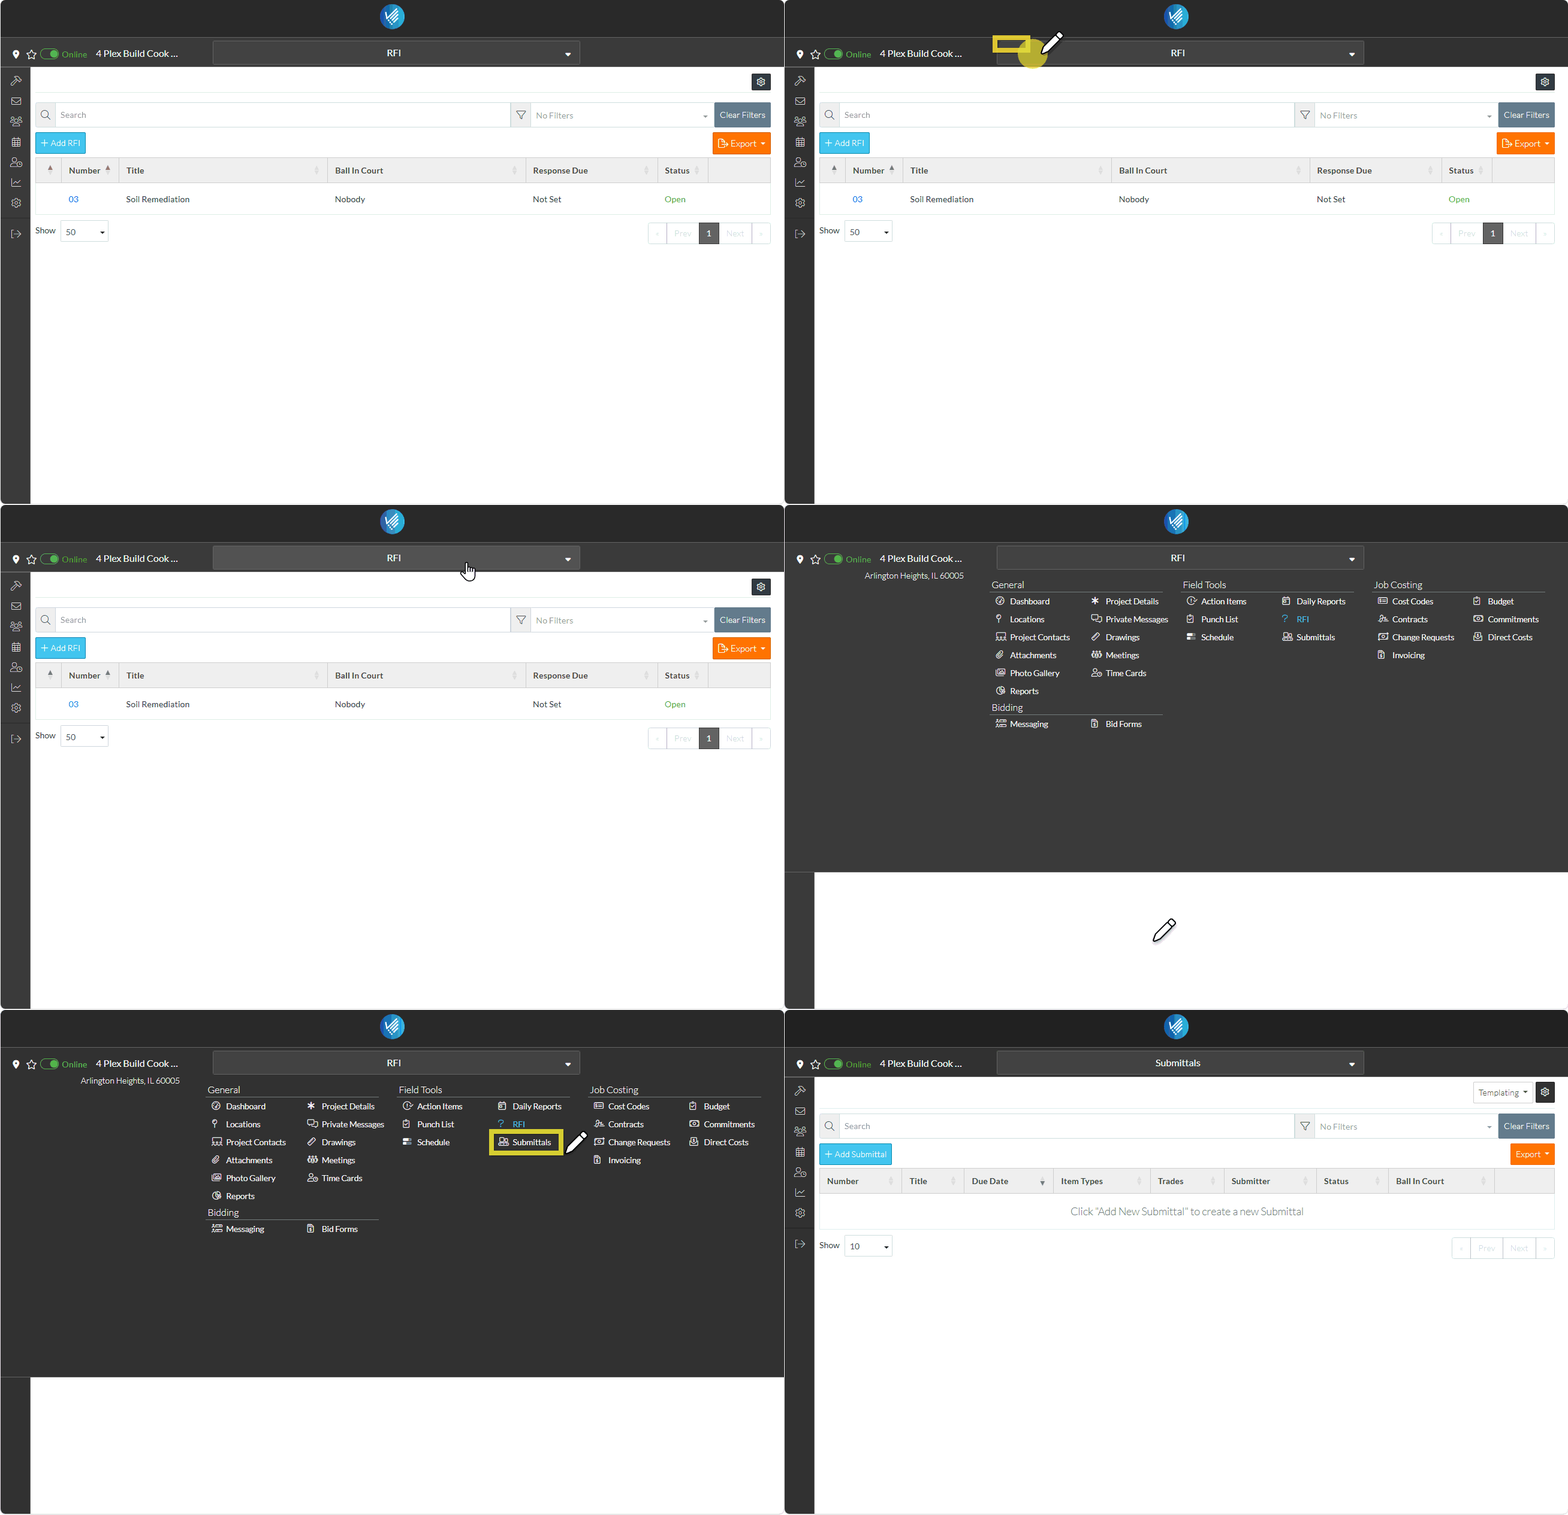
- Click on the Project Menu option bar.
- Click on Submittals in the Field Tools section.

The Submittals form displays.
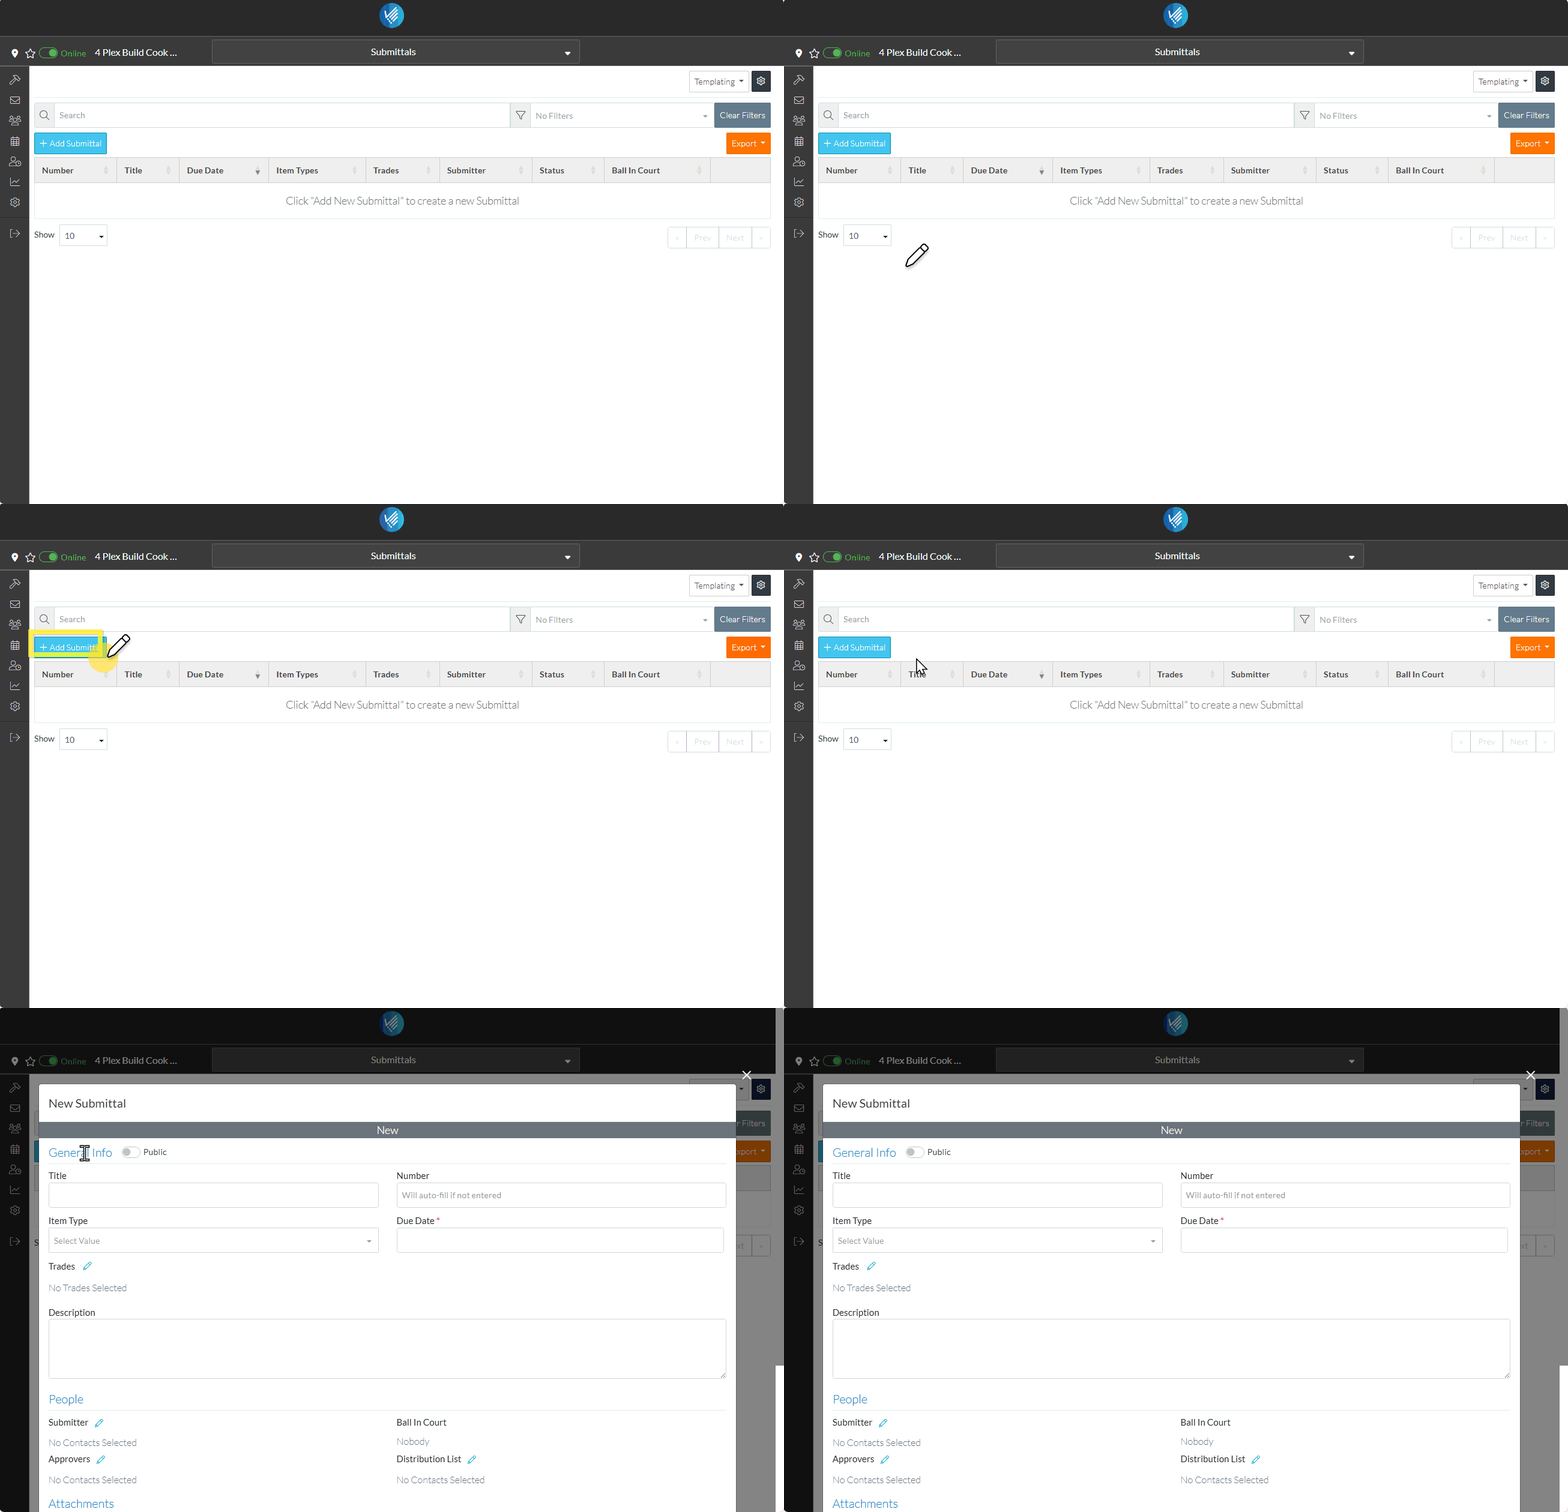
- Click the + Add Submittal
 button.

The New Submittal form displays.
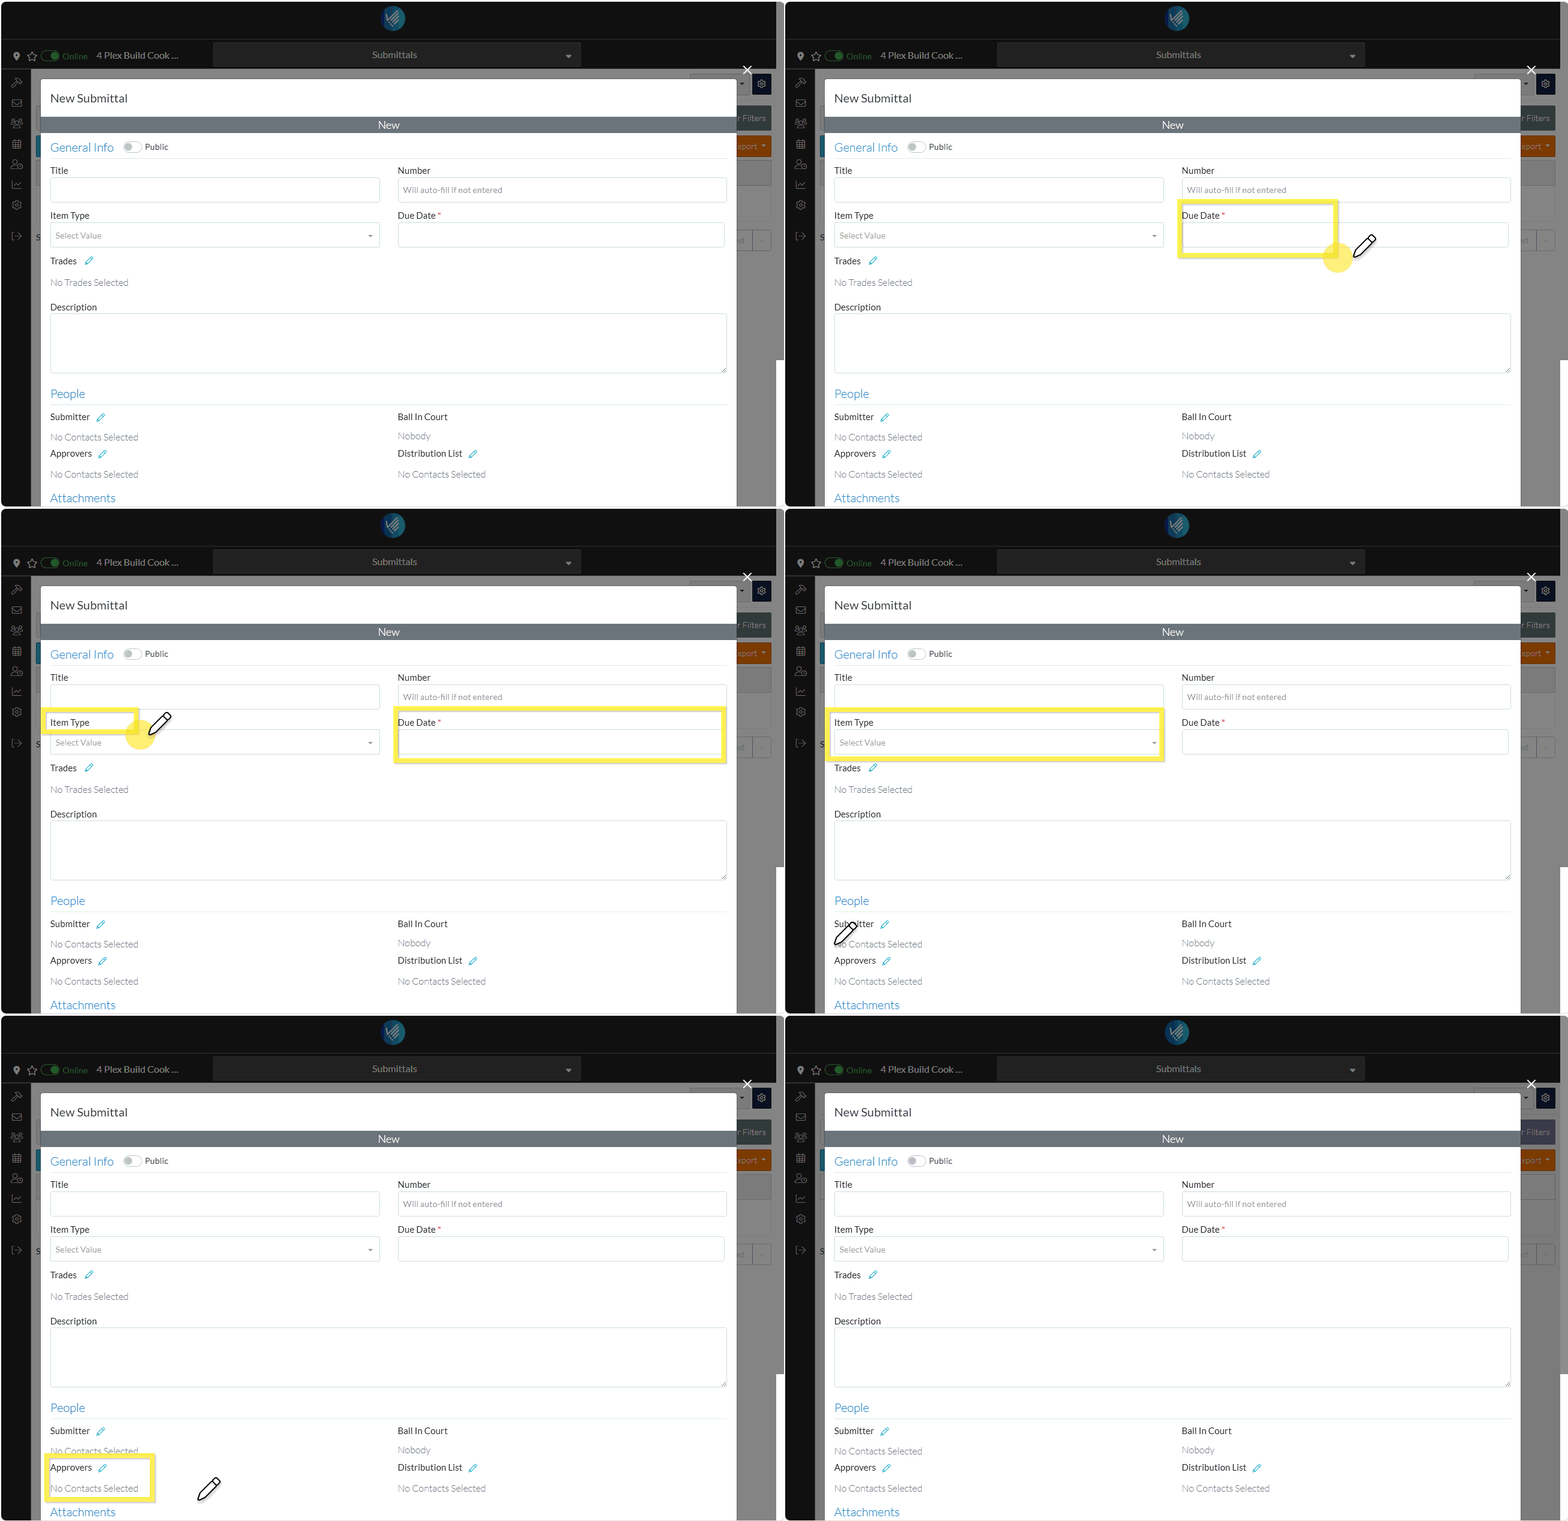
The only required field is the Due Date. For this example, the Item Type and Submitter is also entered (although those fields are optional):

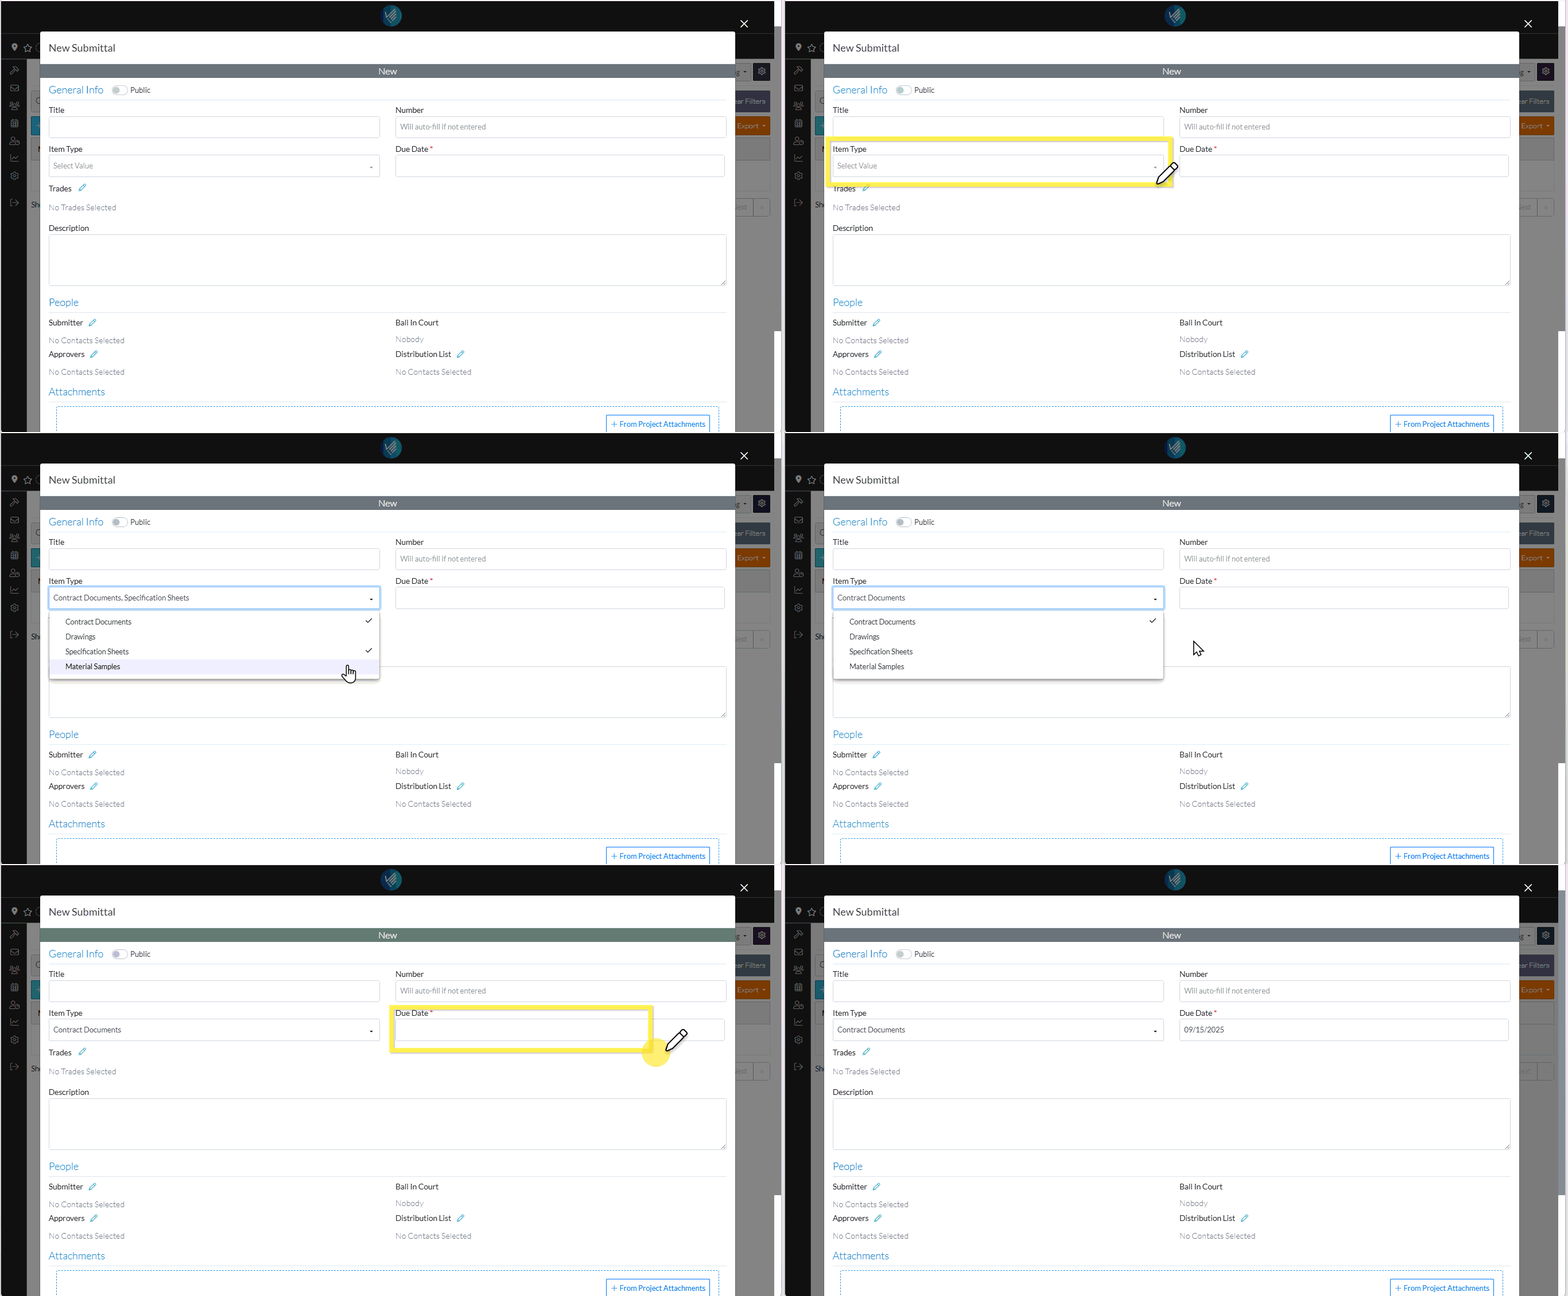
- Select the Item Type.
- Click in the Item Type drop down.
- Click on an Item Type to select it. A check marks appears next to it.
- Click on as many Item Types as required. A check marks appears next to each..
- Click on an item again to unselect.
- Click anywhere outside the drop down to remove the drop down.
- Enter the Due Date.
- Click in the Due Date. The calendar displays.
- Click on a day.

- Enter the Submitter:
- Scroll down the form if necessary to view the Submitter in the People section.
- Click the Edit
 Button next to the Submitter text. The Select Project Contacts form displays. It shows the two Project Contacts that were entered.
 - Click on the box on the far left on the row of the Project Contact to select. It is filled in blue to indicate its selected.
- Click the Save
 button to assign the the Submittal to that Contact.
The Submitter Company Name and Contact Name are displayed.
Once the Submittal is saved, this contact also gets assigned to having the Ball in their Court.

The Status displays in the top with color coding.
There is other information that can be entered for the Submittal Item, such as entering a title, assigning a Trade, setting up approvers, creating a distribution list, entering comments and uploading attachments.
- Scroll to the bottom of the form to see all of the data that can be entered (but for this example and to demonstrate how easy it is to add the item, the rest of the fields can just be left blank).

- Click the Save
 button to save the Submittal.
The Submittal is displayed in the list.
By default, the Approver or anyone on the Distribution list is sent an email notifying them a Submittal has been created with a link to the Submittal so they can view and update it. See Email Notification - Submittal Created.
Also, because the Submitter is also set to having the Ball in their Court, an email is sent notifying them of that, see Email Notification - Submittal Ball in Your Court.
Next Steps
Review Job Costing that is available with the Advanced or Enterprise plan, see Setup Cost Codes.
