Company - Setting to Active or In-Active
![]() Updated
Updated
Suggested Prior Reading
Contacts – Accessing the list of Contacts
View or Edit an Existing Contact
View/Add/Edit Contact - Form Layout
View/Add/Edit Contacts - Company Details
Overview Company - Setting to Active or In-Active
Companies can be set to active or non active (there are instructions below for each of these actions).
Active indicates that the Company is actively participating in bids or are having projects done (or could have projects done in the future).
In some cases however, a Company may no longer be active, but is still retained in the system for reference purposes likely because it has been assigned to past projects or bids and it is important to keep that data. To retain that information, but also indicate that the Company shouldn't be used going forward, the Company can be set to inactive. All the Company Contacts will be set to non active as well.
Although an entire Company and all its contacts can be non active, alternatively, the Company can be active but an individual contact for a Company can be set to non active (again to keep it as reference in the system, but also indicate that individual Contact should not be used going forward). If a Company is active, then at least one Contact for that company must also be active (and the system won't allow a Company to be Active unless there is at least one Active Contact as well).
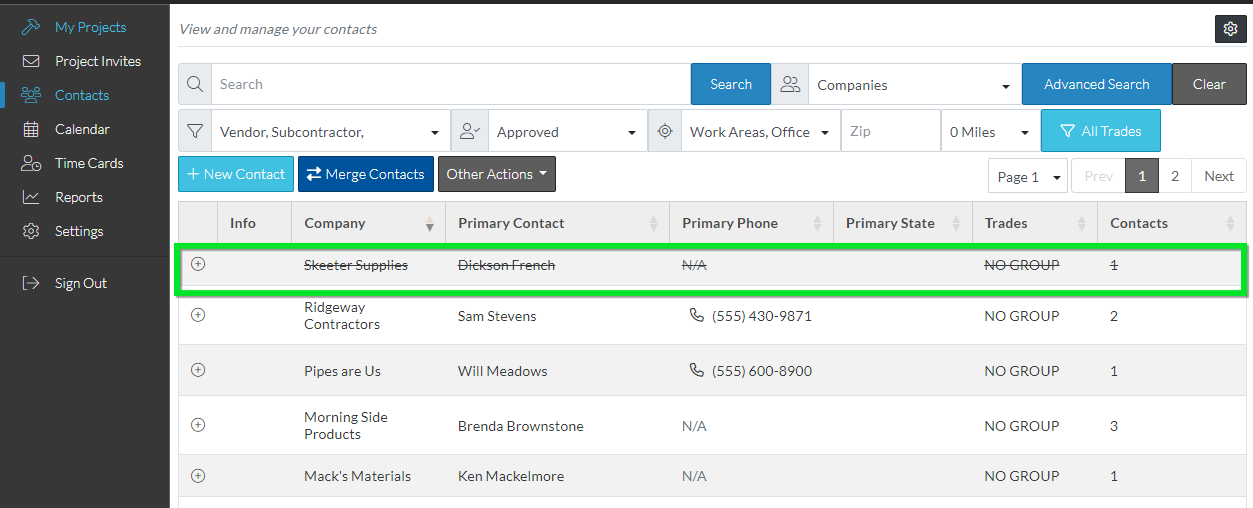
Non active Companies (or Contacts) will appear with a strike thru font on Contacts list. This is a visual indicator however only. The Company and/or Contact can still be selected.
To set a Company as non-Active
- From the Contacts List (see Contacts – Accessing the list of Contacts)
- Add a Contact or View or Edit an Existing Contact
- The View/Add/Edit Contacts - Company Details form appears
- Click on the Active button next to the Company Details header to toggle the Company from Active to non-Active.
- Scroll down. The Primary Contact will have also be set to non Active.
- Scroll to the bottom of the form and click Save.
The Contacts list will display with the Company (and any Contacts) now showing with a strike thru font. This is how it will display on any Contact forms (with strike thru font) but it can still be selected. It is a visual reference only, but doesn't prevent selection of that Company or Contact.
To set a Company as Active
- From the Contacts List (see Contacts – Accessing the list of Contacts)
- Add a Contact or View or Edit an Existing Contact
- The View/Add/Edit Contacts - Company Details form appears
- Click on the Active button next to the Company Details header to toggle the Company from non-Active to Active.
- Scroll down to the Contact Details. The Primary Contact will be automatically selected and will still be non Active. (If there is more than one Contact for the Company, in the Contacts list, select the Contact to make Active) or leave the Primary Contact selected.
- Click on the Active button next to the Contact Details header to toggle the Contact from non-Active to Active (note, if at least one Contact is not set to Active, then the Company will automatically remain non Active as well).
- Scroll to the bottom of the form and click Save.