Change Request - Schedule of Values - Line Item - Description
![]() Updated
Updated
Suggested Prior Reading
Change Request - Schedule of Values - Add Line Item
OR
Change Request - Schedule of Values - Edit Line Item (before Save)
OR
Change Request - Schedule of Values - Edit Line Item (after Save)
Description
The Description is always displayed on the Change Request Schedule of Values Line Items but is optional.
The Description can be entered during the initial add as well as added or changed after the form has been saved (but only until the Change Request Status is changed to Approved, Rejected or Void).
If these Line Items are created on new or existing Commitments/Commitment Change Orders or Contract Change Orders, the Description will be copied to those Line Items and can be added or changed there.
Note* How columns display for the Line Items on the Schedule of Values depends on various factors, see Change Request - Schedule of Values – Layout and Navigation.
To Enter a Description
- If the Description column is not selected, click on it to select it.
- Enter the Description.

- Enter other Line Item Information, see More Information below.
OR
Click the Save button (at the bottom of the form) to save the Change Request.OR
Click here for more information on the Save function.
This saves the Change Request including any information on the General, Schedule of Values and Financial Markups Components.
This list the function was invoked from displays. See Next Steps below.
Click the Save & Email button (at the bottom of the form) to save the Change Request and email it.OR
Click here for more information on the Save and Email function.
This saves the Change Request as including any information on the General, Schedule of Values and Financial Markup components and sends an email with a link to the Change Request in JobPlanner (and optionally include the Change Request as a PDF attachment in the email). The Email can be sent to any Project Contacts. The Email Change Request form displays, see Email Change Request.
Click the Close button (at the bottom of the form) to close the form without saving the Change Request.
Click here for more information on the Close function.
If no information was changed or entered, the list the add or edit function was invoked from displays, see Next Steps below.
If information was changed, then an additional prompt displays indicating there were changes and additional prompts on what to do.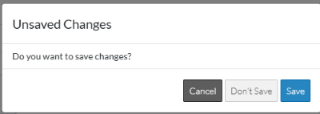
Click the Cancel button to cancel the Close action and return to the Change Request View/Edit form (see the steps above)
OR
Click the Don't Save button to cancel changes to the Change Request. The list the add or edit function was invoked from displays, see Next Steps below.
OR
Click the Save button to save the Change Request including any information on the General, Schedule of Values or Financial Markups components. The list the add or edit function was invoked from displays, see Next Steps below.
More Information
Enter or review other Schedule of Values, Line Item information:
- Cost - see Change Request - Schedule of Values - Line Item - Cost.
- Revenue - see Change Request - Schedule of Values - Line Item - Revenue.
- Over/Under - see Change Request - Schedule of Values - Line Item - Over/Under.
- Financial Markups - see Change Request - Schedule of Values - Line Item - Financial Markups.
- Tax Codes and Tax, see Change Request - Schedule of Values - Line Item - Tax Code and Tax.
- Subtotal - see Change Request - Schedule of Values - Line Item - Subtotal.
View, add or edit General Change Request information, see Change Request - Add - General OR Change Request - Edit - General.
Review all Financial Markups, see Change Request - Financial Markups - Overview.
If this is an existing Change Request (that was previously added and saved and is not Void or Rejected), review and manage RFQs, see RFQs - Overview.
Next Steps
See Change Requests List - Overview (Grouped List View)
OR
Contracts - List of all Change Requests - Overview (Grouped List View)