Cost Code - Import
![]() Updated
Updated
Suggested Prior Reading
OR
To Import a List of Cost Codes
If JobPlanner is not integrated to an ERP system, importing Cost Codes is an easy way to populate the Cost Codes that can be used on a project or a Sub Job on a project. The import is invoked from the Cost Codes form for both projects and sub jobs (see Cost Codes List - Accessing). For Sub Jobs, they must be enabled (see Sub Job - Enable) and the Sub Job must be created first (see Sub Job - Add).
The first step is to setup an Excel file with the information to be imported. See Cost Codes - Create the File to Import.
The next step is to do the import as described below.
Cost Codes being imported can match Company Cost Codes that already exist (and they will just be linked with those via the Code) or it can be Cost Codes specific to the Project or Sub Project (but only if the system is not integrated to an ERP system).
Note* The import does not occur instantaneously. It is imported on a scheduled basis in the background. So all the changes may not be reflected in the system right away and it is suggested to give it 30 to 60 minutes (depending on the amount of data to update).
Import the Cost Codes
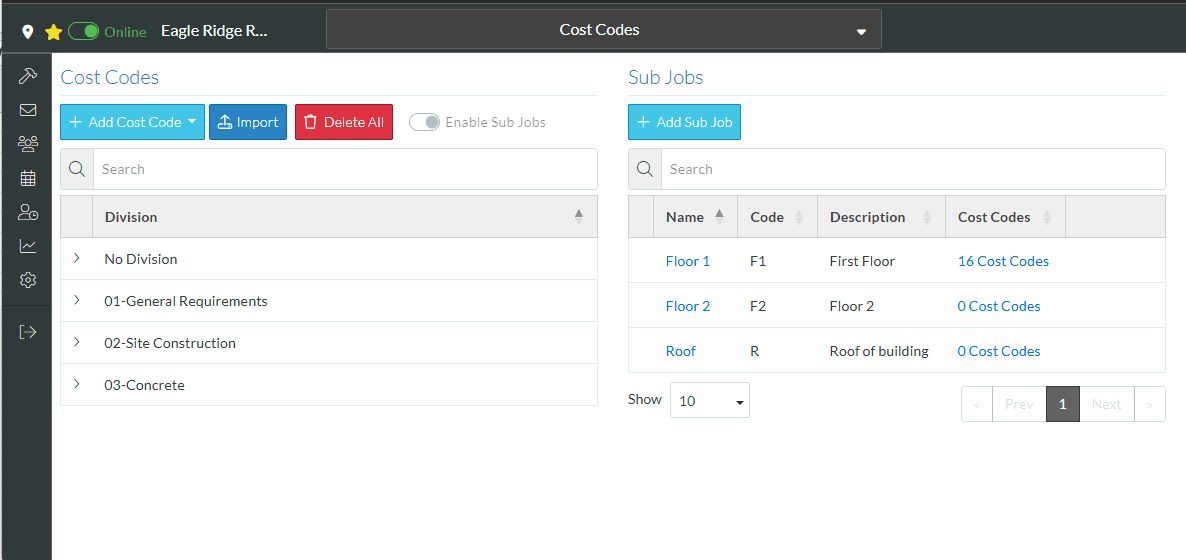
- Navigate to the Cost Code list for the project see Accessing Cost Codes.
- If importing Cost Codes for the project, click the Import
 button in the Cost Codes section.
OR
- If importing codes for Sub Jobs, from the Sub Jobs section, click on the clickable link for the Sub Job Cost Codes, see Sub Job Cost Codes.
The Sub Job Cost Codes form appears.
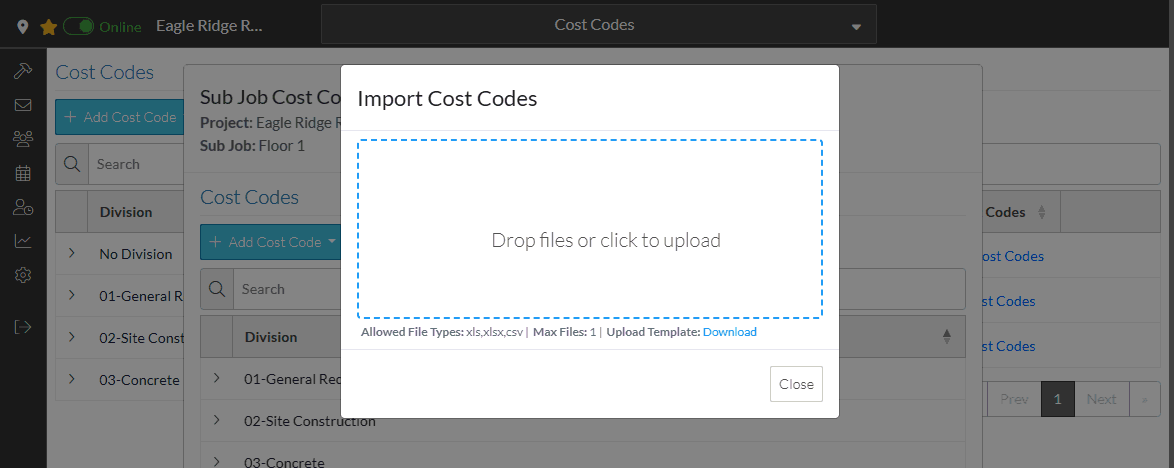
- Click the Import button.
The Import Cost Codes form displays.
- Drag and drop files to the upload box or click on the text to upload the file with File Explorer.
- Upload the File
- A message appears outlining what was found and with prompts for how to continue.
If applicable:
The number of new Cost Codes is displayed.
The number of existing Cost Codes that are in both JobPlanner and the import file is displayed (these are determined by the code, i,e. if the Code matches it is considered an existing Code).
- To Save only New Codes, click the Save New Only
 button.
OR
To Save or Update All codes (including new and update to existing such as name changes or Cost Types), click the Save/Update All  button.
OR
To Close without doing the Import, click the Close  button.
Note* No Cost Codes are ever deleted by doing an import. If the Cost Code exists on the project in JobPlanner but not the import file, it is just left in JobPlanner on the project as is.
More Information
Cost Code List - Layout and Navigation
OR
Next Steps
To use the Cost Codes in Job Costing, see Job Costing.