Purchase Order - General - General Information - Invoice Contact
 Updated
Suggested Prior Reading
Purchase Order - General - General Information (Overview and Steps)
Invoice Contact
The person at the vendor or supplier who prepares and submits invoices for this purchase order and handles billing questions.
This is both the Company and the Invoice Contact in that Company.
- Users that have Add or Edit permissions can not enter the Invoice Contact (either during the initial add or when editing an existing Purchase Order)
- Only Admin users can enter the Invoice Contact/Company.
If the Invoice Contact/Company is changed on an existing Purchase Order, after its been saved, if there were previously created Invoices, all the Invoices will be automatically updated with the new Invoice Contact.
The existing Invoice Contact/Company can be removed (it will also be removed from any existing Invoices).
For more information on where the Invoice Contact is used, see Commitments - Fields - Usage and Configuration.
This help assumes the the New Purchase Order form or the Purchase Order - View/Edit form is displayed (see Suggested Prior Reading above).
To enter or change the Invoice Contact/Company
- Click on the Edit
 button next to the Invoice Contact label.
The Select Project Contact form displays with a list of all the Project Contacts and the Company they belong to. - Select an Invoice Contact/Company by clicking in the box to the left-hand side of the Type column to select it. The box will fill in to indicate its selected.
See Select Project Contact for more information on the navigating the form. - Click the Save
 button to select it.
Click here for an example of entering the Invoice Contact on the New Purchase Order form
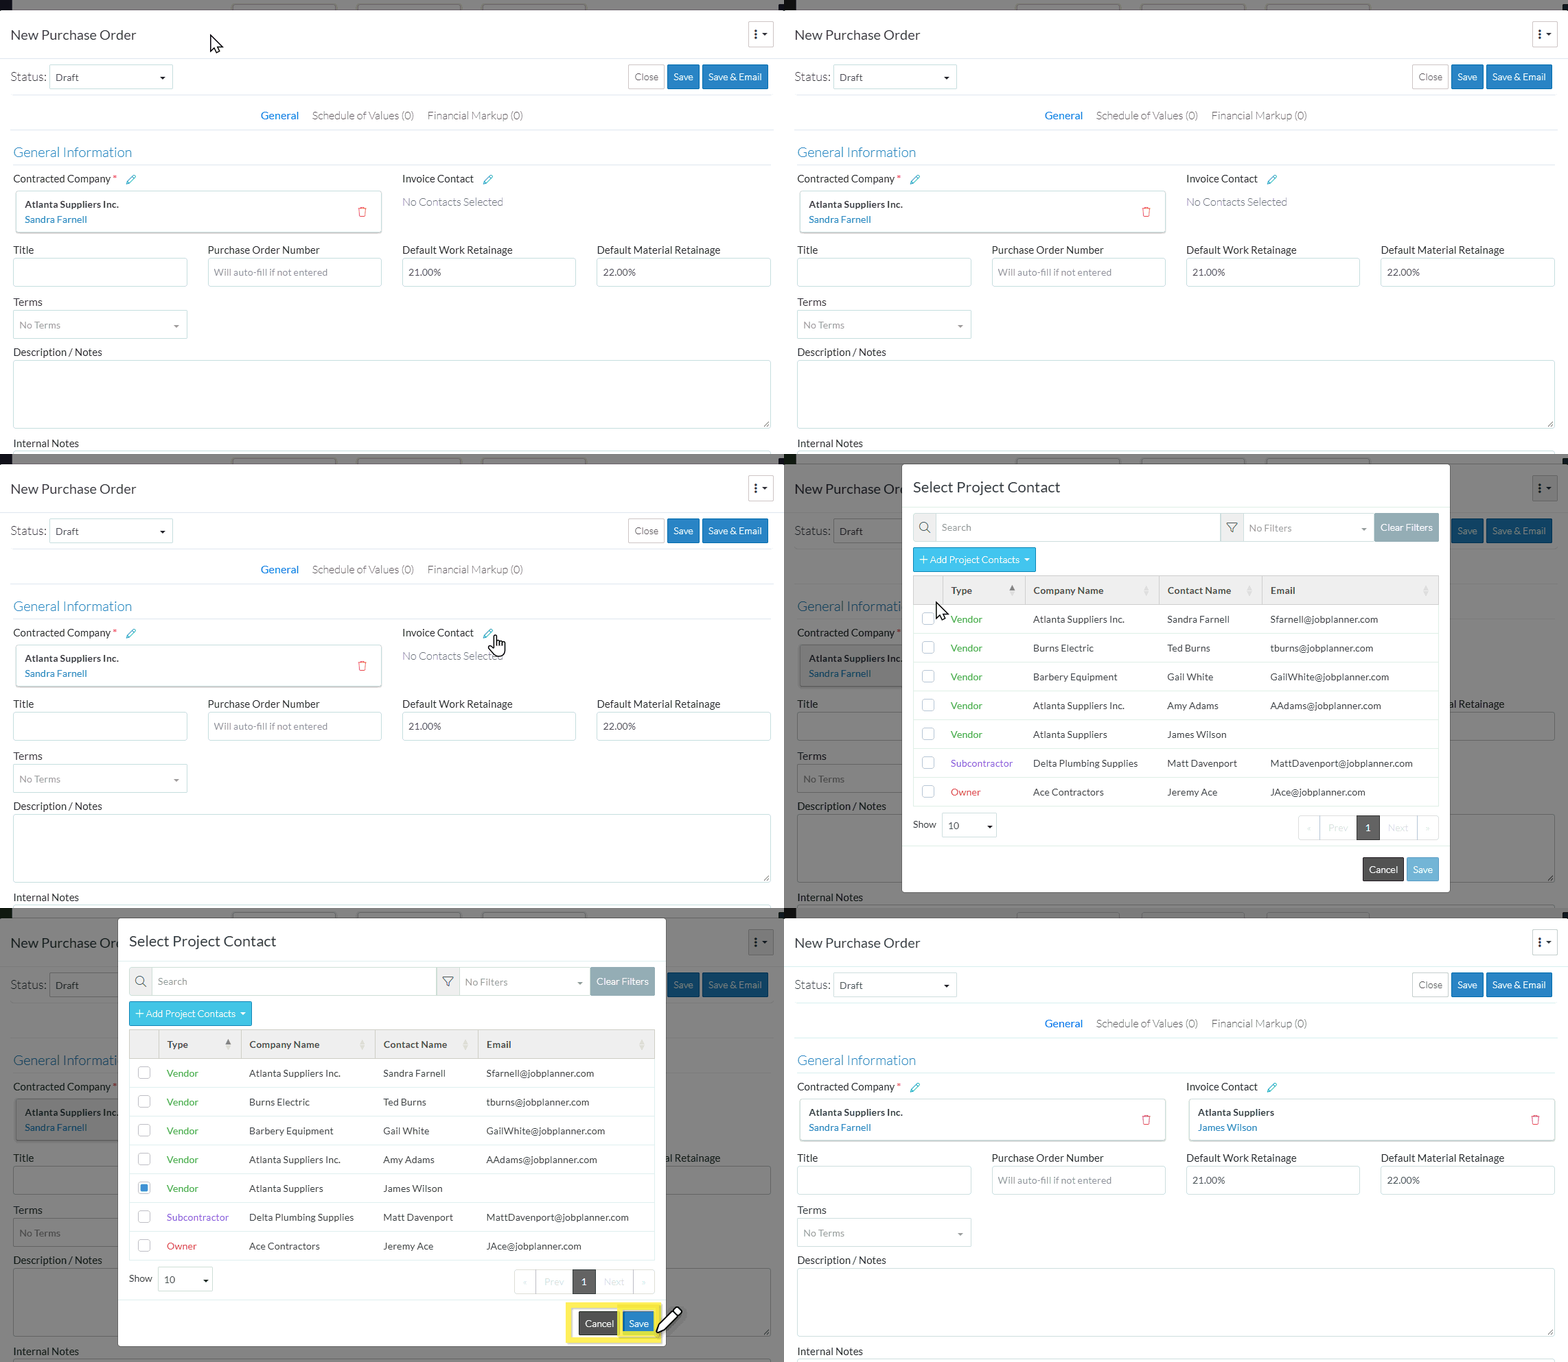
Click here for an example of changing the Invoice Contact with the Purchase Order - View/Edit form
If an Invoice Contact was displayed previously, it will be replaced by this Invoice Contact.
If an Invoice Contact was displayed previously, it will be replaced by this Invoice Contact.
The change is not yet saved until the entire Purchase Order is saved.
To remove the existing Invoice Contact/Company:
Click the Remove  button.
Click here for an example of an Invoice Contact being removed on the Purchase Order - View/Edit form
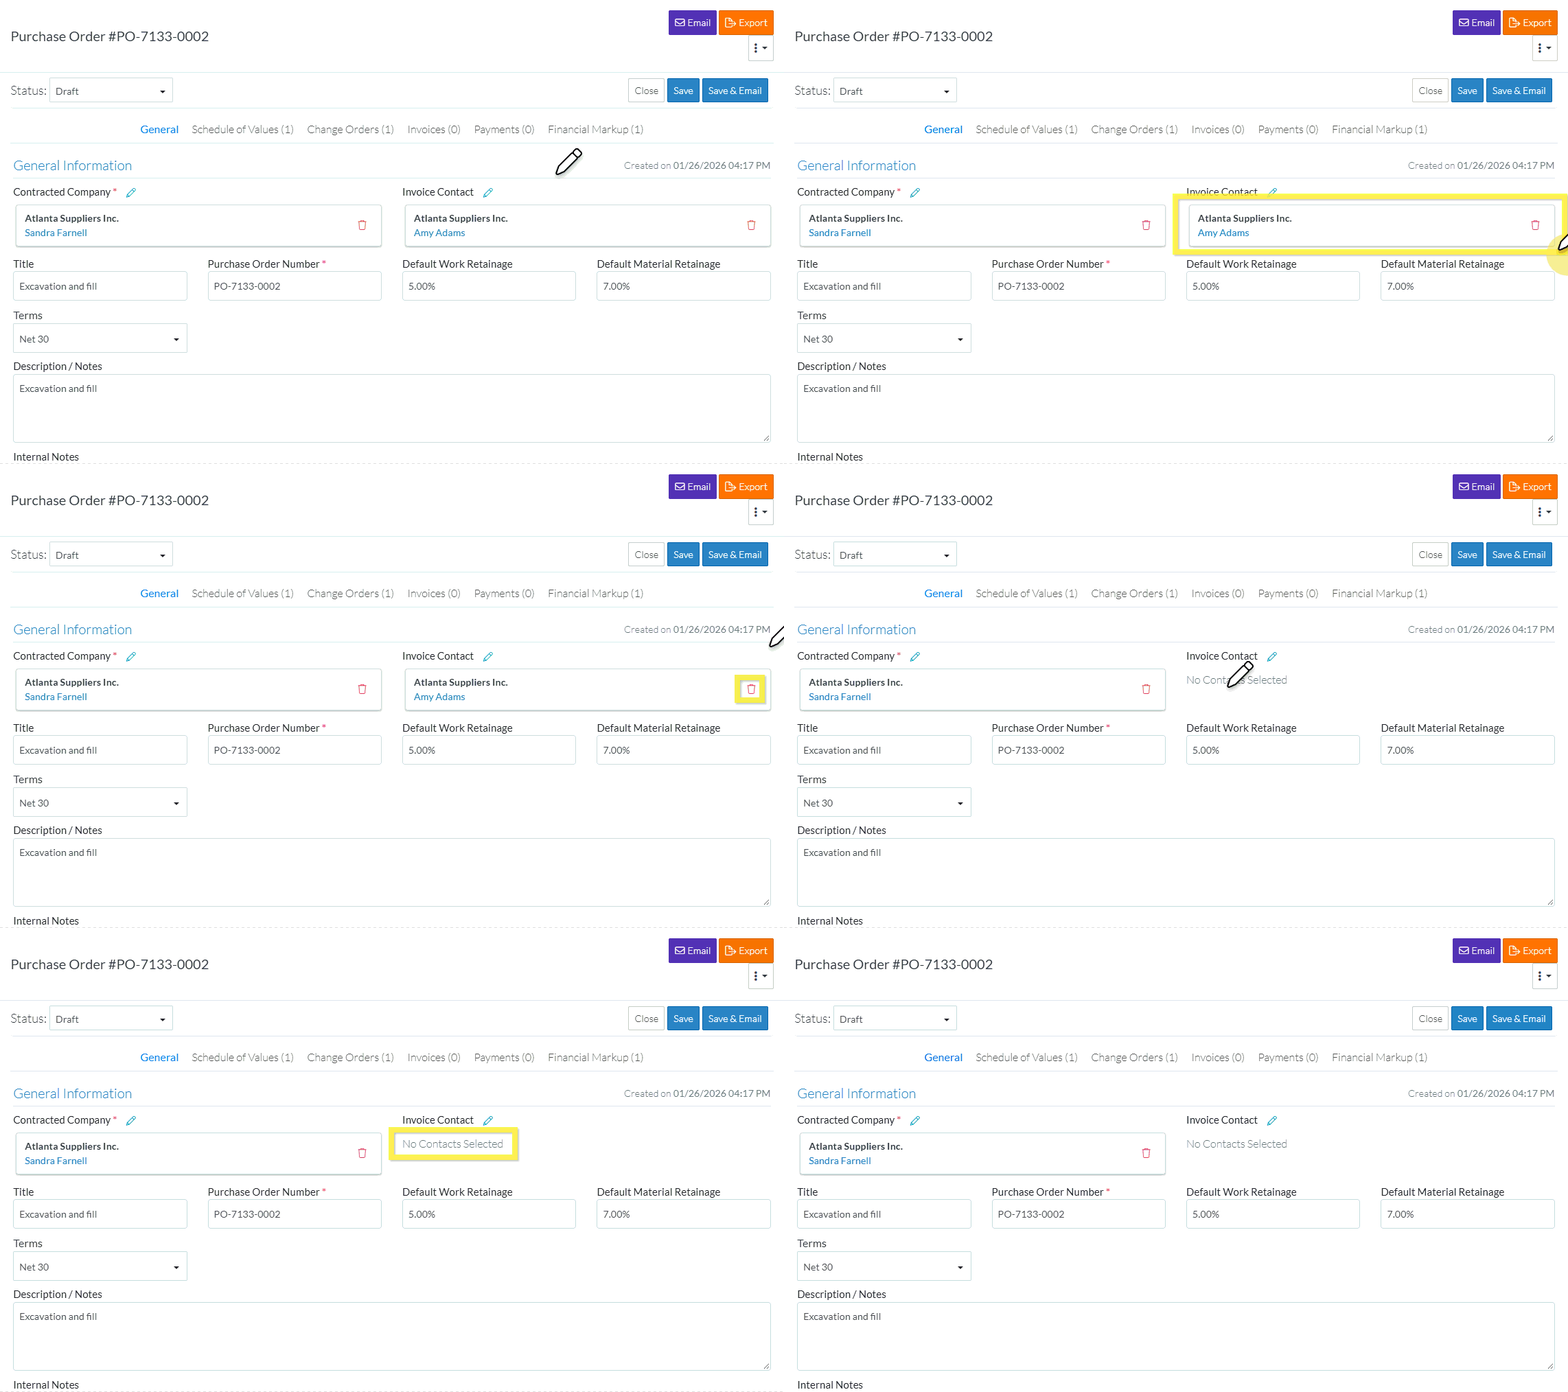
Enter or Change Other Information in the General Section
Click here for entering or changing other information in the General Section
To change the Contracted Company, see Purchase Order - General - General Information - Contracted Company.
To enter, change or remove the Title, see Purchase Order - General - General Information - Title.
To change or remove the Purchase Order Number, see Purchase Order - General - General Information - Purchase Order Number.
To enter, change or remove the Default Work Retainage, see Purchase Order - General - General Information - Default Work Retainage.
To enter, change or remove the Default Material Retainage, see Purchase Order - General - General Information - Default Material Retainage.
To enter, change or remove the Terms, see Purchase Order - General - General Information - Terms.
To enter, change or remove the Description/Notes, see Purchase Order - General - General Information - Description/Notes.
To enter, change or remove the Internal Notes, see Purchase Order - General - General Information - Internal Notes.
To enter, change or remove the Payment Terms, see Purchase Order - General - General Information - Payment Terms.
Enter or Change Other Information or Save, Close or Save & Email the Purchase Order
Add, Edit or View other information for the Purchase Order, see More Information below.
OR
If available/applicable, click the Save  button (at the top or bottom of the form) to save the Purchase Order and close the form.
Click here for more information on the Save function.
The Save function saves the Purchase Order including any information on the General, Schedule of Values and Financial Markups Components (if applicable).
The Purchase Order - View/Maintain form is closed and the list the function was invoked from displays. See Next Steps below.
OR
If available/applicable, click the Save & Email  button (at the top or bottom of the form) to save the Purchase Order and email it.
Click here for more information on the Save and Email function.
The Save & Email button saves the Purchase Order including any information on the General, Schedule of Values and Financial Markup components (if applicable) and sends an email with a link to the Purchase Order in JobPlanner (and optionally include the Purchase Order as a PDF attachment in the email). The Email can be sent to any Project Contacts. The Email Commitment form displays, see Email Commitment.
OR
Click the Close  button (at the top or bottom of the form) to close the form.
Click here for more information on the Close function.
If information was changed, then an additional prompt displays indicating there were changes and additional prompts on what to do.
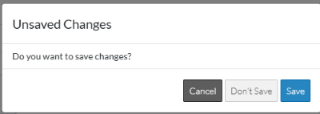
Click the Cancel
 button to cancel the Close action and return to the Purchase Order - View/Maintain form (see the steps above)
OR
Click the Don't Save
 button to cancel changes to the Purchase Order. The list the function was invoked from displays, see Next Steps below.
OR
Click the Save
 button to save the Purchase including any information on the General, Schedule of Values or Financial Markups components (if applicable). The list the add or edit function was invoked from displays, see Next Steps below.
More Information
When creating a new Purchase Order, see New Purchase Order (Overall Steps)
OR
When editing an existing Purchase Order, see Purchase Order - View/Maintain (Overall Steps)
