Inspections - Inspection Items - Attachments
![]() Updated
Updated
Suggested Prior Reading
Inspections - Inspection Items
Attachments
Each Inspection item can have attachments added.
The Attachments can be viewed and also removed (if necessary).
This section covers:
- Accessing Attachments for individual Inspection Items
- Add an Attachment
- Viewing an Attachment
- Removing an Attachment
Accessing Attachments for Individual Inspection Items
- On the Inspections - View/Edit form, in the Inspection Items, navigate to the Inspection Item to add, view or delete attachments for. See Inspections - Inspection Items - Collapsing and Expanding for more information on navigating the form.
- Click on the Attachments button on the row of the Inspection Item
The Inspection Attachment form displays. It will have the Inspection Item number and title displayed at the top of the form.
Any Attachments already added will display in the Attachments box.
To add an Attachment
- Click the click here to upload text to use File Explorer to search and locate documents to upload,
OR
Drag and drop individual files into the Attachments box.
Multiple files can also be selected to upload or drag and dropped.
- Click the Done
 button when finished adding or removing attachments.
Note* At this point the Attachments are not saved. The Inspection form must be saved to save the Attachment changes. The Attachments also can not be viewed until the Inspection form is saved.
- Add, Edit or View additional information on the Inspection, see More Information below.
OR
Click the Save  button when all the changes have been made.
OR
Click the Close  button.
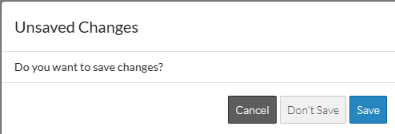
If the form is closed and there are unsaved changes, such as attachment changes, a prompt appears asking to save the changes: Click Cancel  button to return to the form OR click Don't Save
  button to exit the form without saving any changes (except Comments which are already saved) OR click Save
  button to save the changes.
To view an Attachment
For some type of Attachments, the item can be clicked on to view it (for example some graphics that can be viewed in a web browser). For other types of documents such as word documents, PDFs or excel spreadsheets, they need to be downloaded and then viewed using their native application.
Note* During the initial add, an attachment can't be viewed (as it is not yet saved and it is assumed the attachment was viewed and understood before being added). Once the Inspection is saved, then the Attachment is also saved and then can be viewed.
- From the Attachments form, click on an item to view it (if it can be opened in a web browser). It will be displayed. Use the built in browser functionality to navigate the attachment.
OR
- Hover on the item
- Click on the download button. The file will be downloaded. (if there are scanning tools installed, messages may appear from the scanning application). Use File Explorer to check the downloads folder for the document and to view it with its native application.
To delete an Attachment
- From the Attachments form, hover on the attachment.
If the Inspection form was saved there will be both a download and a delete button on the graphic. If the Inspection form has not yet been saved, there will only be a delete button on the graphic.
- Click the Delete
 button on the graphic.
The graphic is removed.
Note* At this point changes to Attachments are not saved. The Inspection form must be saved to save the Attachment changes. The Attachments also can not be viewed until the Inspection form is saved.
- Add, Edit or View additional information on the Inspection, see More Information below.
OR
Click the Save button when all the changes have been made.
OR
Click the Close button.
If the form is closed and there are unsaved changes, such as attachment changes, a prompt appears asking to save the changes. Click Cancel button to return to the form OR click Don't Save button to exit the form without saving any changes (except Comments which are already saved) OR click Save button to save the changes.
More Information
For more information on the Status and managing the Inspections, see Inspections - Add/Edit/View - Status.
For more information on the General Information, see Inspections - Add/Edit/View - General Information.
For more information on the People, see Inspections - Add/Edit/View - People.
For more information on the Inspection Items, see Inspections - Add/Edit/View - Inspection Items.
Next Steps
To email the Inspection along with a PDF of the Inspection as an attachment, see Inspections - View/Edit - Email.
To export the Inspection to PDF format for printing or filling out via PDF form applications, see Inspections - View/Edit - Export.
To delete the Inspection, see Inspections - Delete.