Inspections - Add/Edit/View - Attachments
Suggested Prior Reading
Overview
Inspections can be managed in JobPlanner as part of the Field Tools functionality. See Inspections - Overview for more information.
This help pertains to the Attachments section of the Inspection.
Attachments will be automatically included on the Inspection if they were on the Inspection Template.
The Attachments can be downloaded and viewed.
For existing Inspections, the Inspection must have an Open Status for Attachments (or any other Inspection Information) to be changed. If an Inspection has a Submitted or Closed status the information can not be edited, it can only be viewed. See Inspections - Add/Edit/View - Status.
This help outlines
- Adding Attachments
- Viewing Attachments
- Deleting Attachments
To Add Attachments
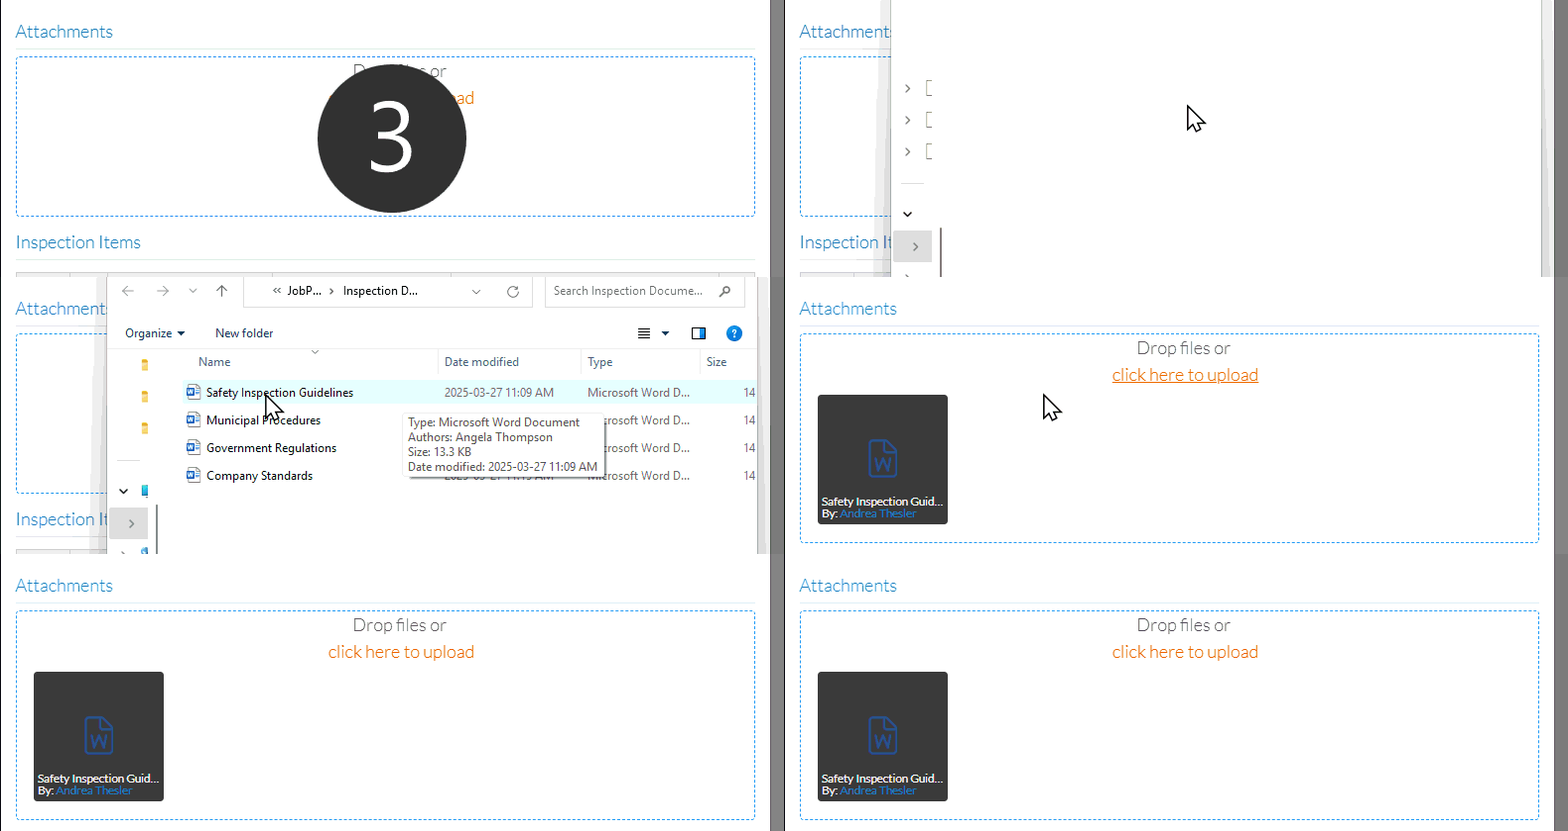
If the Inspection has an Open status, Attachments can be added by using File Explorer to locate and update the file or by dragging and dropping files:
- From the New Inspection OR Inspections - View/Edit form, use File Explorer to search and locate documents to upload, click the click here to upload text.

OR
Drag and drop individual files into the Attachments box.

OR
Drag and drop multiple files into the Attachments box.

Note* Directly after an upload and before an Inspection is saved, the Attachments can't be viewed (they can be deleted) but not viewed until after the Save.
- Add, Edit or View additional information on the Inspection, see More Information below.
OR
Click the Save button when all the changes have been made.
OR
Click the Close button to not make the changes.
OR
If editing an Inspection, the Inspection can be deleted directly from this form, click the Delete button.
To view Attachments
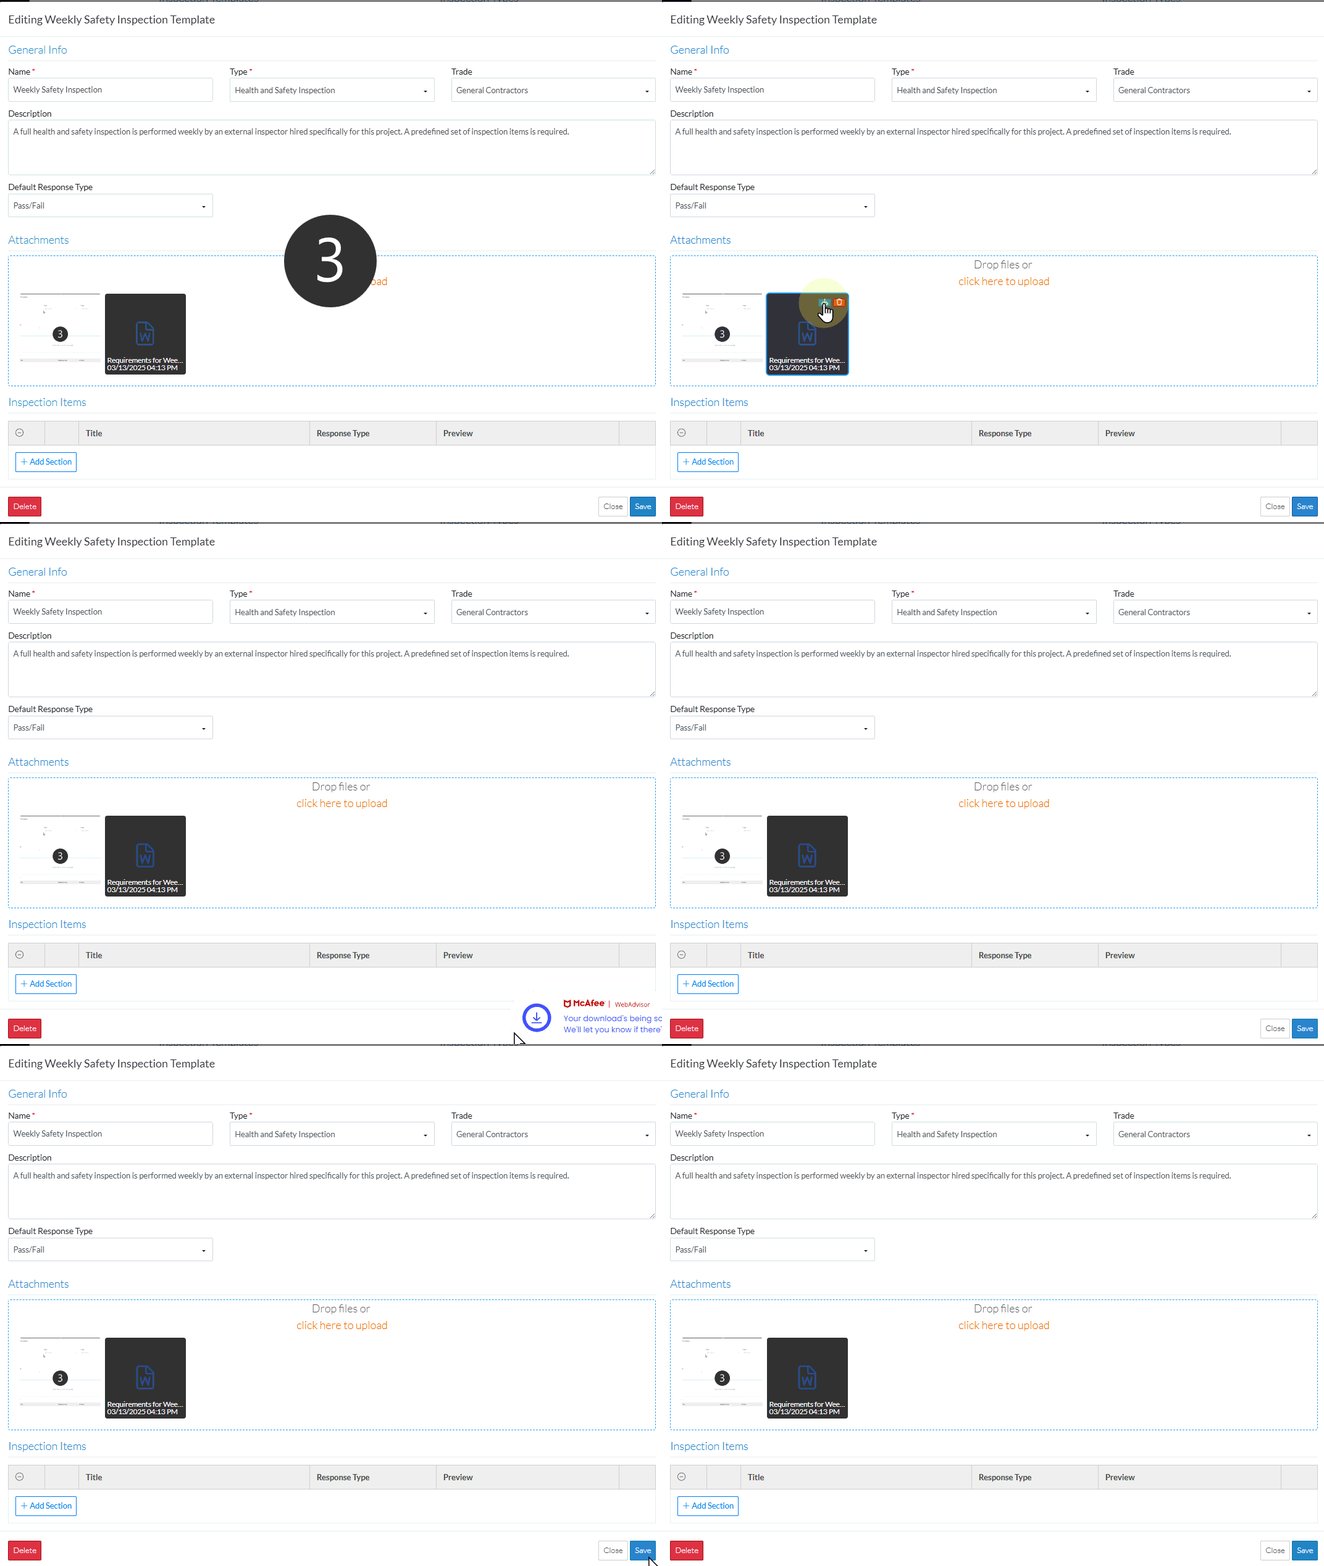
For some type of Attachments, the item can be clicked on to view it (for example some graphics that can be viewed in a web browser). For other types of documents such as word documents, PDFs or excel spreadsheets, they need to be downloaded and then viewed using their native application.
- Click on an item to view it (if it can be opened in a web browser)
OR
- Hover on the item
- Click on the download button. The file will be downloaded and if there are scanning tools installed, messages may appear from the scanning application. Use File Explorer to check the downloads folder for the document and to view it with its native application.

To delete an Attachment
If the Inspection has an Open status, Attachments can be deleted from the Inspection.
- Hover on the item
- Click on the delete
 button on the item. The file will be removed.

- Add, Edit or View additional information on the Inspection, see More Information below.
OR
Click the Save button when all the changes have been made.
OR
Click the Close button to not make the changes.
OR
To delete the Inspection directly from this form, click the Delete button. See below more more information on deleting a type.
More Information
For more information on the Status and managing the Inspections, see Inspections - Add/Edit/View - Status.
For more information on the General Information, see Inspections - Add/Edit/View - General Information.
For more information on the People, see Inspections - Add/Edit/View - People.
For more information on the Inspection Items, see Inspections - Add/Edit/View - Inspection Items.
Next Steps
To email the Inspection along with a PDF of the Inspection as an attachment, see Inspections - View/Edit - Email.
To export the Inspection to PDF format for printing or filling out via PDF form applications, see Inspections - View/Edit - Export.
To delete the Inspection, see Inspections - Delete.
