Inspections - View/Edit - Email
![]() Updated
Updated
Suggested Prior Reading
Email the Inspection
The Inspection can be emailed directly from the View/Edit form.
- Select one or more contacts from the Project Contacts list to send the email to (it can only be emailed to those in the project contact list. See Project Contacts - Overview).
- Set the email subject line (it defaults to the "Inspection Shared - " and the name of the Inspection but can be changed if required)
- Enter text for the body of the email (that can include formatting such as headers, font settings, color, lists, paragraph formatting, lines or CSS code)
A PDF of the Inspection is created and included as an attachment to an email.
To email the Inspection
- Create a new Inspection, see New Inspection OR view/edit an existing Inspection, see Inspections - View/Edit
- Click the Email
 button.
The EMail Inspection form displays.
- Select the Project Contacts to send the email to. There are two ways to do this:
- Detailed Search
- Simple Search
See Inspections - View/Edit - Email - To for more details.
The number of recipients is displayed in the lower left of the form.
- Update the Subject Line (if required)
- Enter text in the Body of the email (if required)
- Click the Send
 button.
OR
Click the Close  button to close the email form without sending the information.
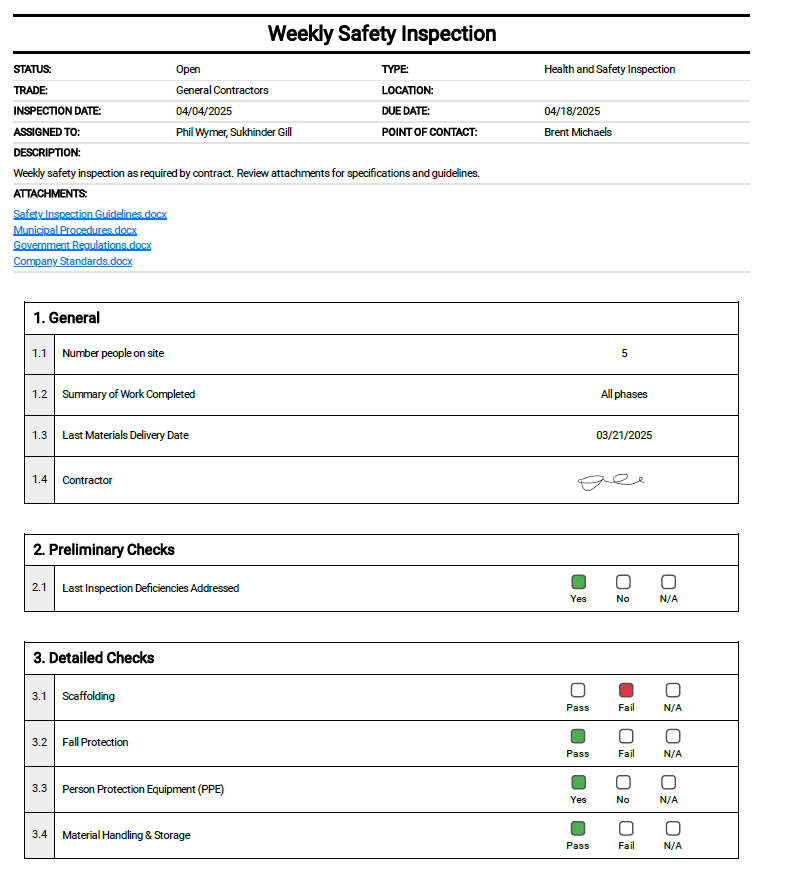
Inspection PDF
An PDF file is created with the Inspection Name and Inspection Date and added as an attachment to the email.
More Information
For more information on the Status and managing the Inspections, see Inspections - Add/Edit/View - Status.
For more information on the General Information, see Inspections - Add/Edit/View - General Information.
For more information on the People, see Inspections - Add/Edit/View - People.
For more information on Attachments, see Inspections - Add/Edit/View - Attachments.
For more information on the Inspection Items, see Inspections - Add/Edit/View - Inspection Items.
Next Steps
To export the Inspection to PDF format for printing or filling out via PDF form applications, see Inspections - View/Edit - Export.
To delete the Inspection, see Inspections - Delete.