Inspection Reports - Filters
Suggested Prior Reading
Inspection Reports - Modify a Saved Report
Inspection Reports Filter
The following are the filters that can be set when creating an Inspection Report or modifying a saved Inspection report. The following filters are covered in this help:
- My Projects Only or all projects
- Project Status
- Inspection Status
- Inspection Dates
- Due Dates
My Projects Only or All Projects
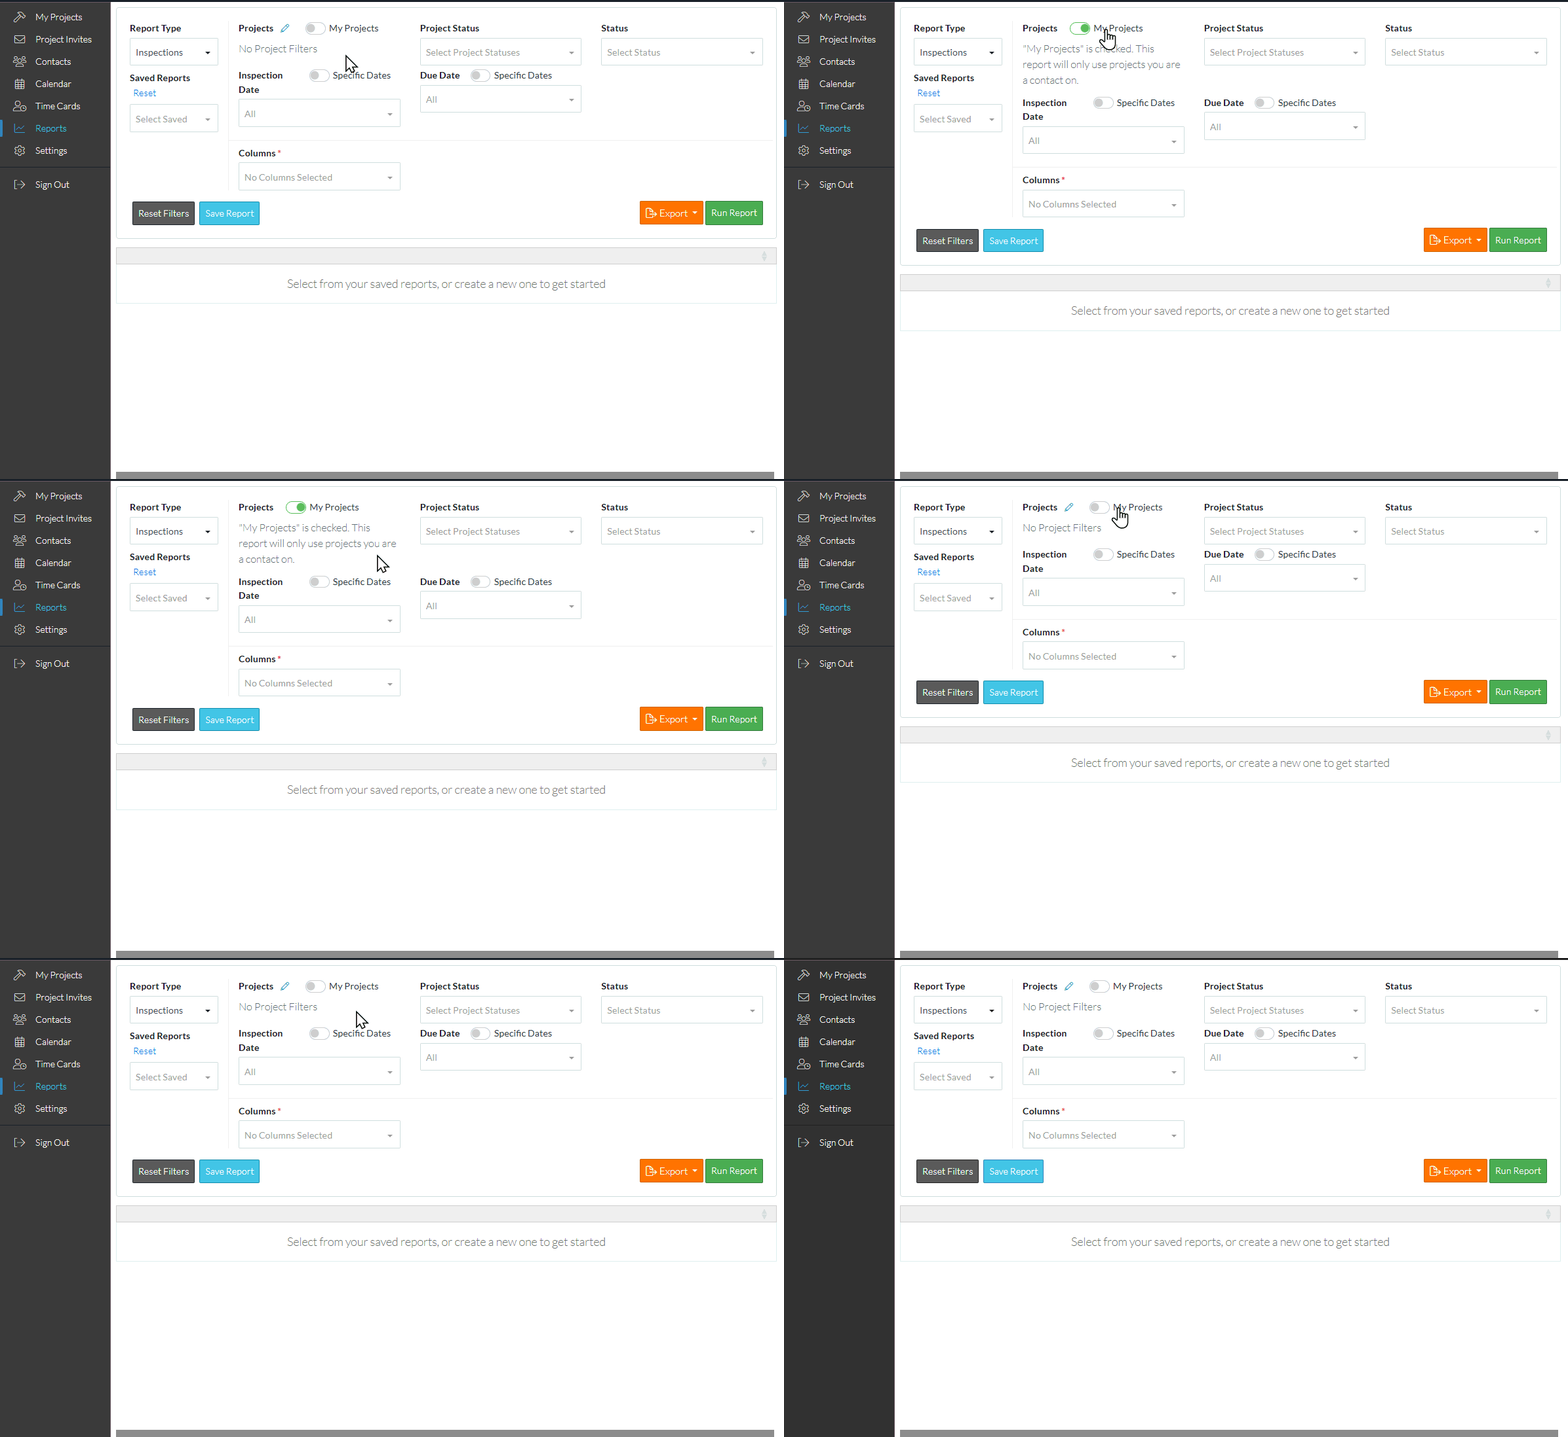
By default, the My Projects only option is off (so all projects will print on the report):
The My Projects only option is off when the button is grey and to the left of the slider bar 
The My Projects only option is on when the button is green and to the right of the slider bar 
To set the report to show only My Projects (those that the user is a Project Contact on)
- Click on either the slide bar or the My Projects text to toggle the setting on
- Click on it again to toggle it back off.
Project Status
To report on Inspections that belong to Projects with only certain statuses:
- Click in the Project Status drop down. The Project Statuses display: Pending, Bidding, Not Awarded, Awarded
- Click on the Project Status to include on the report. A check mark appears to the right of the selection.
- Click on more than one Project Status if required. A check mark appears to the right of each selection.
- Click on a Project Status that is checked marked to toggle it off.
- Click outside of the Project Status drop down to remove display of the drop down list.
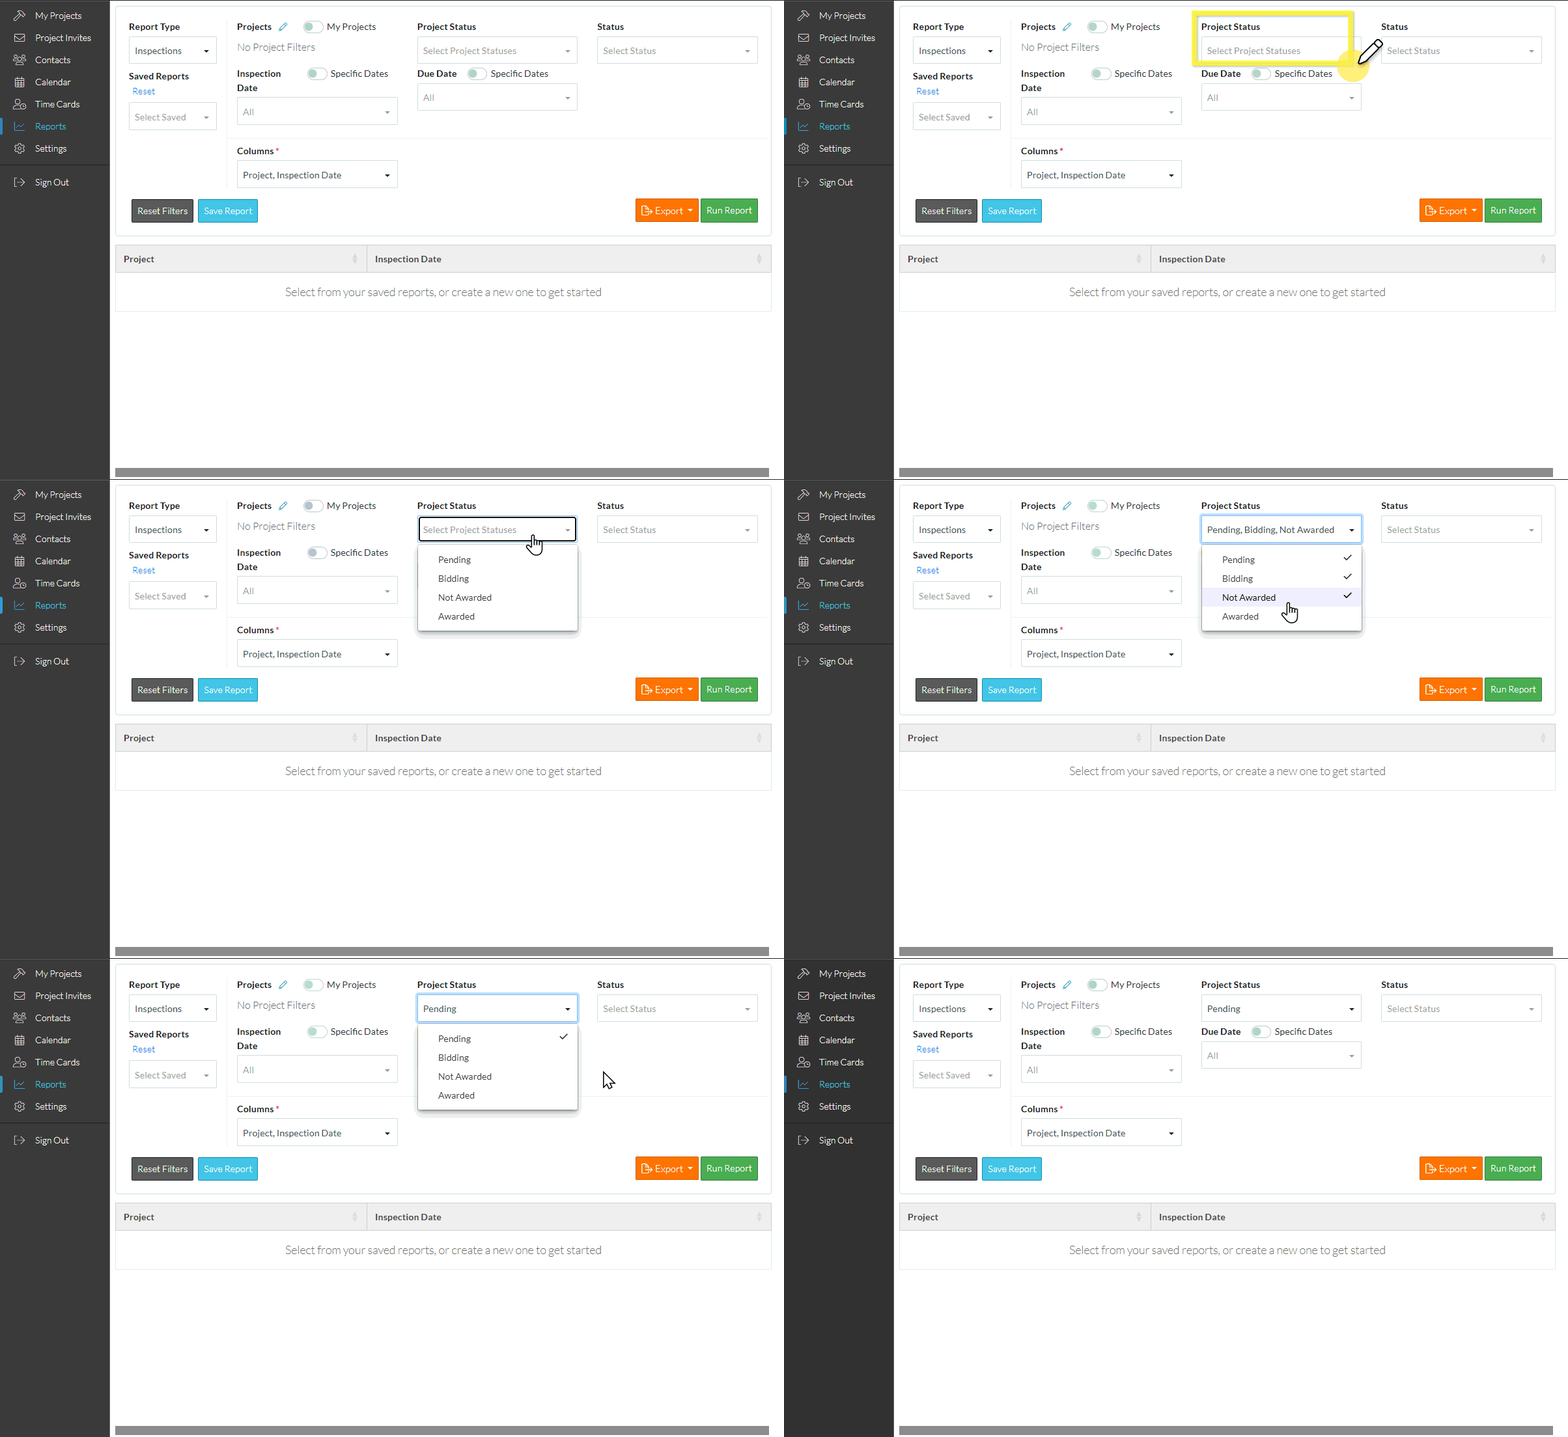
The Project Statuses selected display in the drop down box.
Inspection Status
To report on Inspections that are only in certain statuses: Open, Submitted or Closed (see Inspections - Add/Edit/View - Status).
- Click in the Status drop down. The Inspection Statuses display: Open, Submitted or Closed
- Click on the Status to include on the report. A check mark appears to the right of the selection.
- Click on more than one Status if required. A check mark appears to the right of each selection.
- Click on a Status that is checked marked to toggle it off.
- Click outside of the Status drop down to remove display of the drop down list.
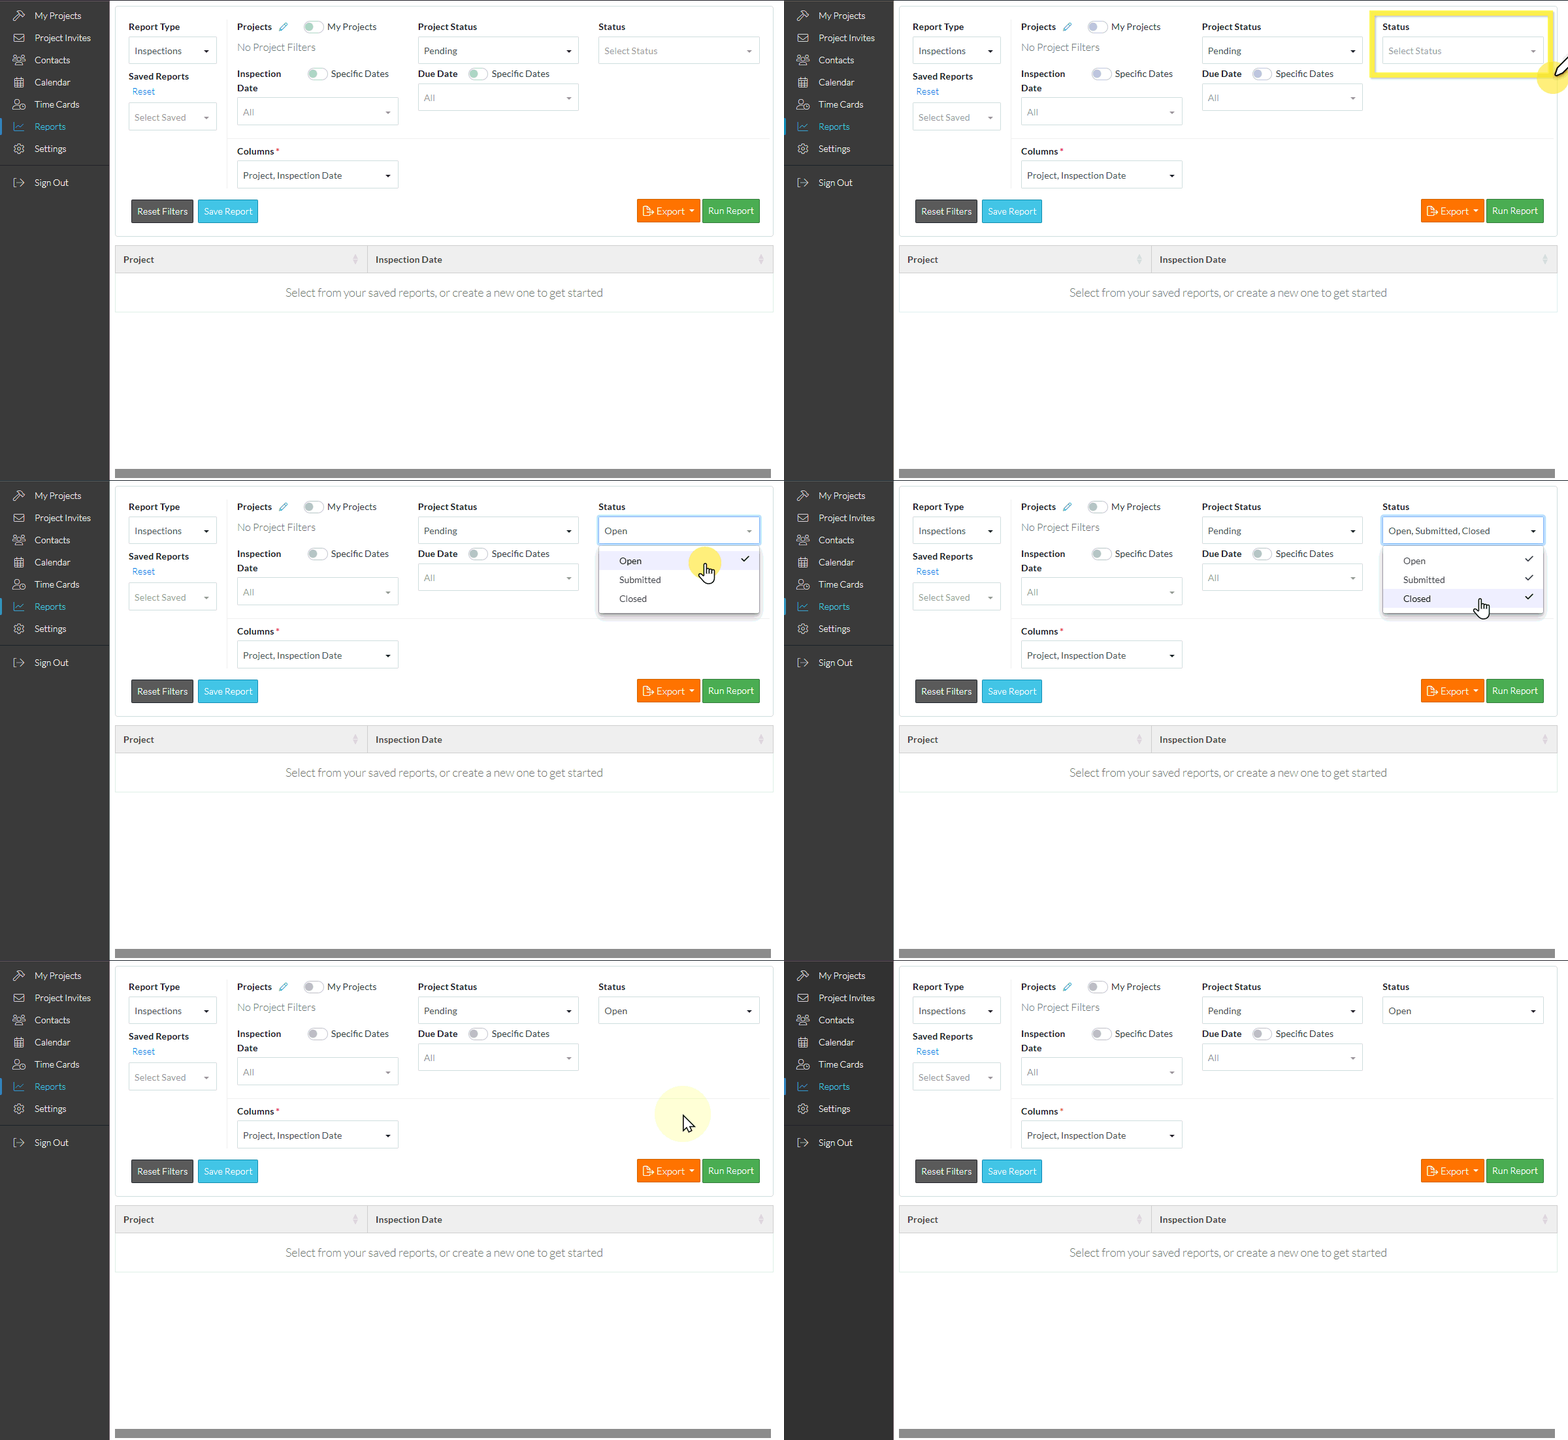
The Inspection Statuses selected display in the drop down box.
Inspection Dates
There are two ways to report by Inspection Dates:
- Predefined ranges (such as Past Year, Past 6 Months, Next Week) that change relative to the current date
- Within a specific date range (the actual dates are set)
There is a Specific Dates setting that determines which of the above is used:
The Specific Dates option is off when the button is grey and to the left of the slider bar  . This means that predefined Inspection Date ranges would be used. This is the default.
The Specific Dates option is on when the button is green and to the right of the slider bar  . This means that specific date ranges are entered.
- To turn Specific Dates option on/off:
- Click on either the slide bar or the Specific Dates text to toggle the setting on
- Click on it again to toggle it back off
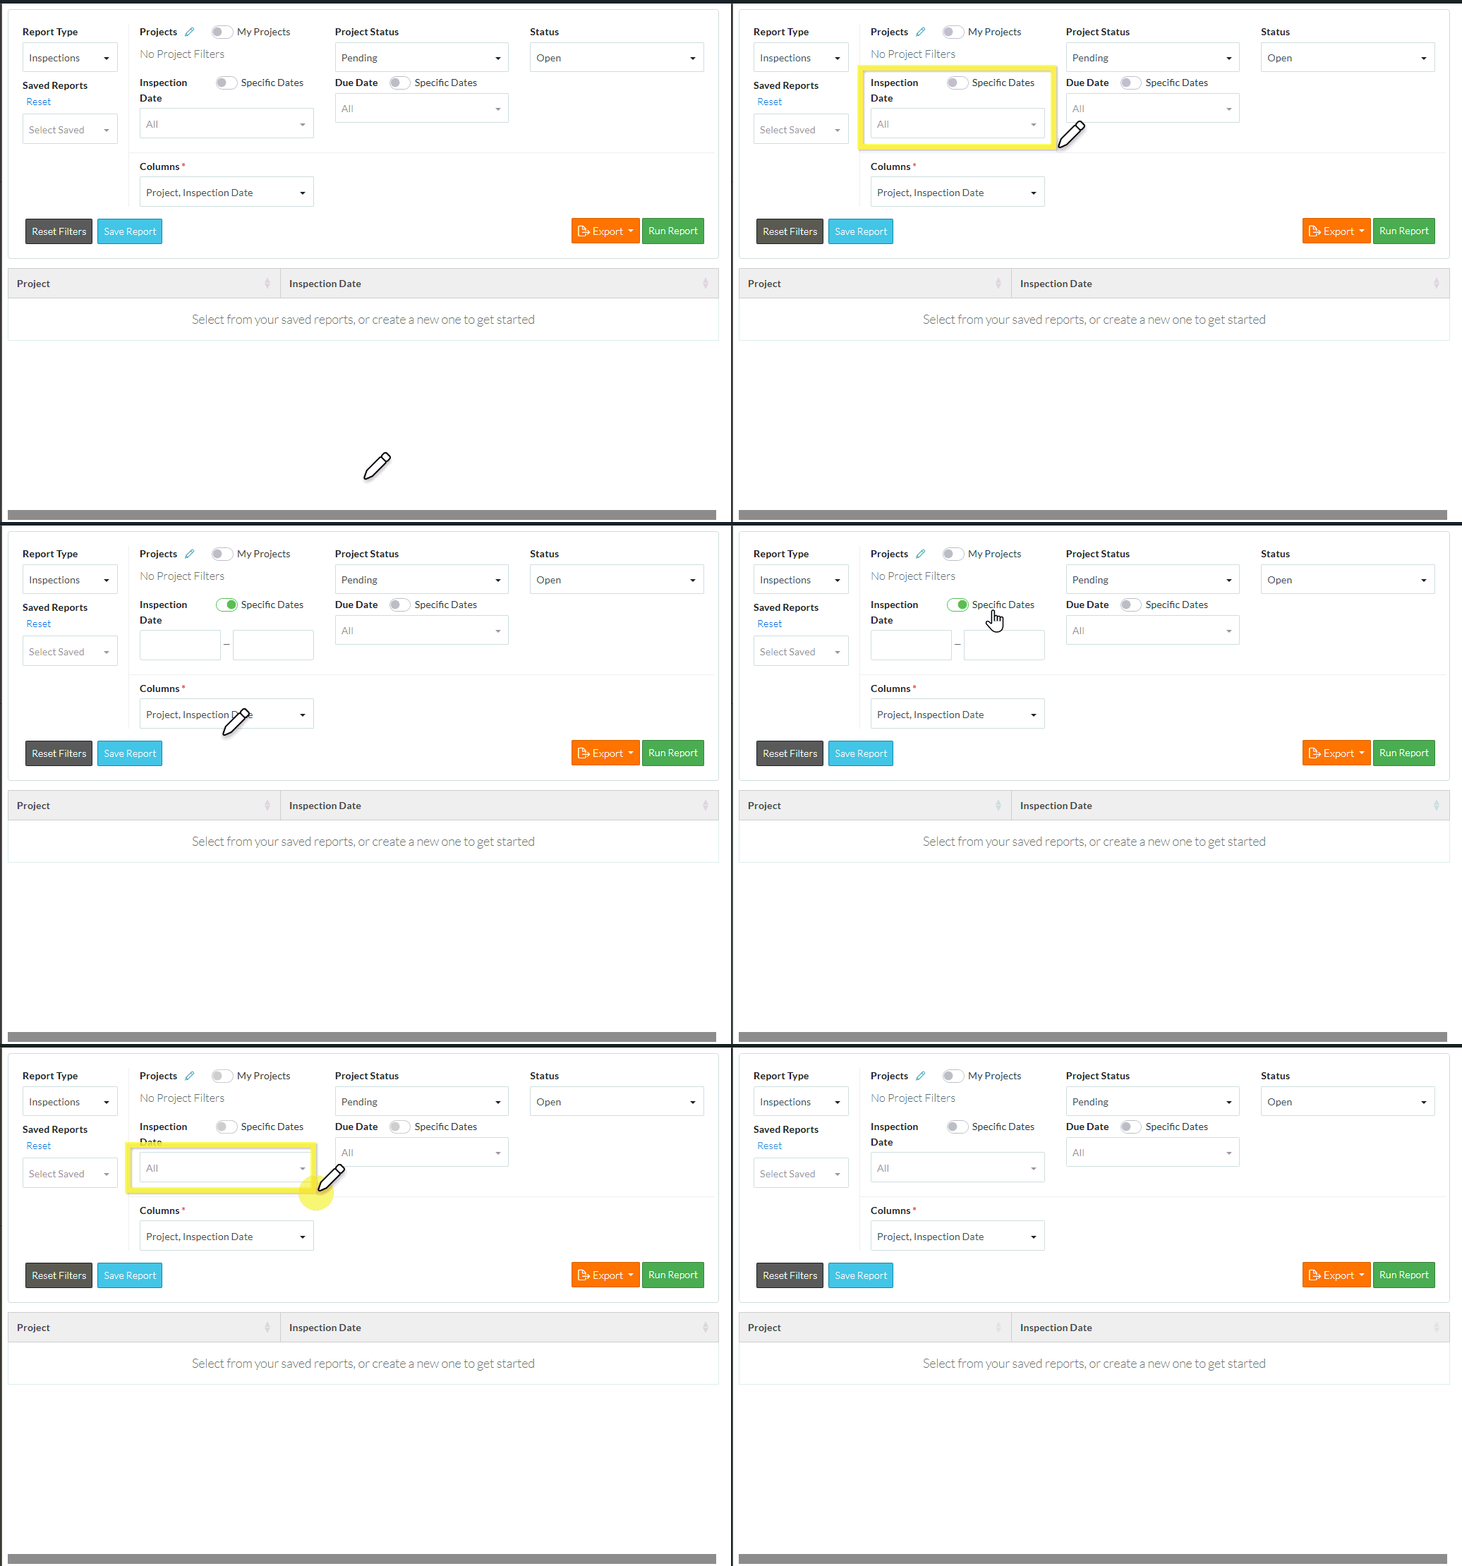
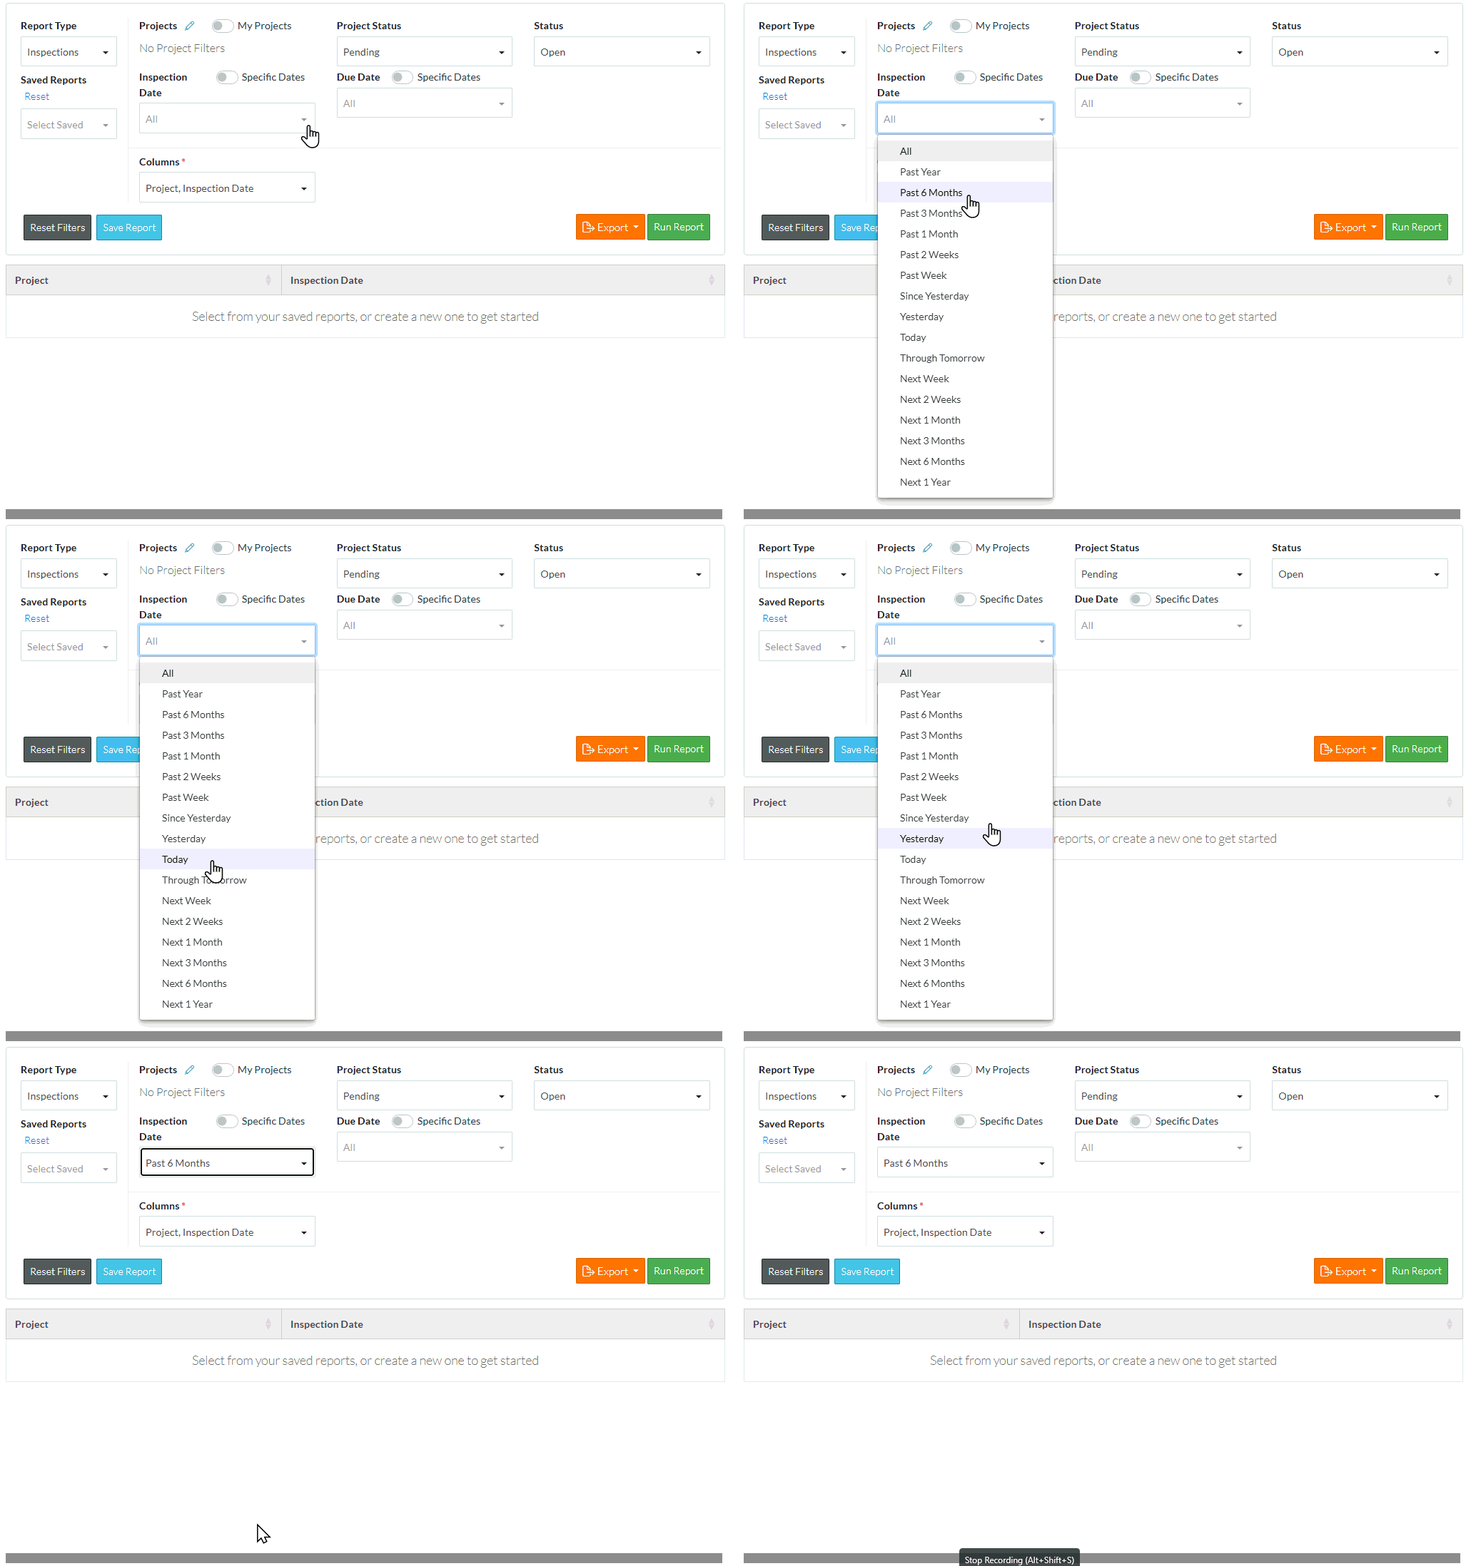
- If the Specific Dates option is off,
 , click in the Inspection Date drop down box to select a predefined date range. This will select all the Inspections in that range relative to the current date:
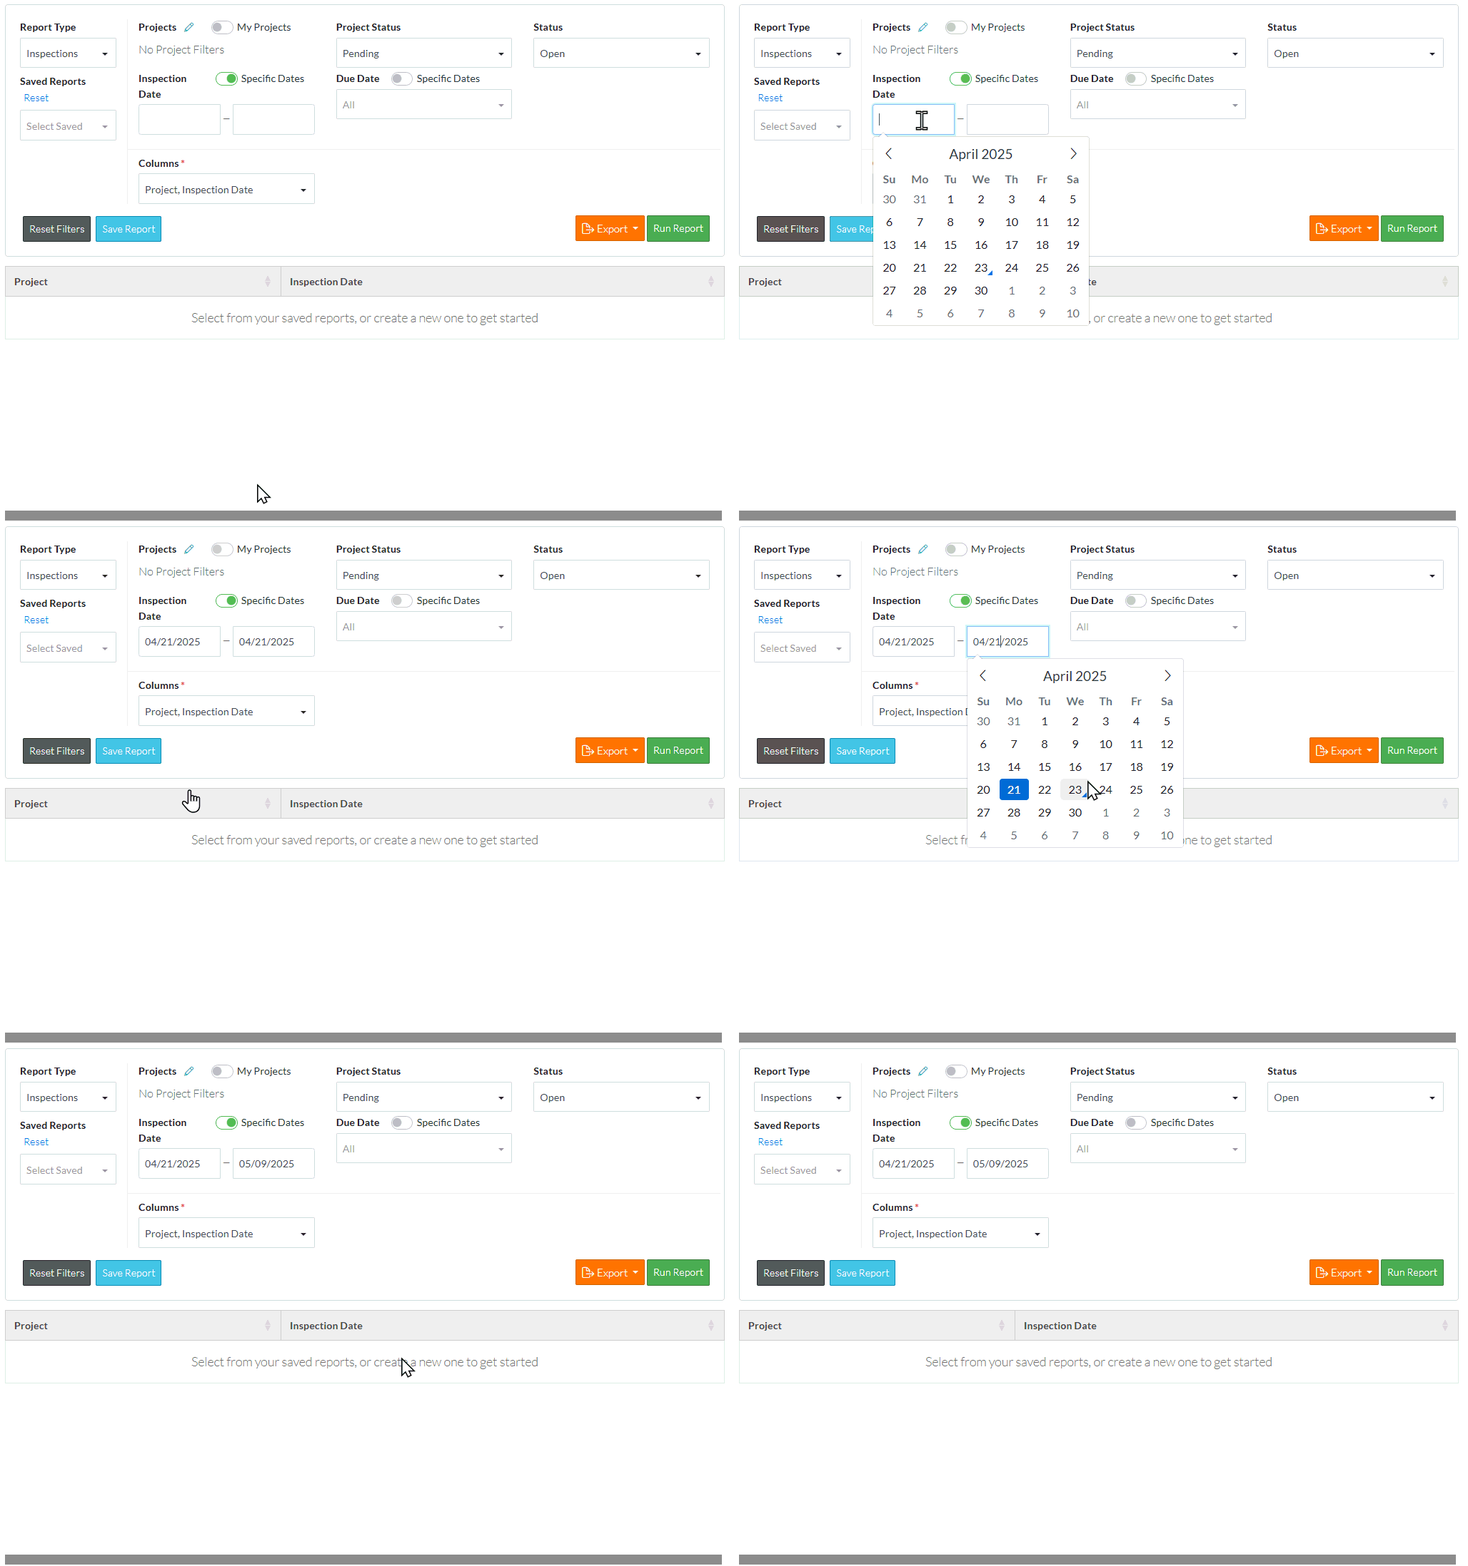
- If the Specific Dates option is on,
 ,
,- Click in the Inspection Date from and enter the date
- Click in the Inspection Date to and enter the date
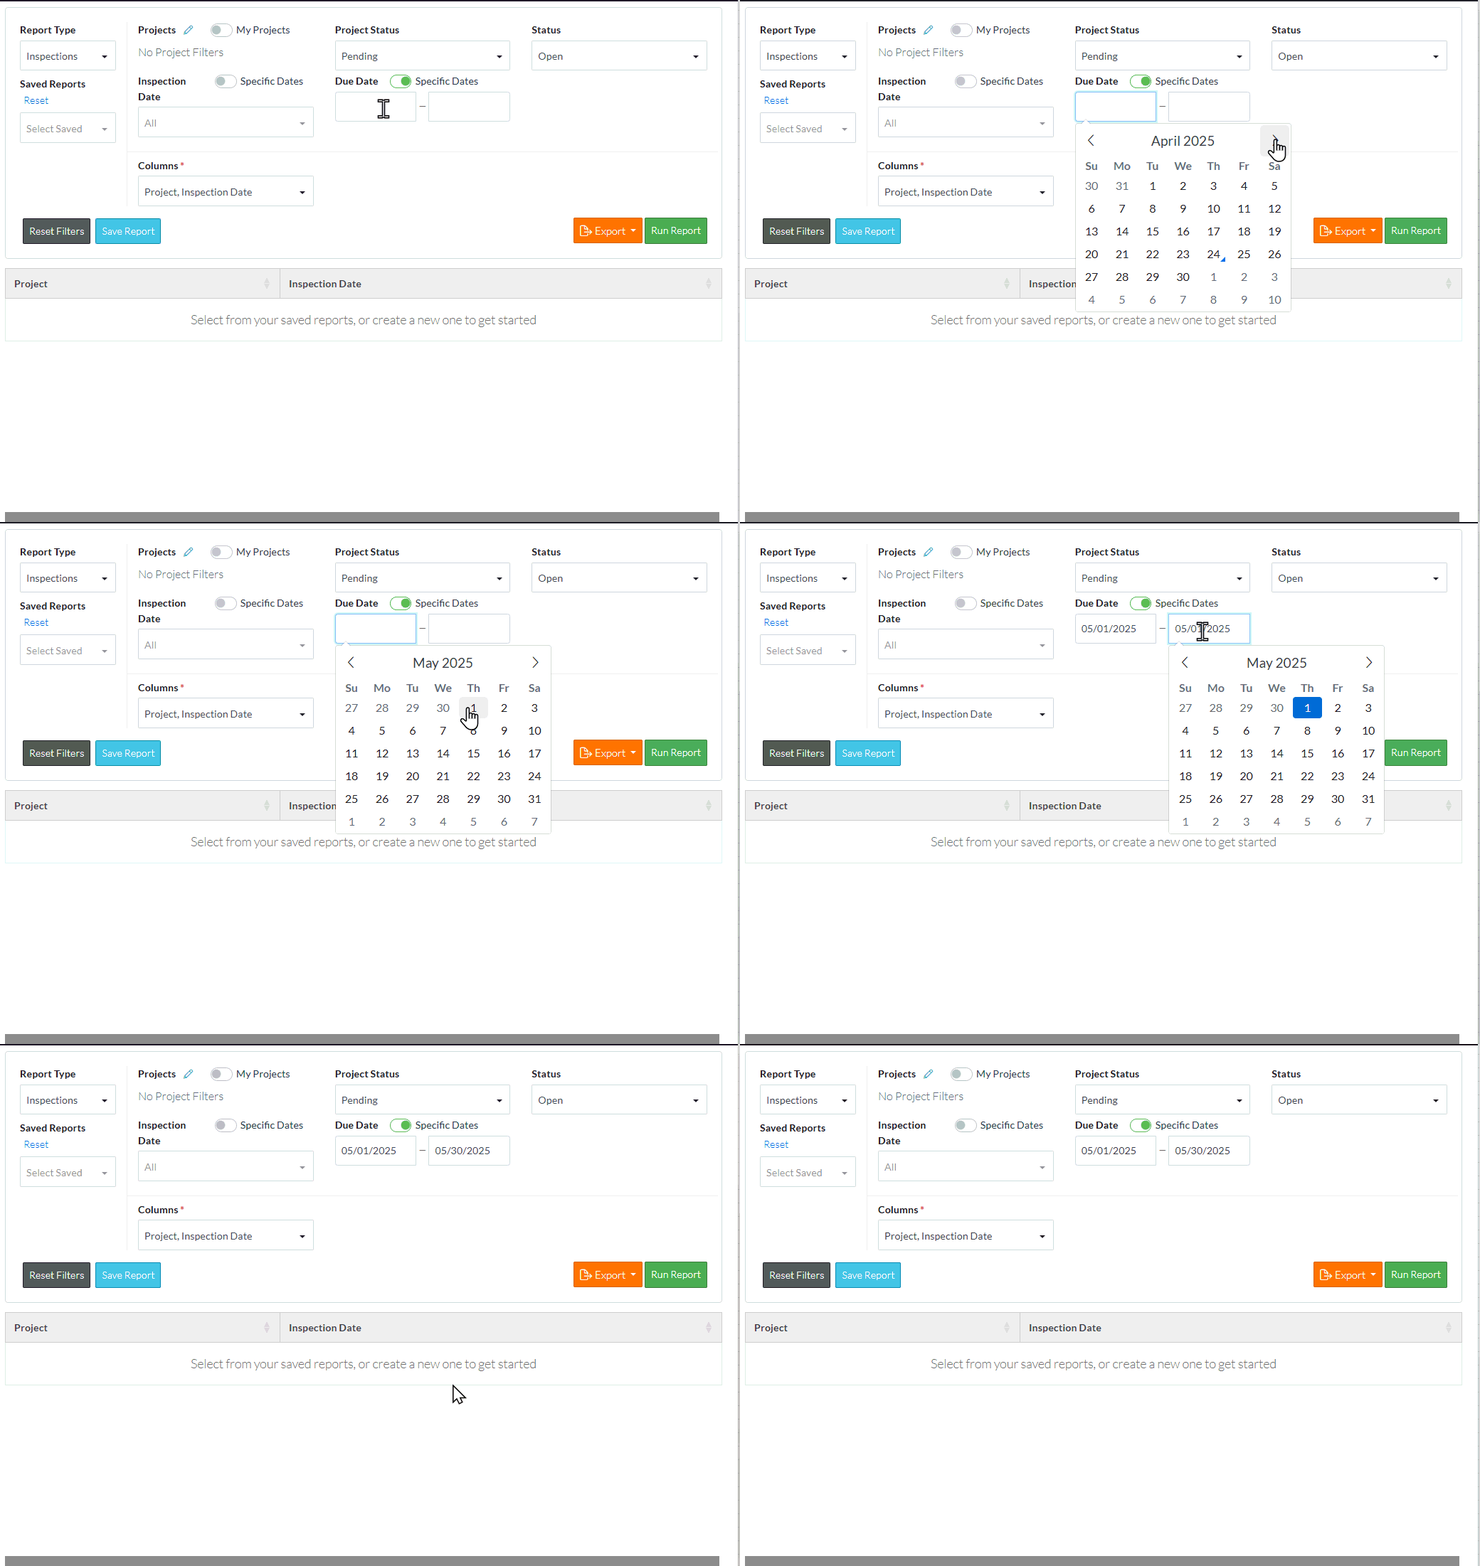
Due Dates
There are two ways to report by Due Dates:
- Predefined ranges (such as Past Year, Past 6 Months, Next Week) that change relative to the current date
- Within a specific date range (the actual dates are set)
There is a Specific Dates setting that determines which of the above is used:
The Specific Dates option is off when the button is grey and to the left of the slider bar  . This means that predefined Inspection Date ranges would be used. This is the default.
The Specific Dates option is on when the button is green and to the right of the slider bar  . This means that specific date ranges are entered.
- To turn Specific Dates option on/off:
- Click on either the slide bar or the Specific Dates text to toggle the setting on
- Click on it again to toggle it back off
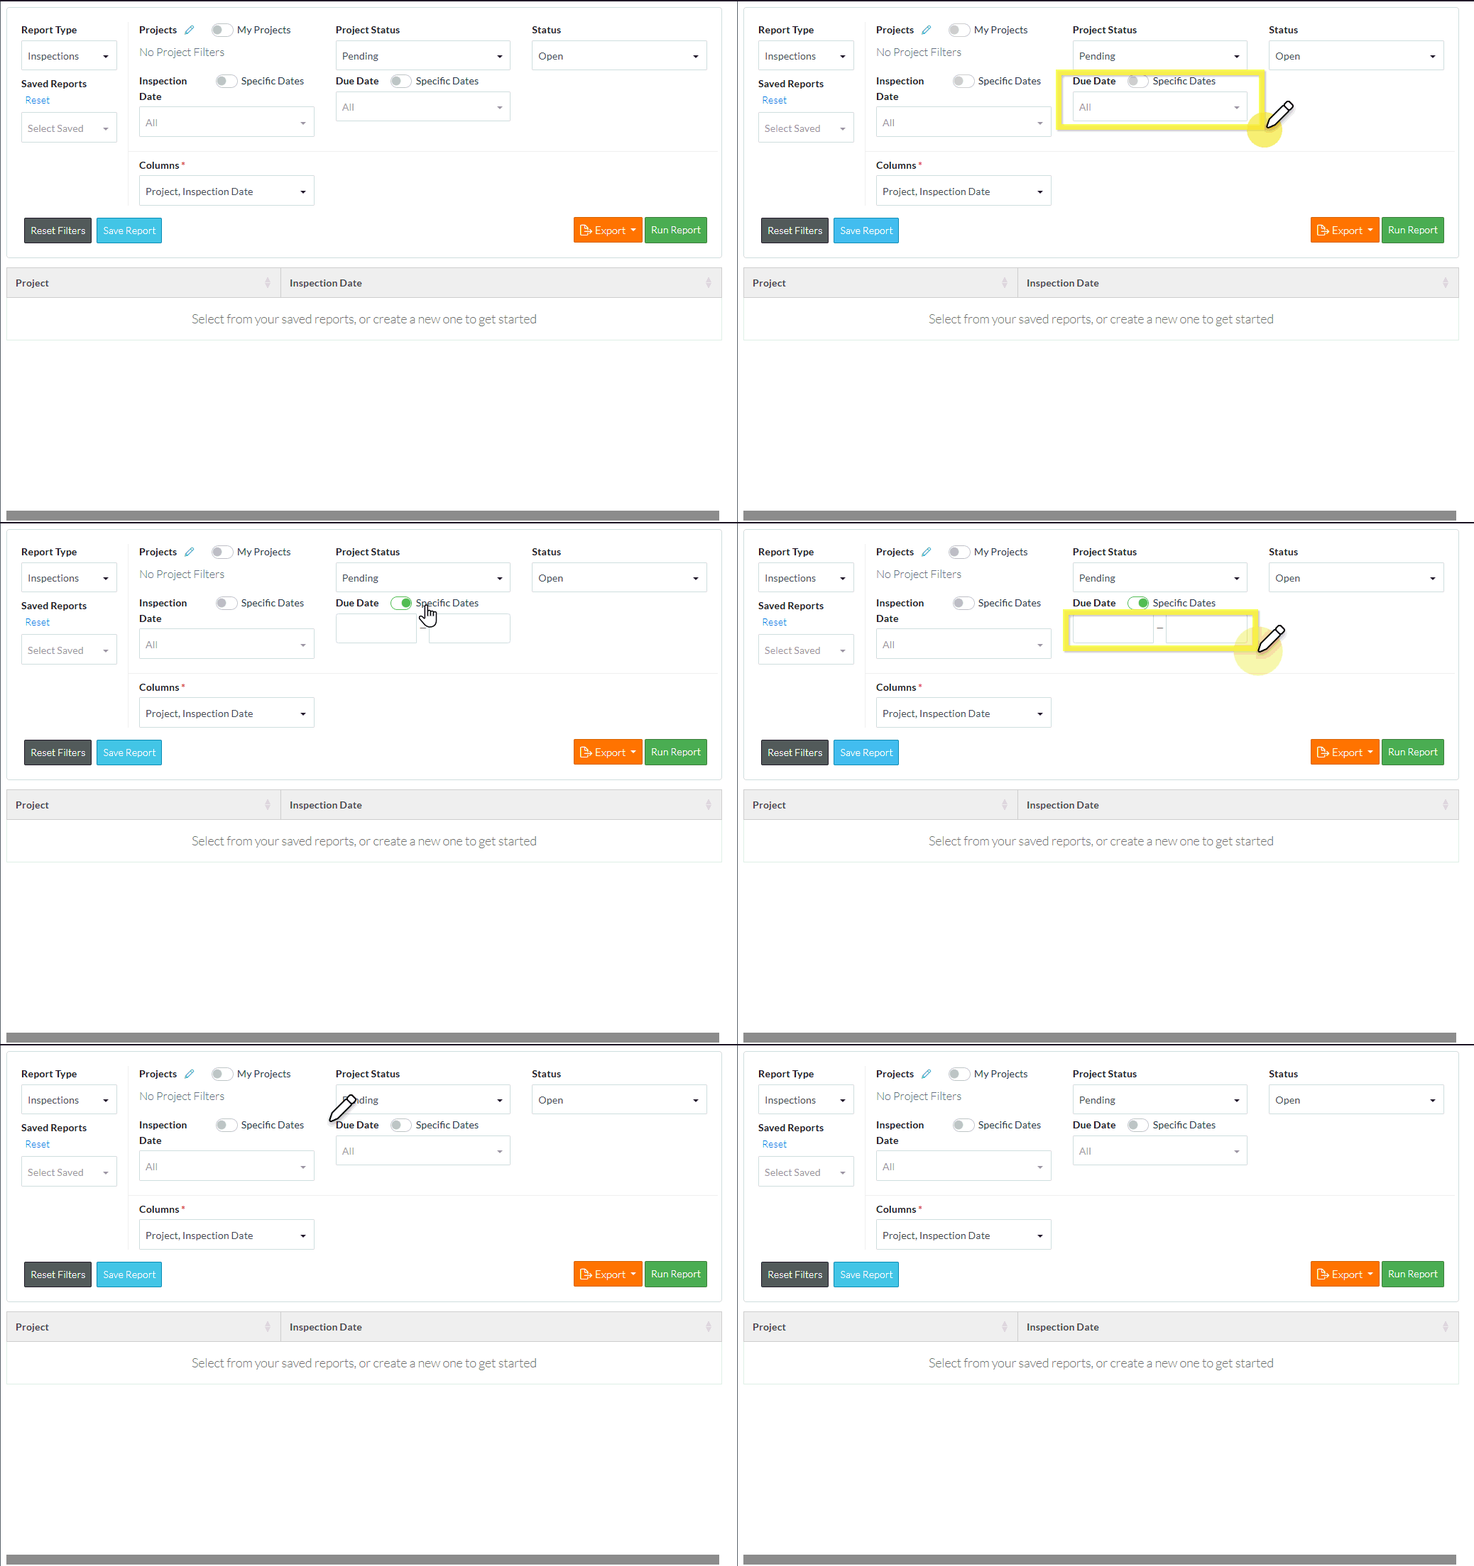
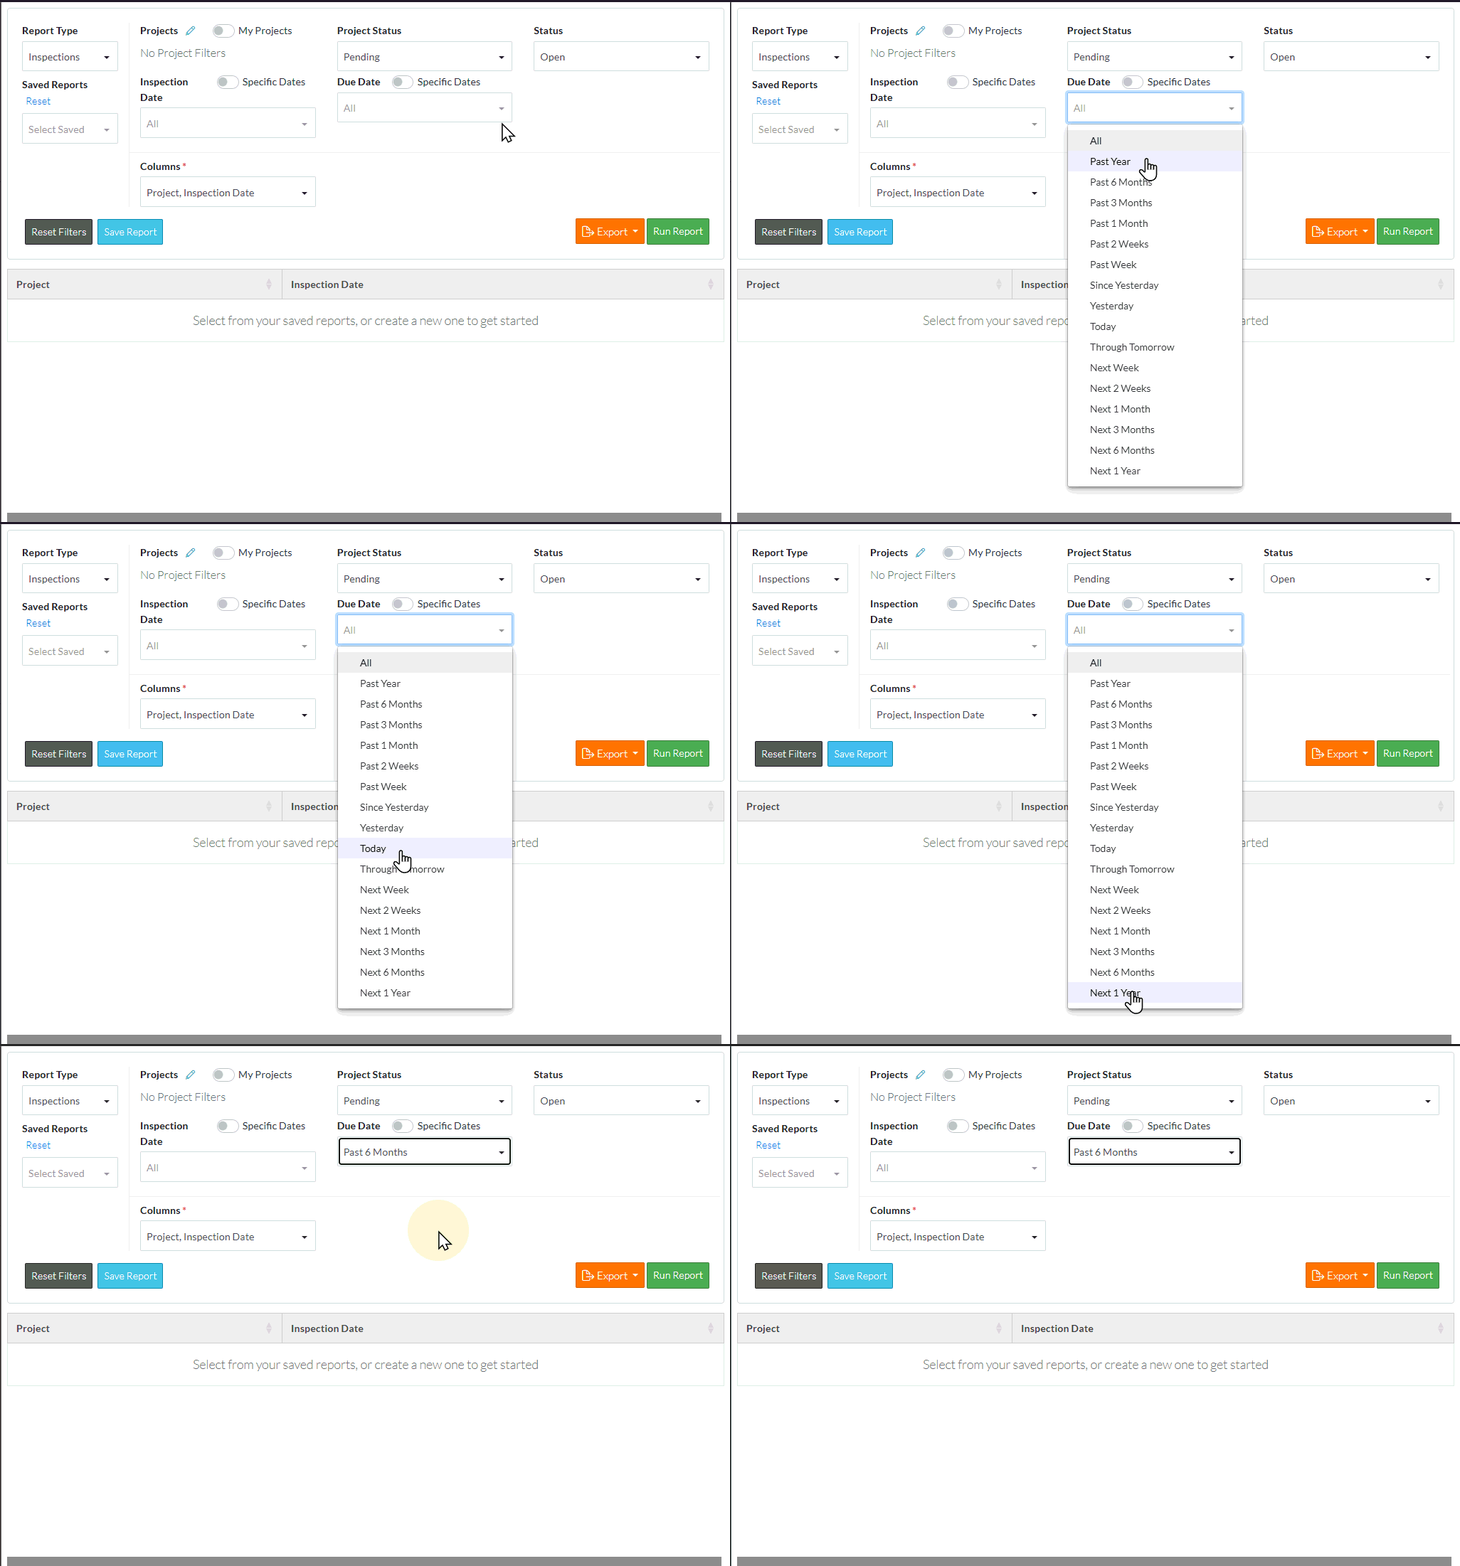
- If the Specific Dates option is off,
 , click in the Inspection Date drop down box to select a predefined date range. This will select all the Inspections in that range relative to the current date:
- If the Specific Dates option is on,
 ,
,- Click in the Inspection Date from and enter the date
- Click in the Inspection Date to and enter the date
More Information
Select the Columns to display on the report, see Inspection Reports - Columns.
Change the order of the display of the columns, see Reports - Move Columns.
Sort the information by column, see Reports - Sort Columns.
Next Steps
Run the report, see Reports - Run.
Save the report, see Reports - Save.
Export the report results to PDF or Excel, see Reports - Export.
Keep the reports type selected and the currently saved report name entered, but remove all Filters applied, see Reports - Reset Filters.
Reset all information in regards to saved reports and reports type (essentially erase all report settings and start again so that different report types or saved reports can be selected), see Reports - Reset.
