Financial Markup - Add
![]() Updated
Updated
Suggested Prior Reading
Financial Markup - Calculation and Display
Financial Markup - Compounding Examples
Financial Markup - Navigation and Layout
Adding a Financial Markup
Financial Markups can be added based on the Status of the item.
If the Status of the item indicates the item can be added or edited, new Financial Markups can be added and will automatically apply to all line items already entered on the Schedule of Values as well as any new line items added.
To Add a Financial Markup
- Add or Edit the item, see Financial Markup - Where Used for more details.
- Access the Financial Markup component by clicking on the Financial Markup from the Form Navigation Menu Options.
- Click the Add Markup Item
 button.
The Add Financial Markup form displays.
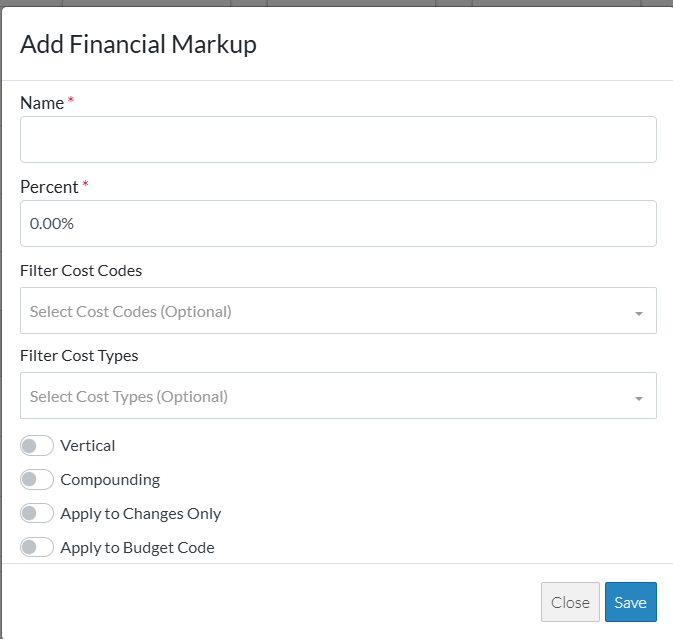
- Enter the information as required. See Financial Markup - Add/Edit/View - Details.
- Maintain the Financial Markups further as required (see More Information below).
OR
Click the Save button to save all the information about the Item including the Financial Markup(s).
OR
Click the Save & Email button to save all the information to save all the information about the Item including the Financial Markup(s) and send an email with a link to the item in JobPlanner. The Item is also added as an attachment in PDF format.
OR
Click the Close button to close the form without saving the information.
See Financial Markup - Navigation and Layout for more information on the Save, Save & Email and Close buttons.
More Information
Add Financial Markup, see Financial Markup - Add.
Edit Financial Markups, see Financial Markup - Edit.
Set the order the Financial Markups display or are used in Compounding, see Financial Markup - Setting the Order.
Delete a Financial Markup, see Financial Markup - Delete.
Next Steps
If maintaining Financial Markups for Contracts, see Contract List - Overview.
If maintaining Financial Markups for Contract Change Orders, see Contract Specific Change Orders List - Overview.